WinSCP
Obtain WinSCP
Download and install WinSCP from https://winscp.net
Use WinSCP
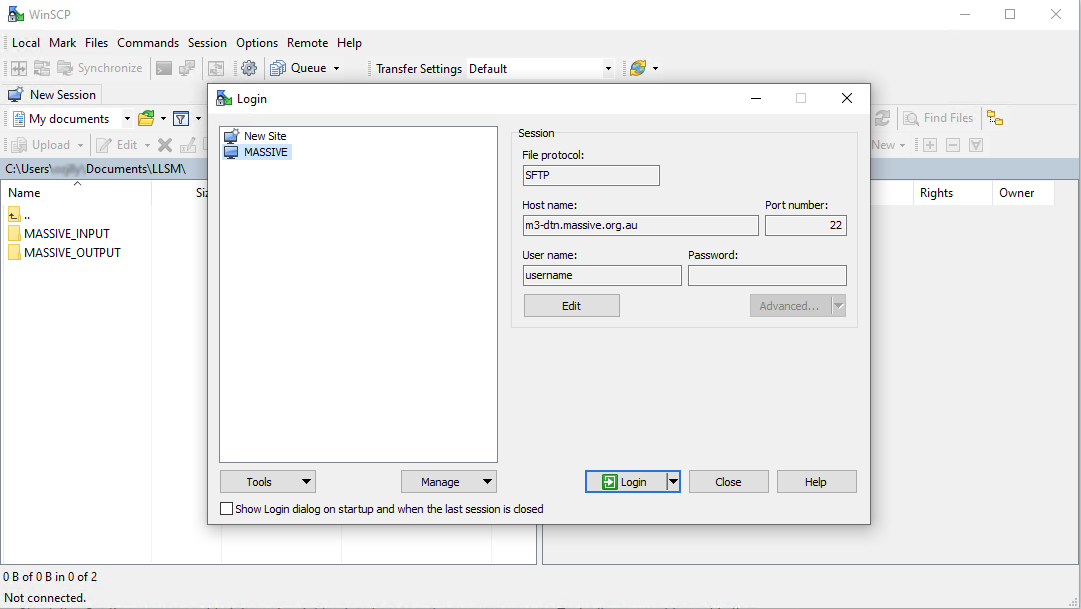
Setup your connection to MASSIVE as shown here:
| Field | Value |
|---|---|
| Protocol | SFTP |
| Host | m3-dtn.massive.org.au |
| Port | 22 |
| Username | Your HPC ID username |
| Password | Leave blank, you will be prompted for it. |
After connecting to MASSIVE, your screen will be similar to that below. In this example the folders MASSIVE_INPUT and MASSIVE_OUTPUT have been created locally on the Windows machine and remotely on MASSIVE.
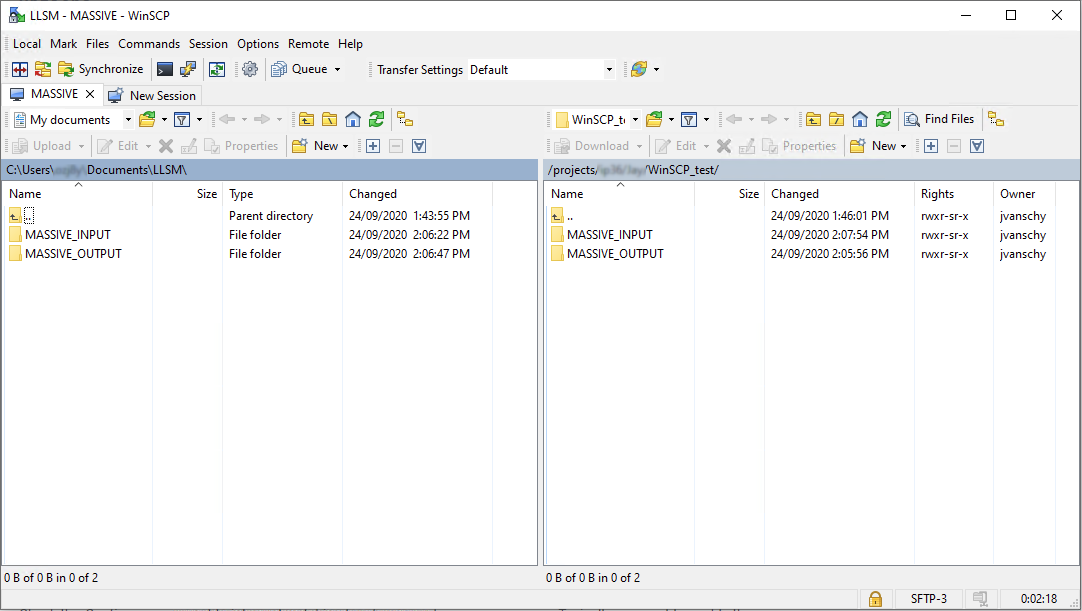
Now you can manually transfer files to and from MASSIVE using the interface. To automatically monitor folders for new files read below.
'Watch' a local folder and automatically SFTP files to MASSIVE
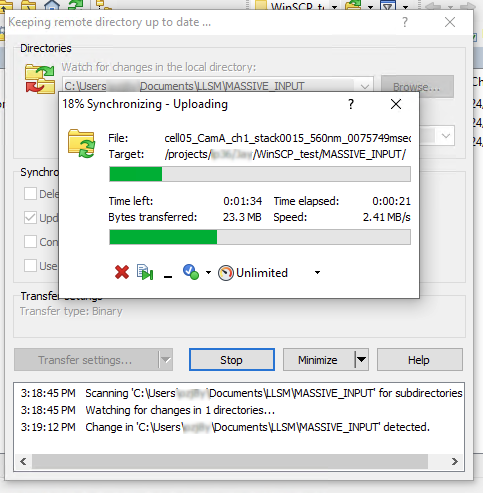
WinSCP can monitor the contents of a local folder and automatically SFTP new files across to MASSIVE. Note: this is ONE way, Windows to MASSIVE. For the reverse direction, see below.
-
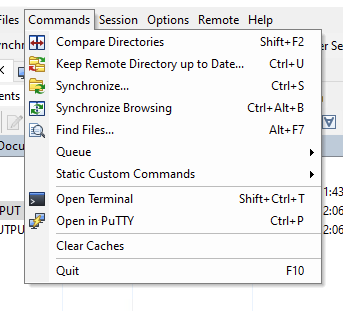
Click on 'Commands', 'Keep Remote Directory up to Date...'
-
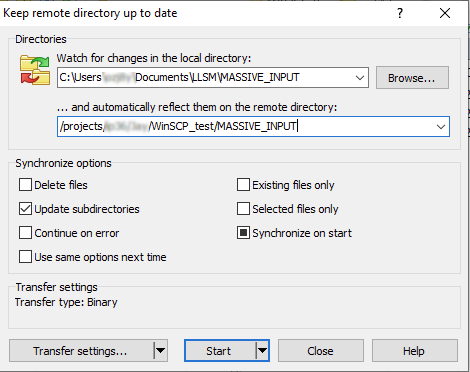
Fill out the correct path for the source folder to watch and the destination folder
-
Click. 'Start'. An initial synchronisation of the folders will be completed and then when new files are added to the Windows folder, they will be SFTP'd to the MASSIVE folder.
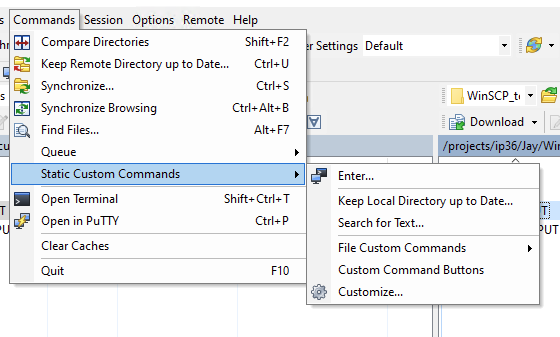
'Watch' a MASSIVE folder and automatically SFTP files to a local folder
To automatically bring files to Windows from MASSIVE, WinSCP executes a Powershell script.
-
Click on 'Commands', 'Static Custom Commands', 'Keep Local Directory up to Date...'
-
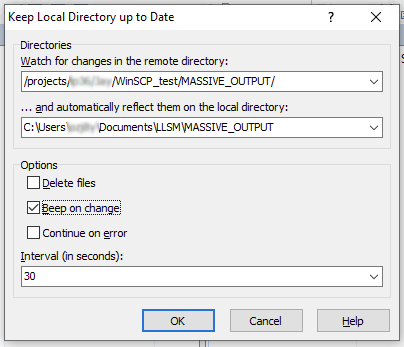
Setup the folders as required. In this example, MASSIVE_OUTPUT on MASSIVE and Windows is used. The synchronisation interval can be set. This is how often WinSCP checks MASSIVE for new files and then SFTPs them to Windows.
-
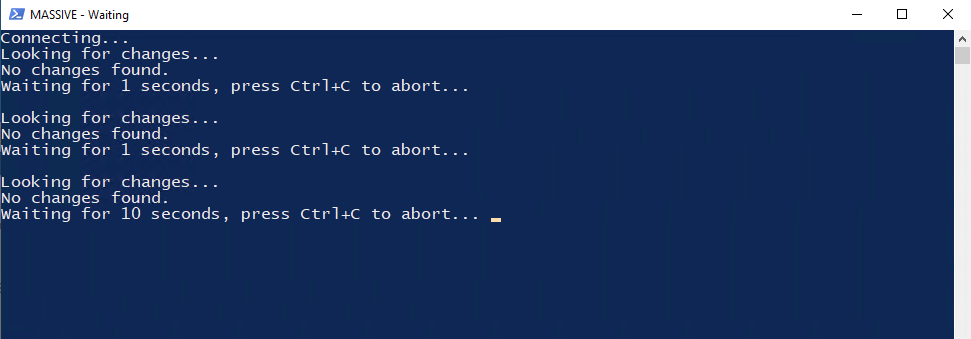
Click 'OK'. A Powershell window will then open. This process will continue until Ctrl+c is entered.
To monitor folders on both systems using WinSCP, start first 'Keep Local Directory up to Date' and then start 'Keep Remote Directory up to Date'.