Globus
Globus can be used to transfer data at high speed in and out of MASSIVE. The Globus software is widely used to transfer data around the world between different endpoints. Endpoints are setup at a wide range of institutions and can also be created on your personal computer.
Update: Globus v5 has been installed on the MASSIVE data transfer nodes. The
login process is the same, except the endpoint names have changed. The previous
endpoints (massive#massive, massive#mern) will be decommissioned in the future.
The main endpoint is now known as 'MASSIVE M3'. For researchers connected to the
Monash eResearch Network, massive#mern will be redeployed as 'MASSIVE on MeRN'
Getting Started
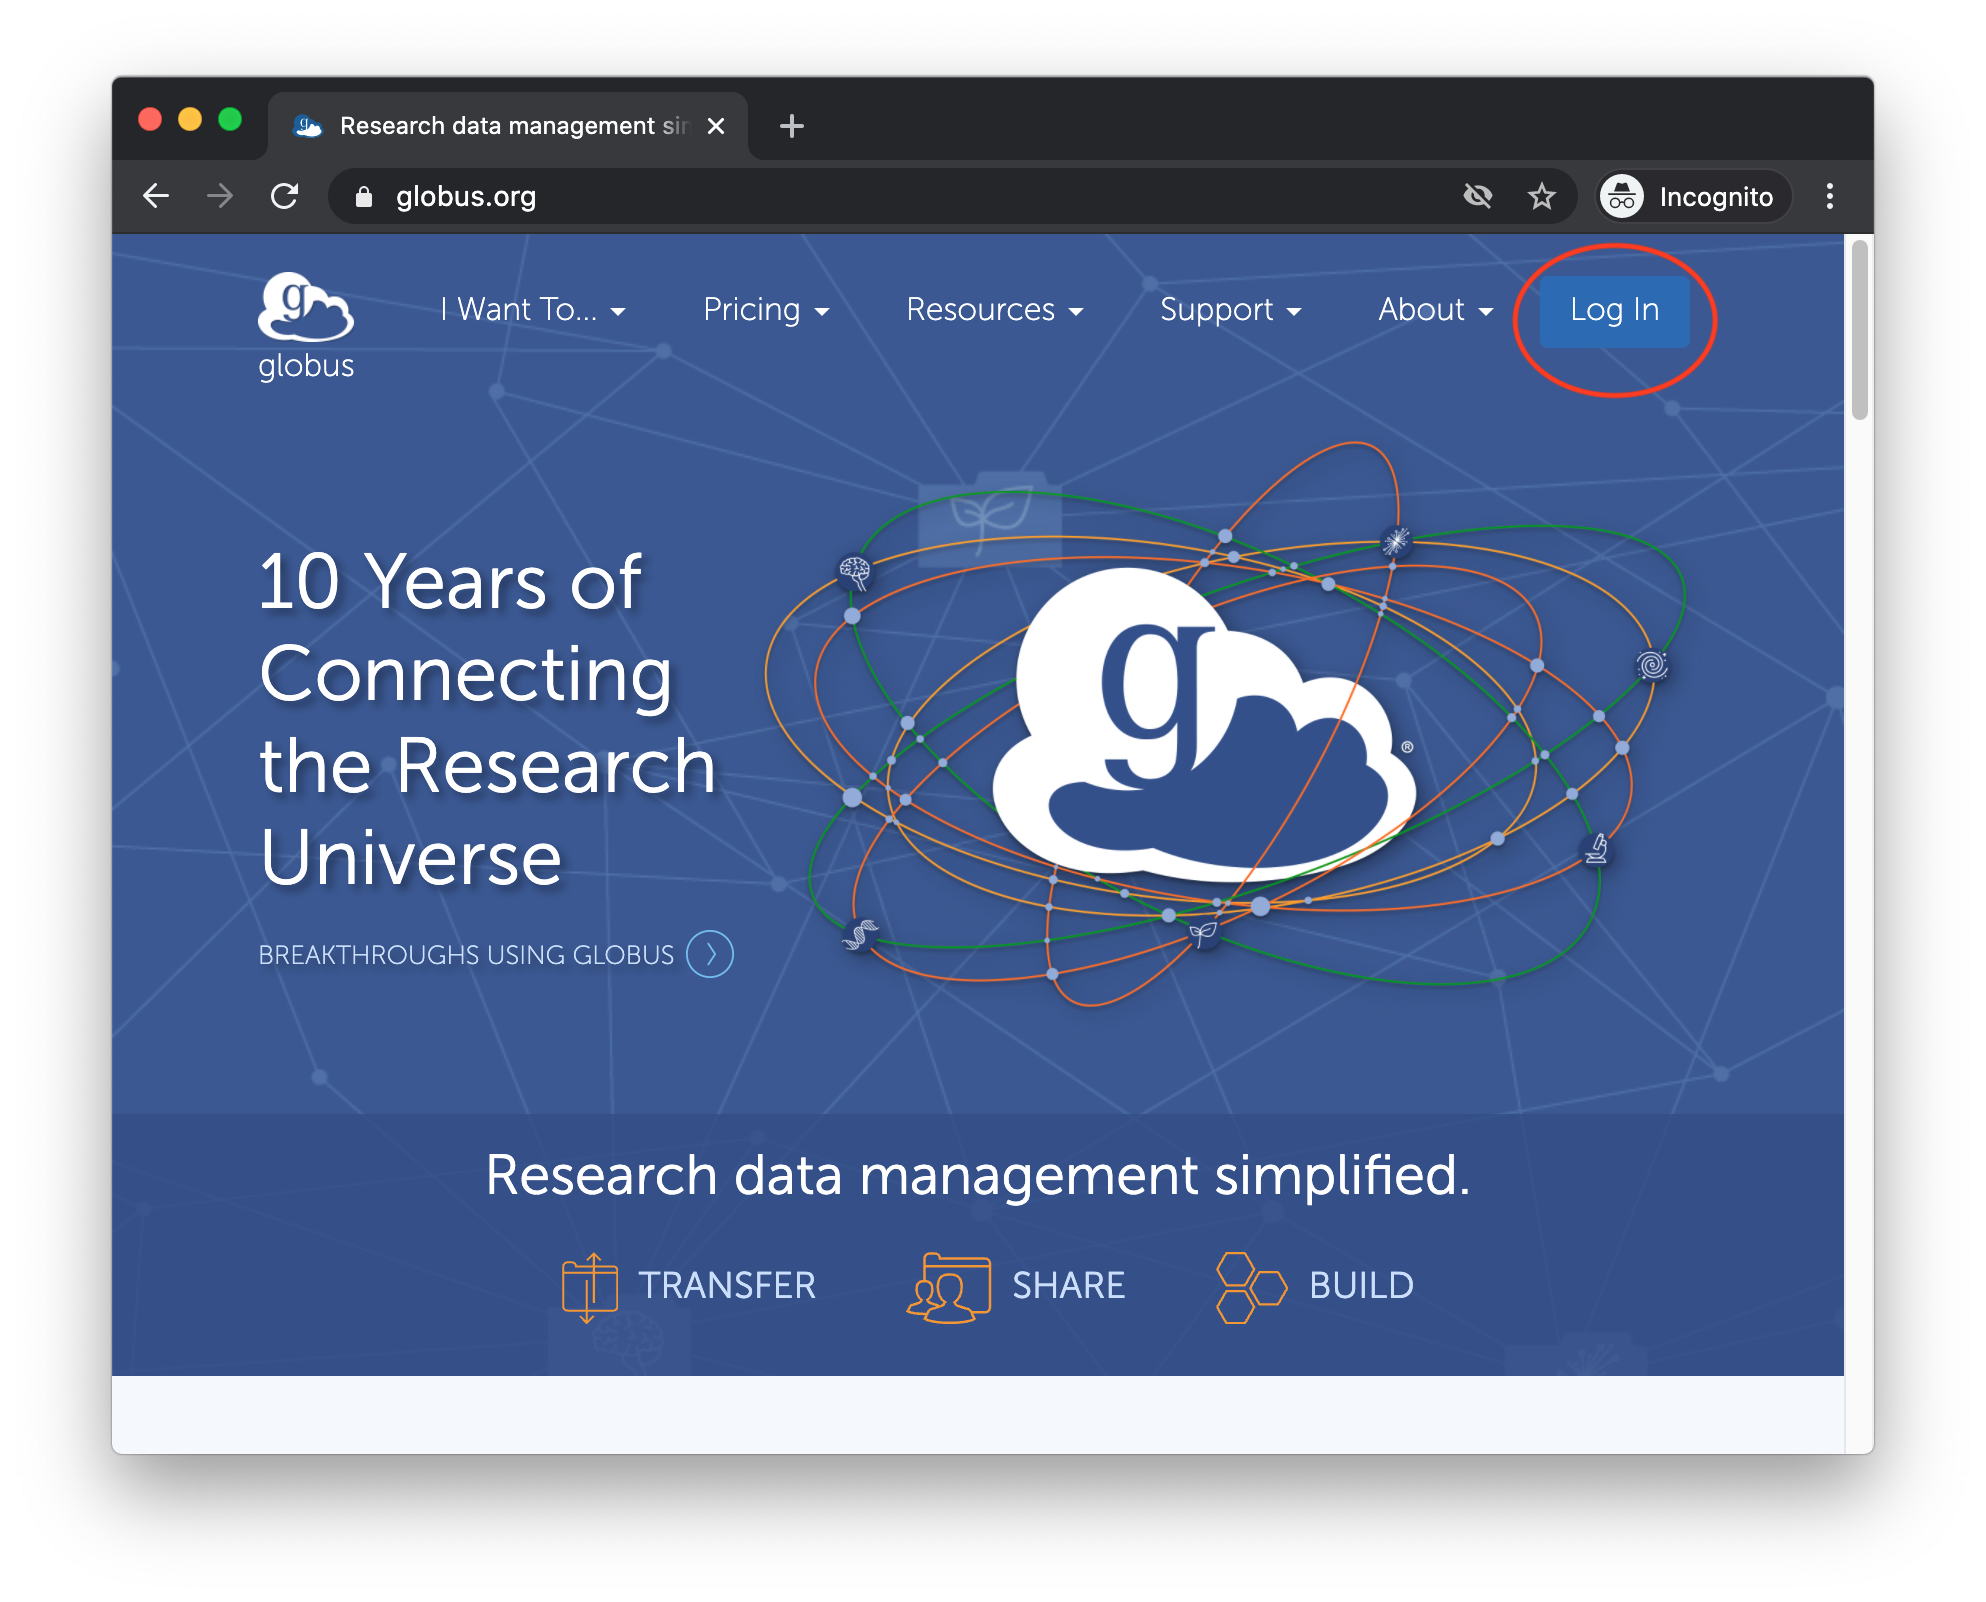
- Click on "Log In" to Globus: https://globus.org
-
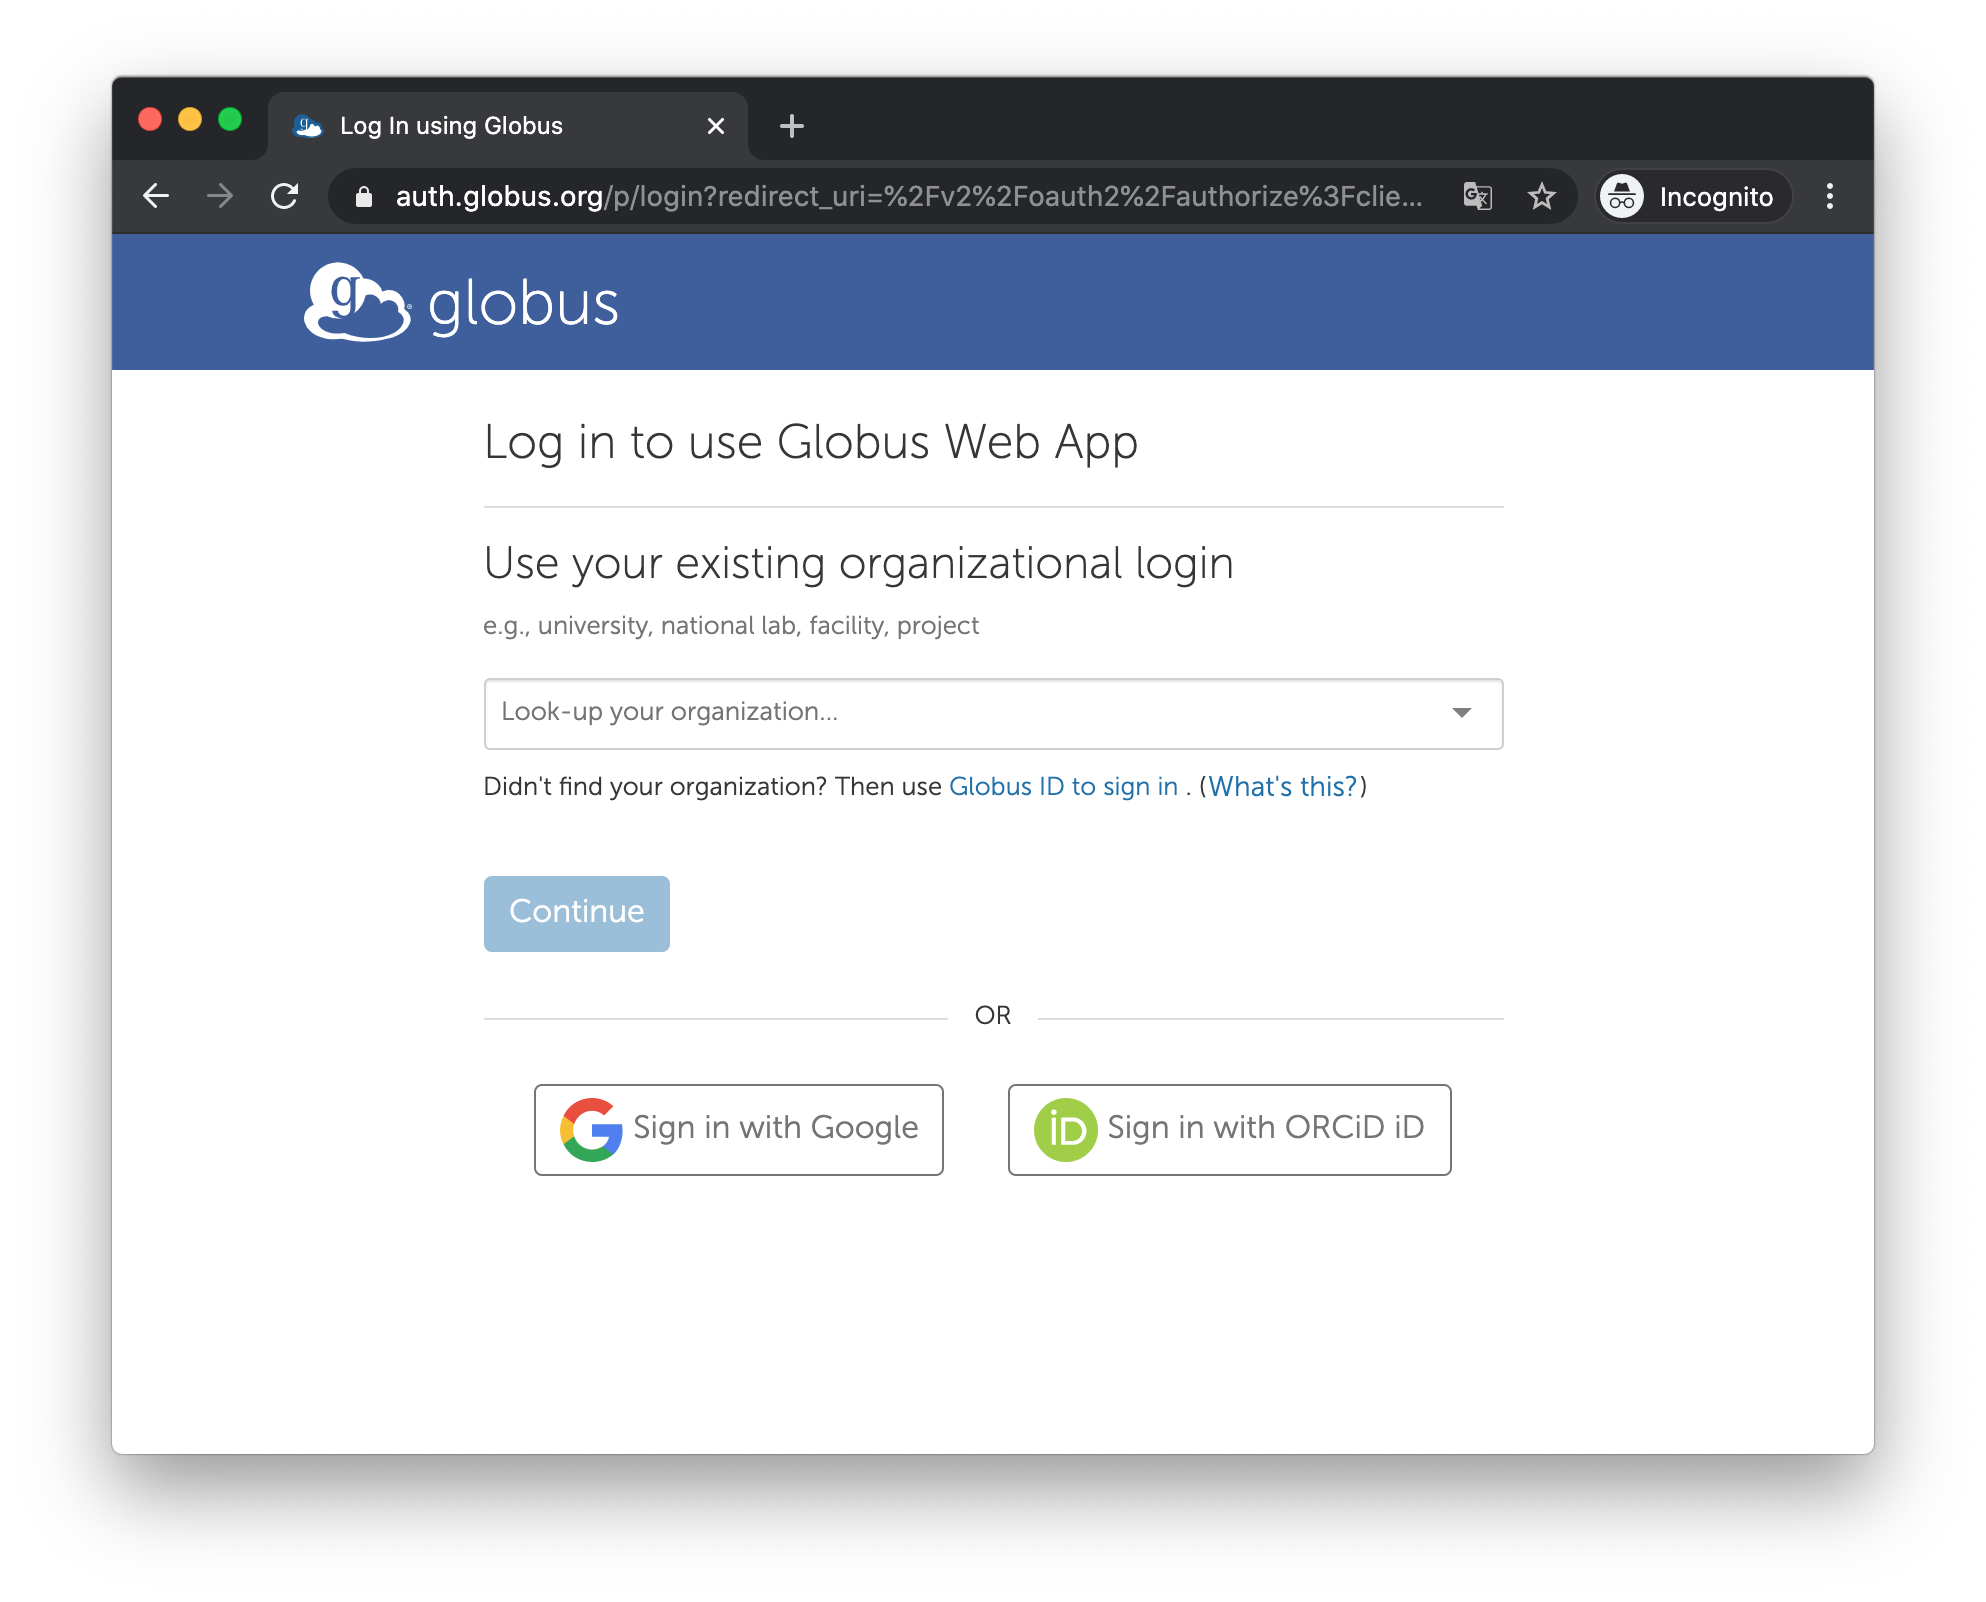
Authenticate to Globus. There are a few options available.
- if your organisation is in the list, select it and click continue (this works for Monash and others.)
- use your Google account
- use your ORCiD iD
- if you have a Globus ID, click on 'Globus ID to sign in'
- use your Google account (this works for Monash)
- use your ORCiD iD
Choose the most appropriate option and follow the displayed pages.
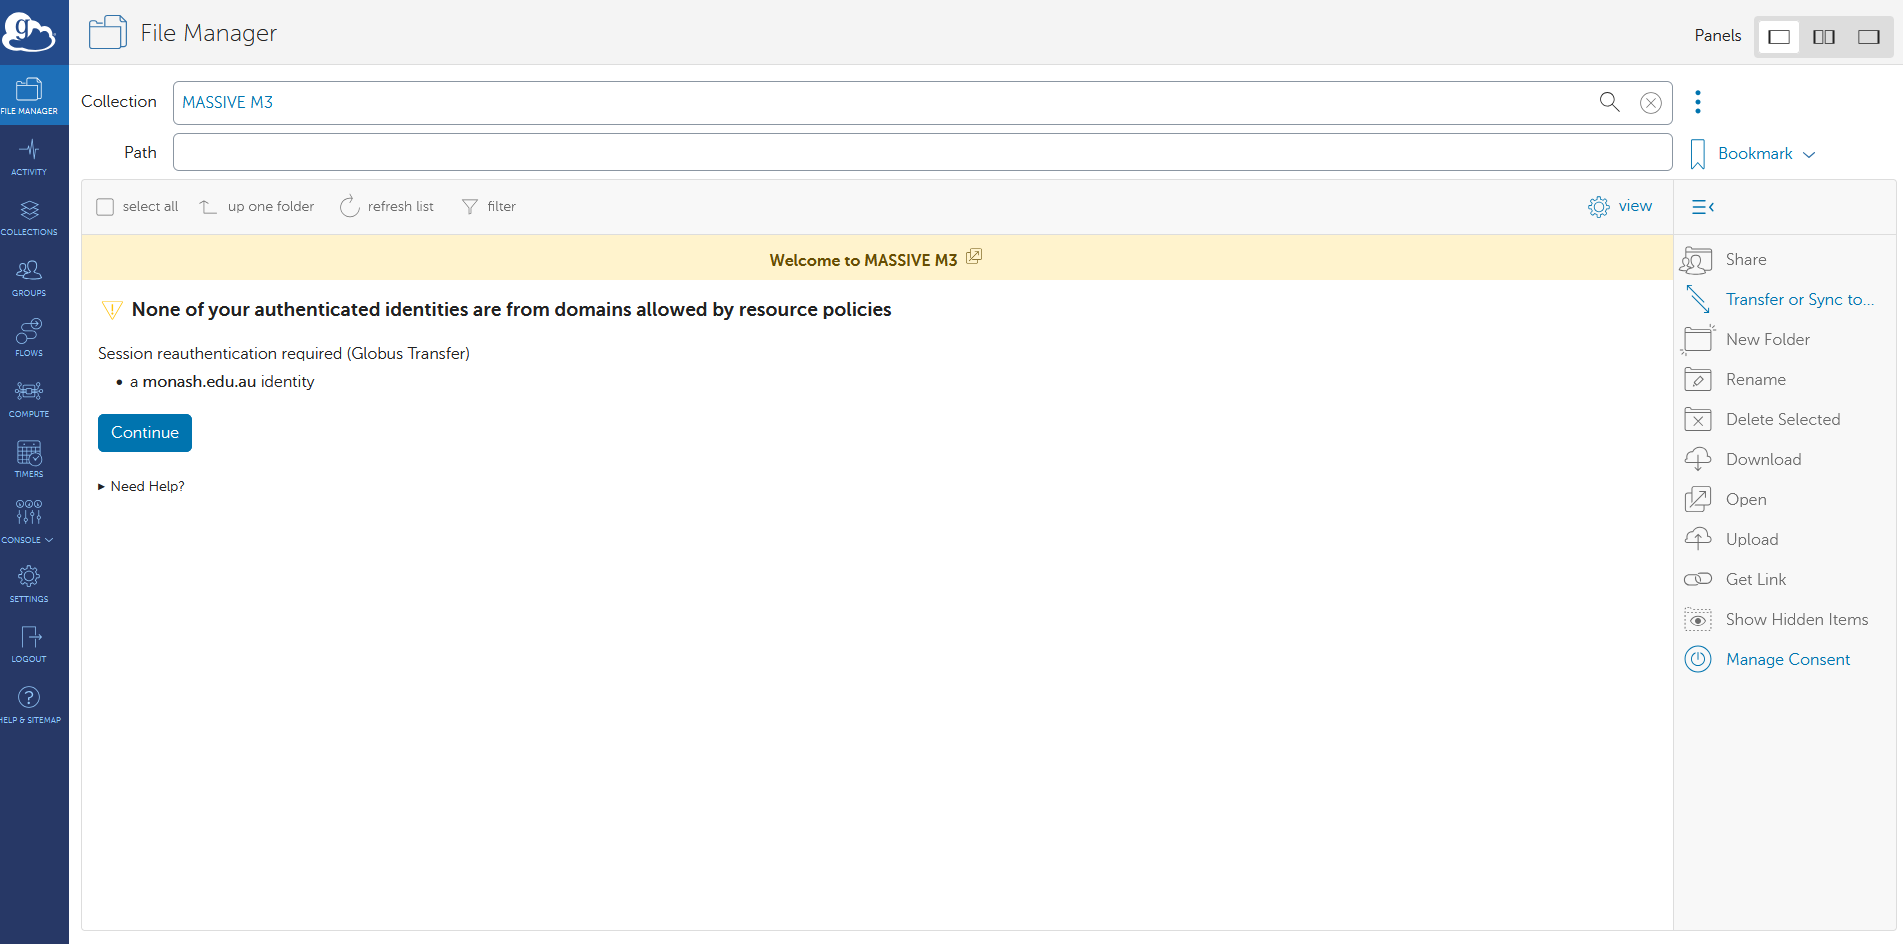
- After authenticating to Globus the File Manager will be presented.
- Click on the icon as shown to ensure two panels are displayed.
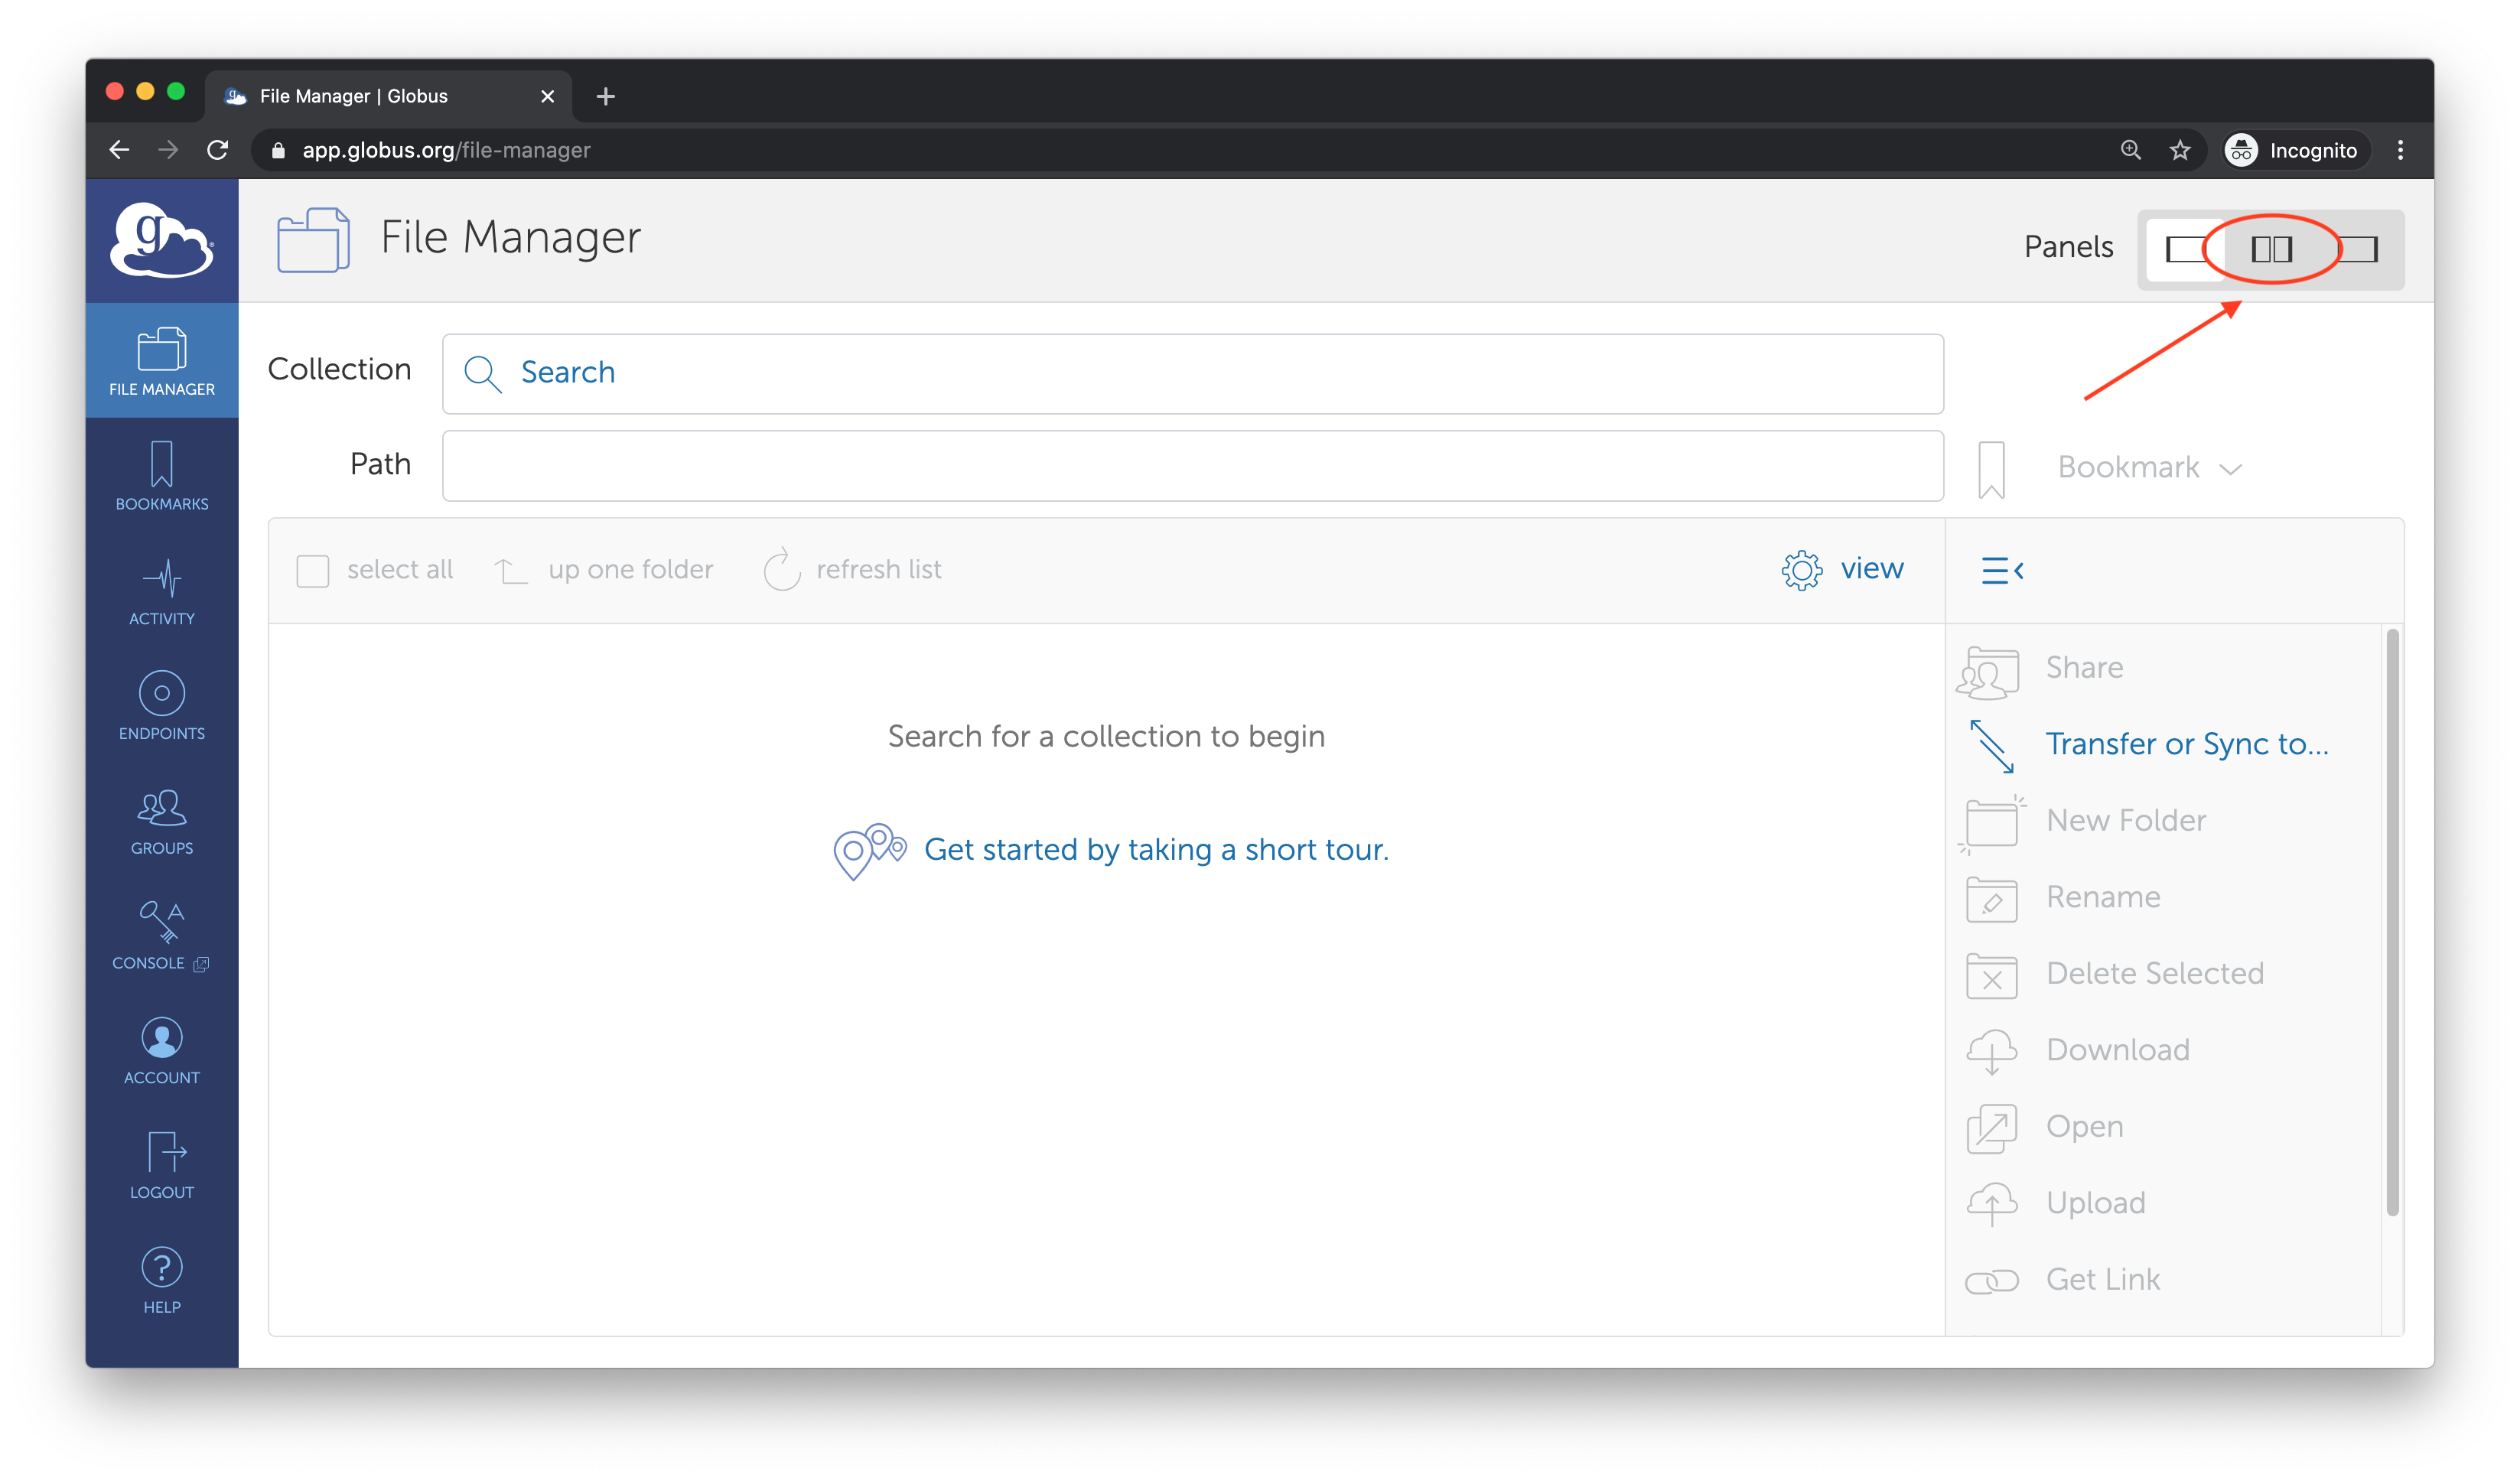
- The next step is to connect to the MASSIVE endpoint.
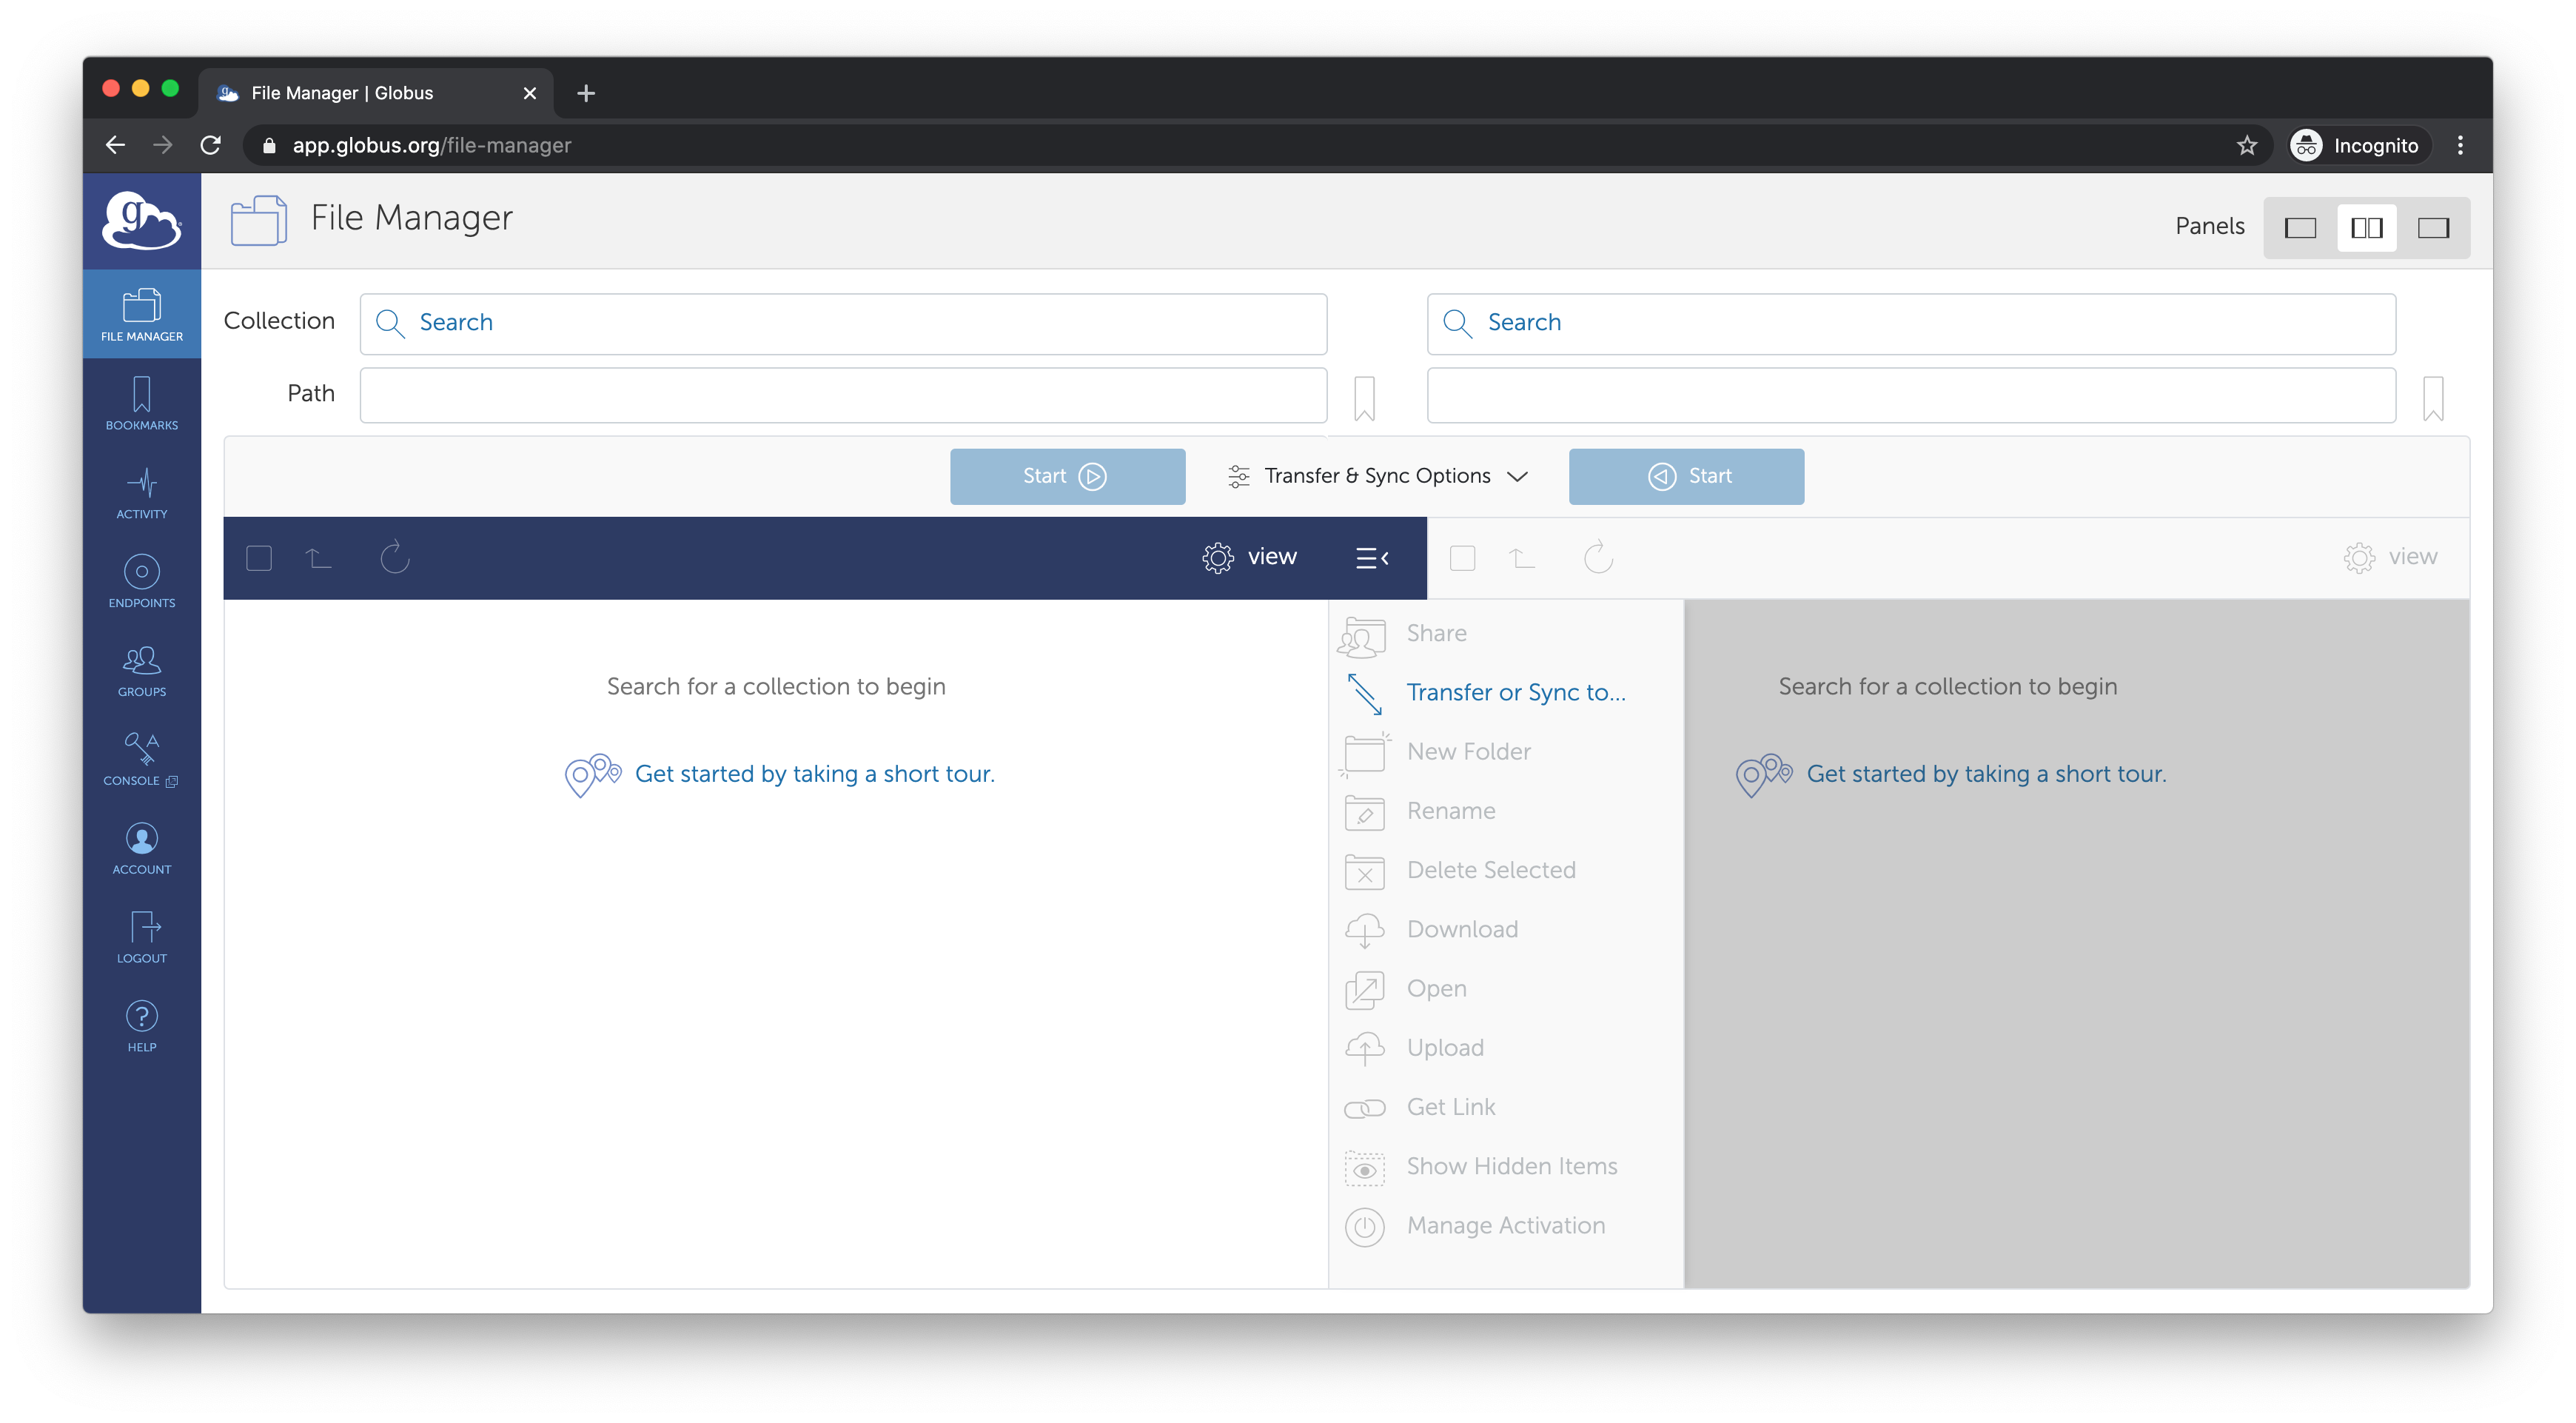
- Click in the Collection text box. It does not matter which one, left or right.
- Enter "MASSIVE M3" to search for the MASSIVE endpoint.
- Select "MASSIVE M3" from the list.
- Click 'Continue'
- Select your Monash Identity
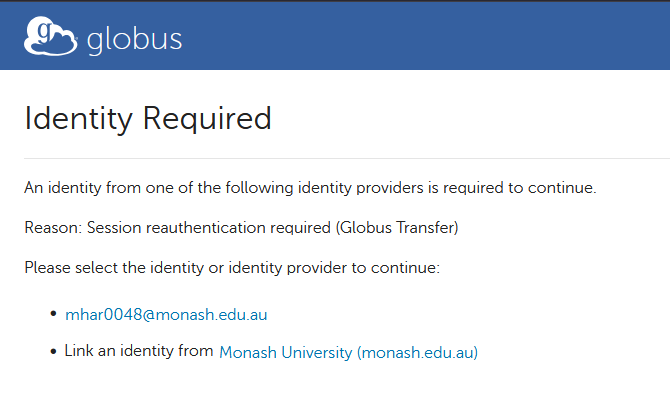
- You will be redirected to Okta. Use your Monash username, password and 2nd factor to 'Sign In'
- After authenticating successfully, your MASSIVE home folder will be displayed.

- Now you need to add another endpoint to transfer data in and out of MASSIVE.
- Using the other 'Collection' field, enter the name of the required endpoint. In the example shown below, 'AARNet-Public-Test-Share' has been used.

Personal Globus Endpoint
An Endpoint can be created on your personal computer. This allows you to transfer between your PC and any other endpoint, including MASSIVE.
To install, please choose the correct system and follow the Globus instructions:
- Install, Configure, and Uninstall Globus Connect Personal for Mac OS X https://docs.globus.org/how-to/globus-connect-personal-mac
- Install, Configure, and Uninstall Globus Connect Personal for Windows https://docs.globus.org/how-to/globus-connect-personal-windows
- Install, Configure, and Uninstall Globus Connect Personal for Linux https://docs.globus.org/how-to/globus-connect-personal-linux
Remembering the endpoint name setup during installation, search for your Endpoint in the Globus File Manager. The process is the same as steps 3 and 4 above.
For the Linux version, you may find the browsable directories are restricted for your Personal Globus Endpoint.
The file ~/.globusonline/lta/config-paths can be altered to fix this.
For full details please read this link: https://docs.globus.org/globus-connect-personal/install/linux/#config-paths
Transferring Data
If your datasets contains symbolic links (or symlinks) please be aware of how Globus behaves with regards to these. Read this carefully: https://docs.globus.org/faq/transfer-sharing/#how_does_globus_handle_symlinks
This section assumes two endpoints have been connected to File Manager. If
not, please refer to Getting Started above.
- In the below image, the right hand side is highlighted (dark blue menu), this means any actions will apply to files from the endpoint "AARNet-Public-Test-Share".
- possible file actions are highlighted in the middle of the screenshot.
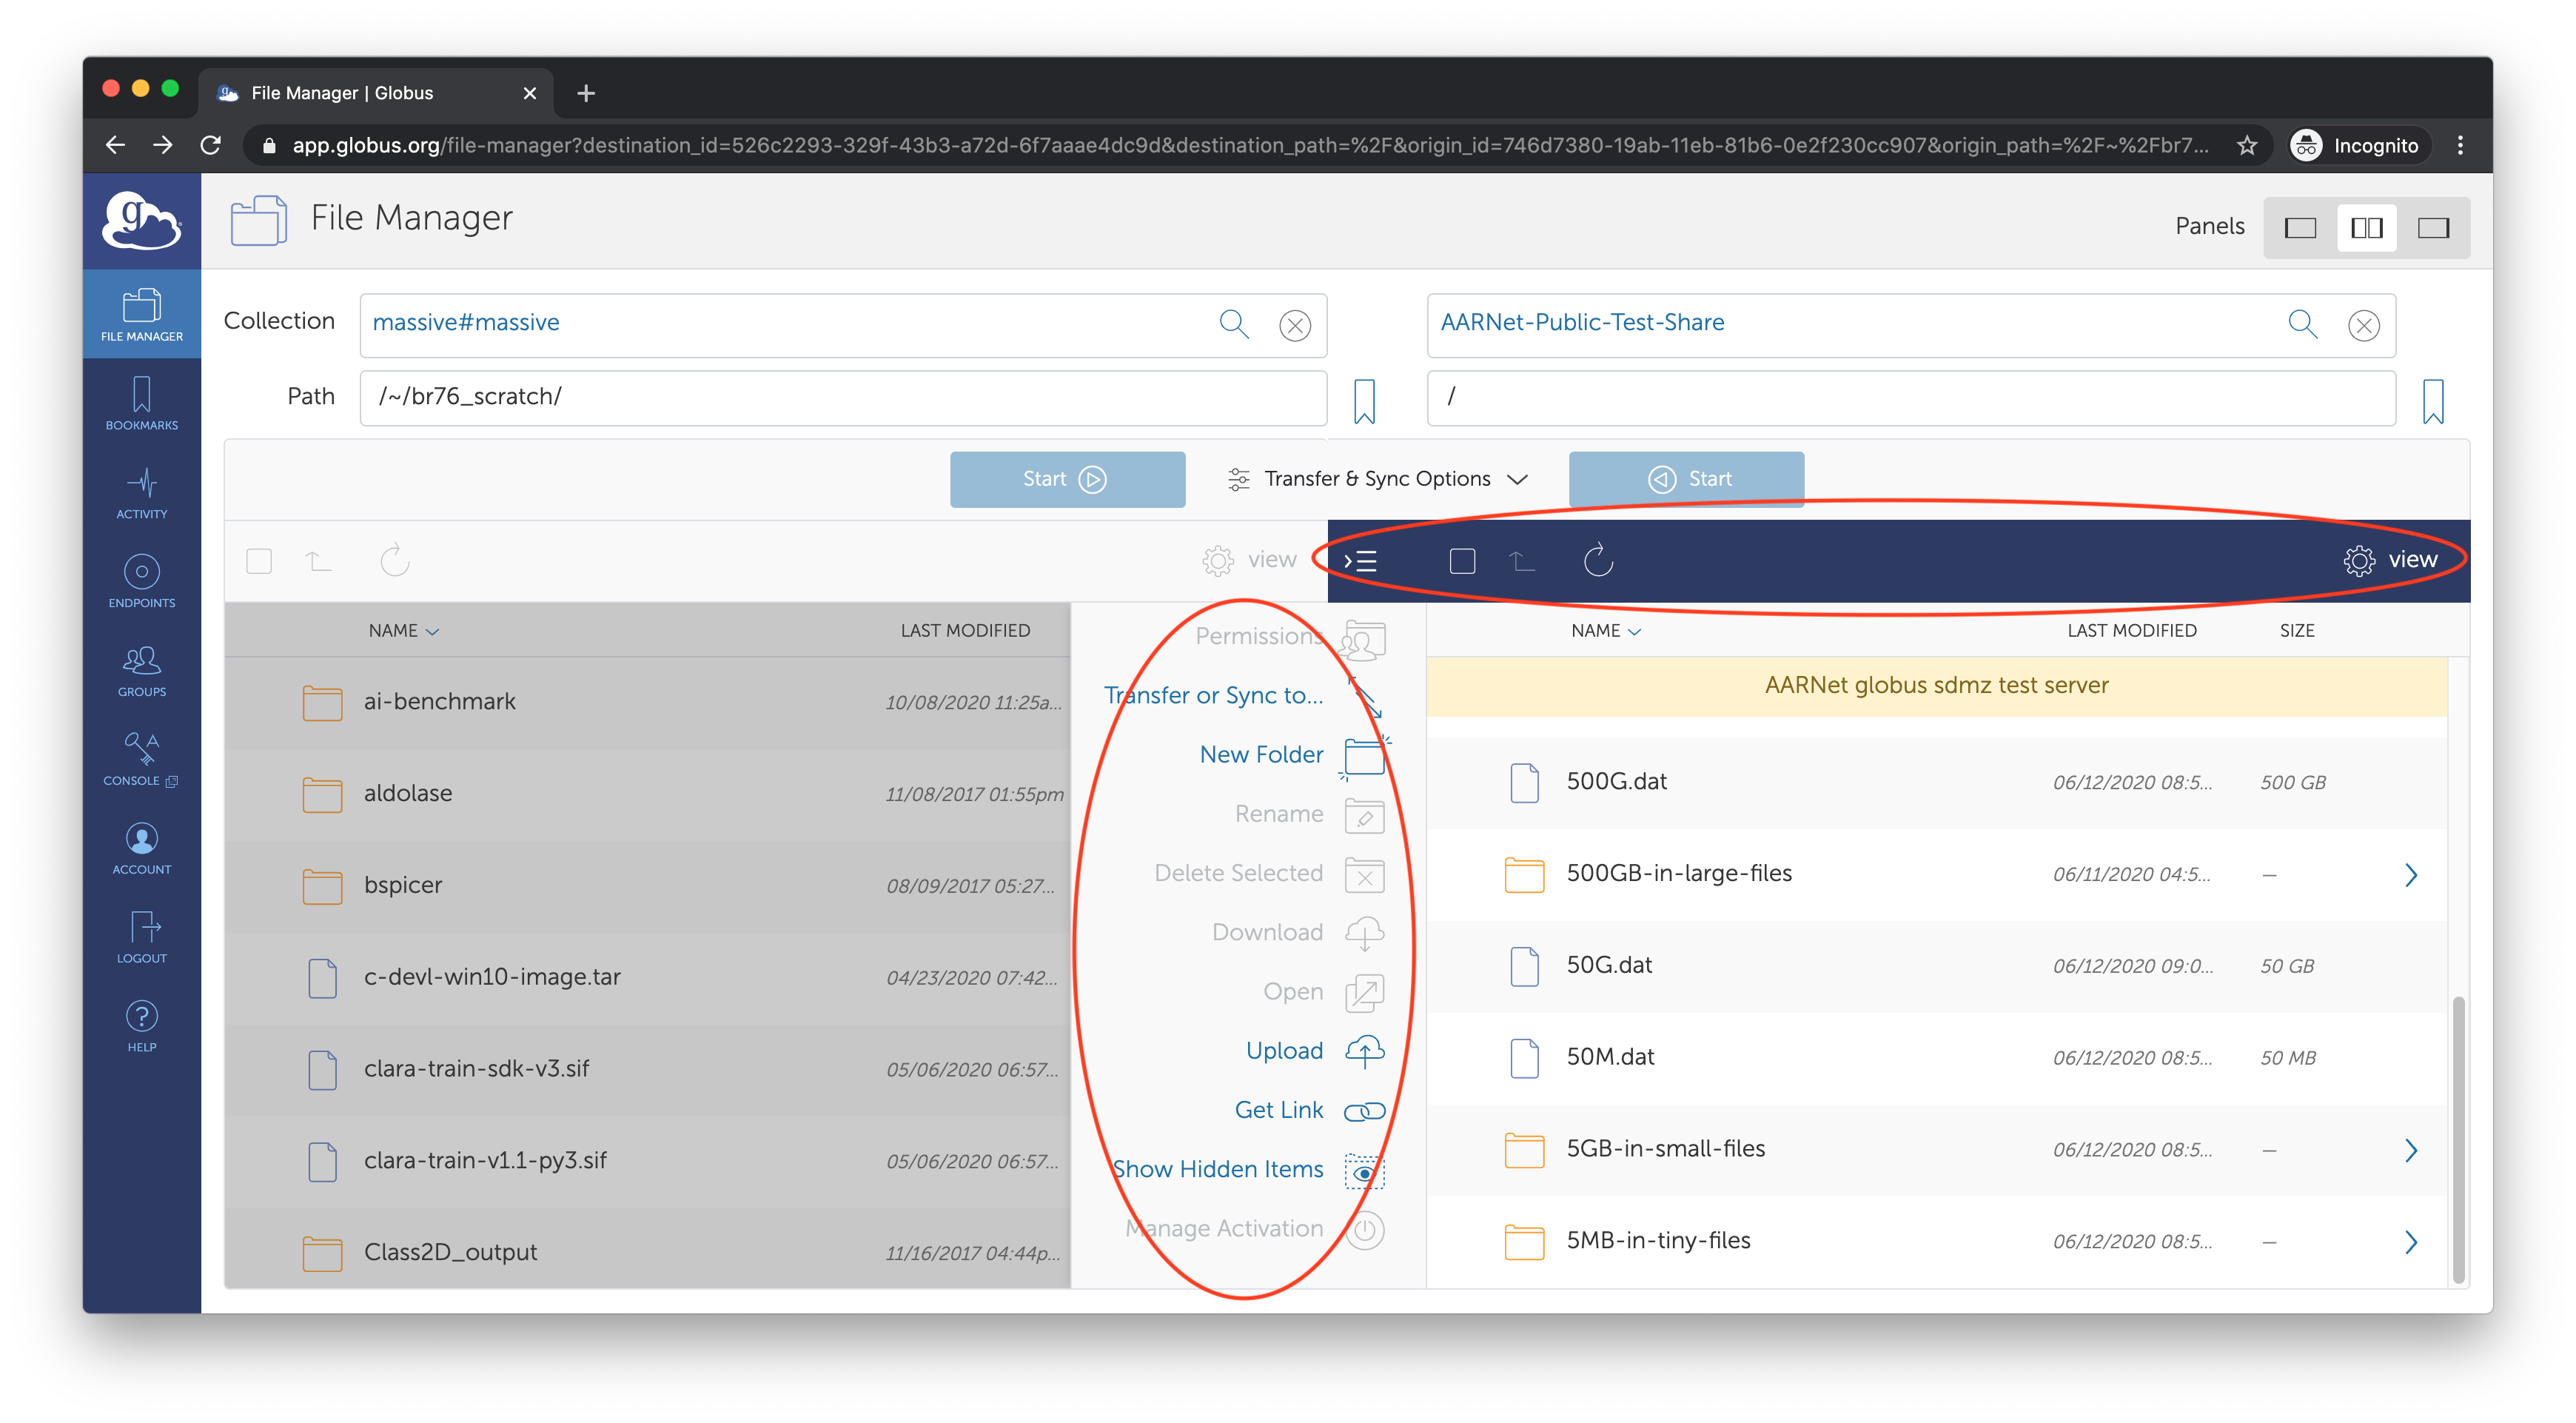
- to apply file actions to the endpoint MASSIVE, click on the left.
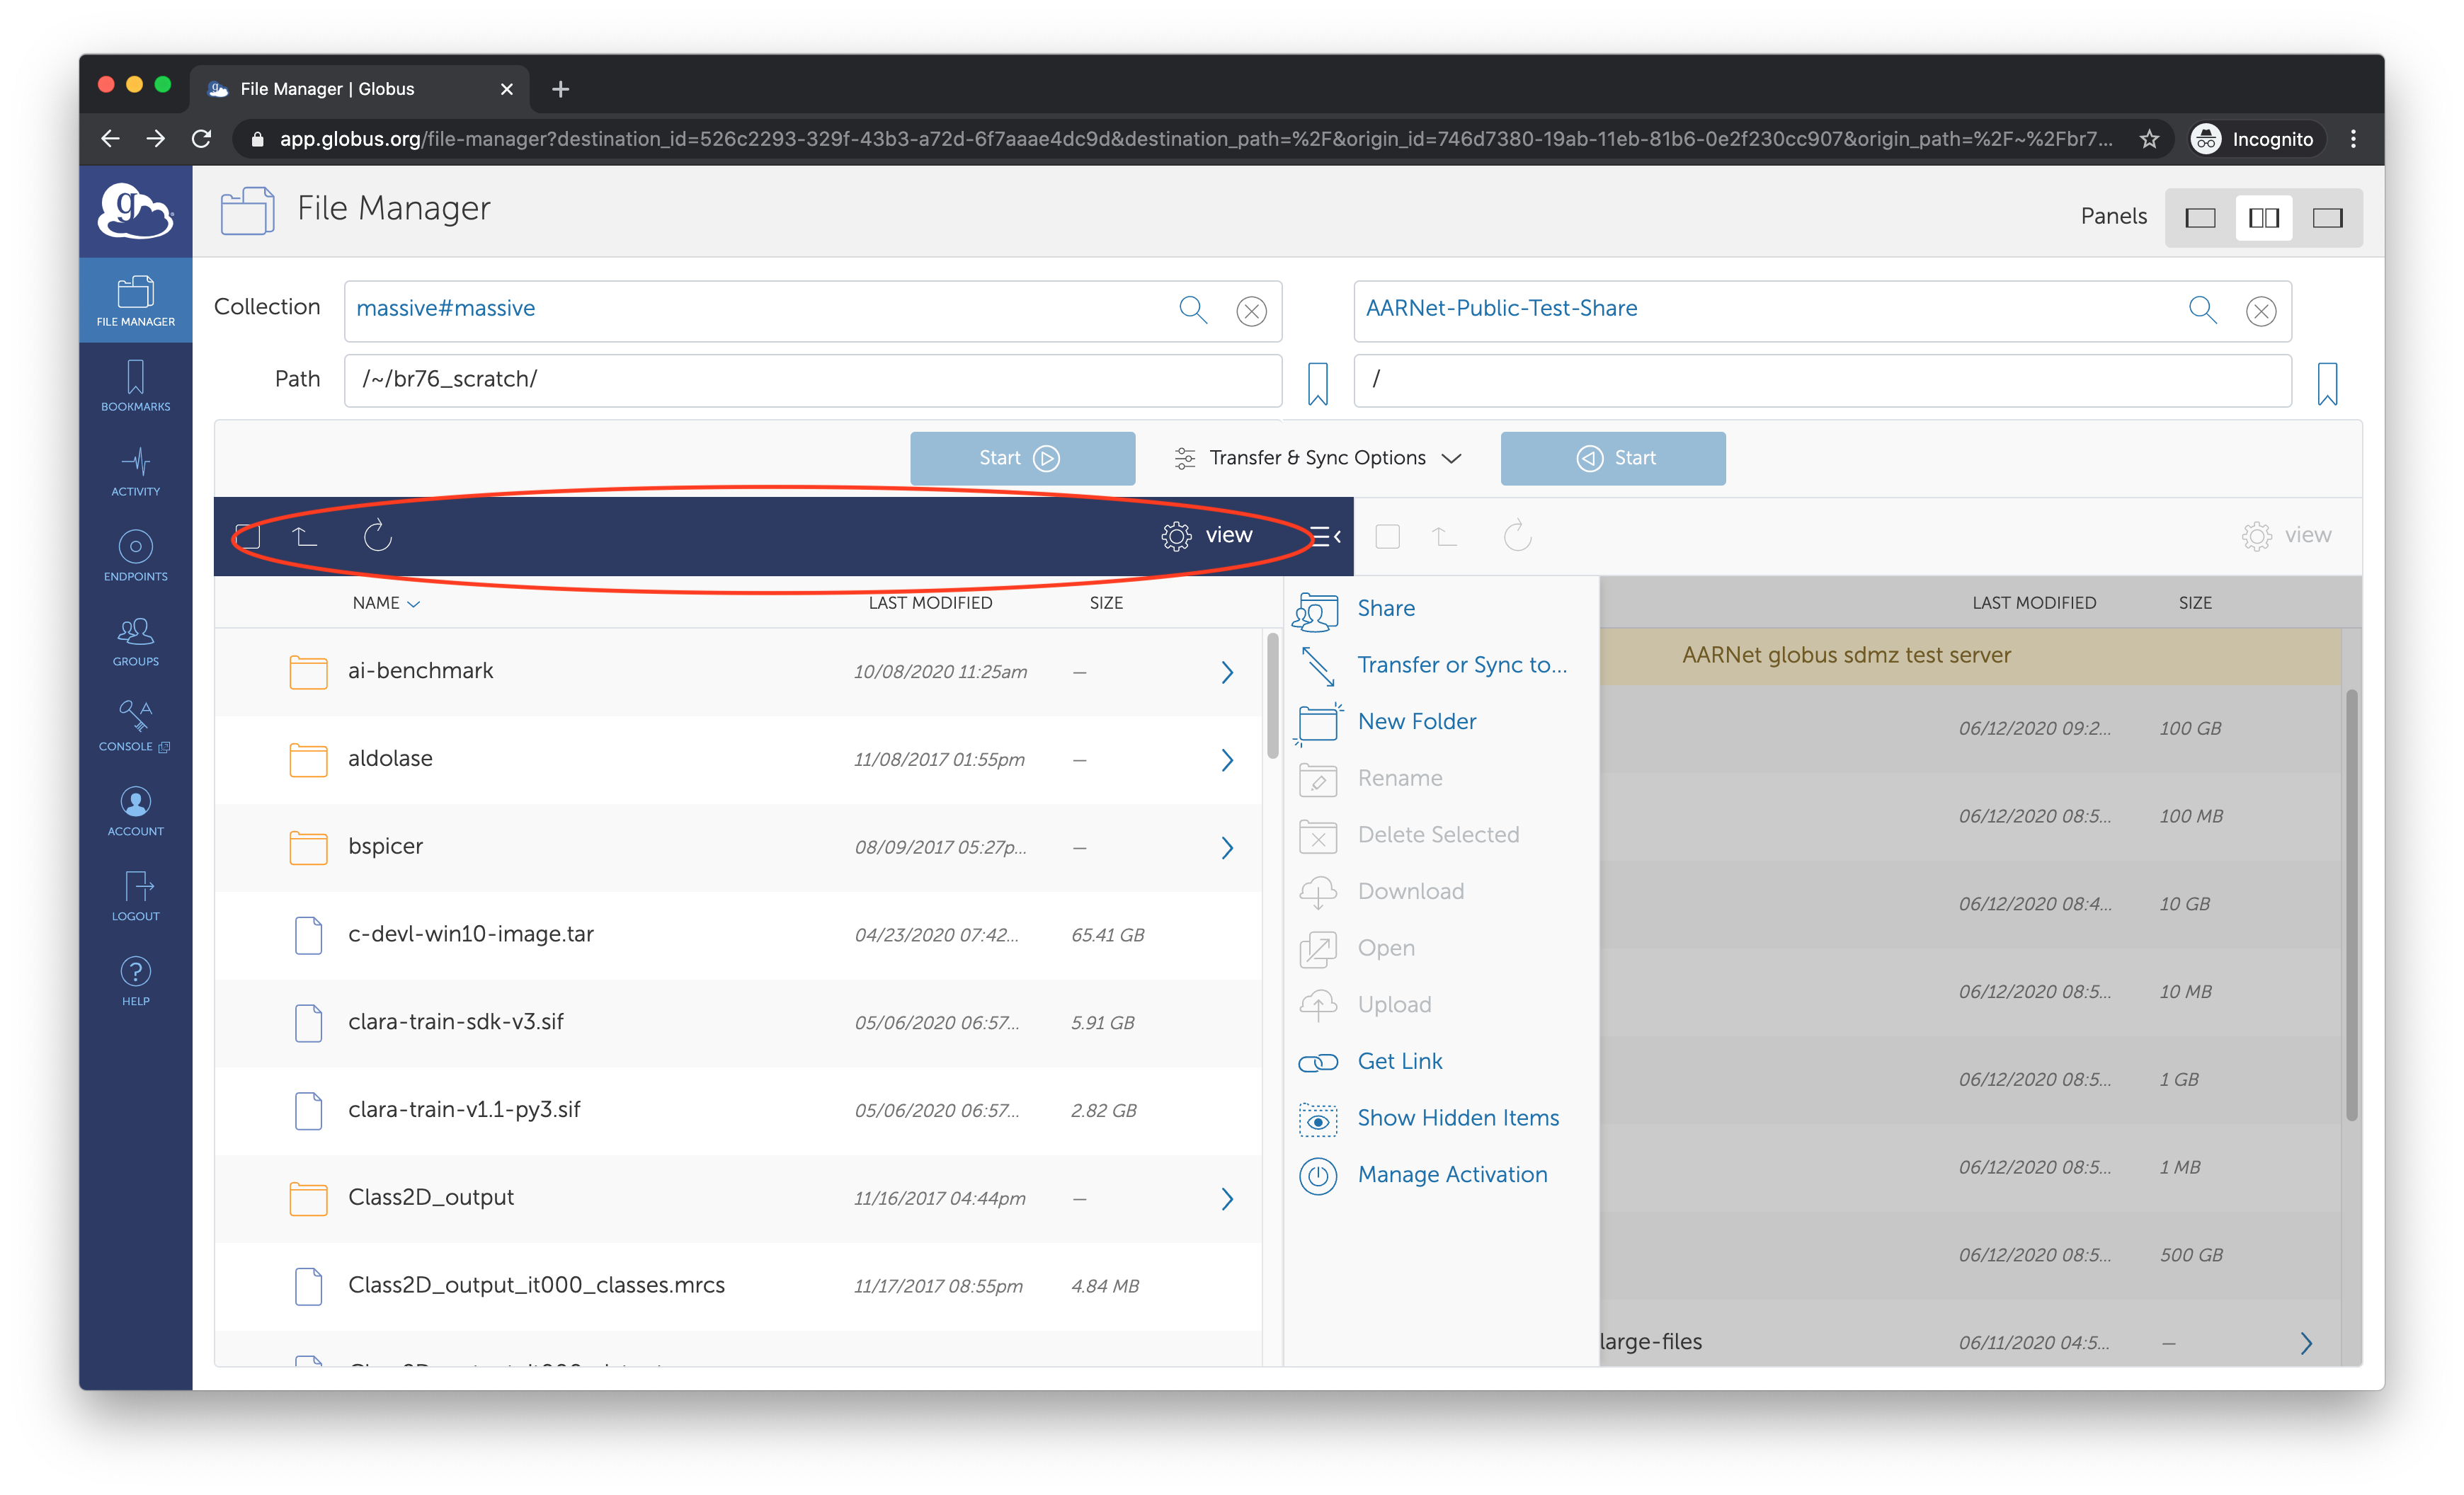
Transferring files from AARNet-Public-Test-Share to MASSIVE
- Ensure the destination path is correct. e.g.
~/ab12_scratch - Click on the right hand side and select some files.
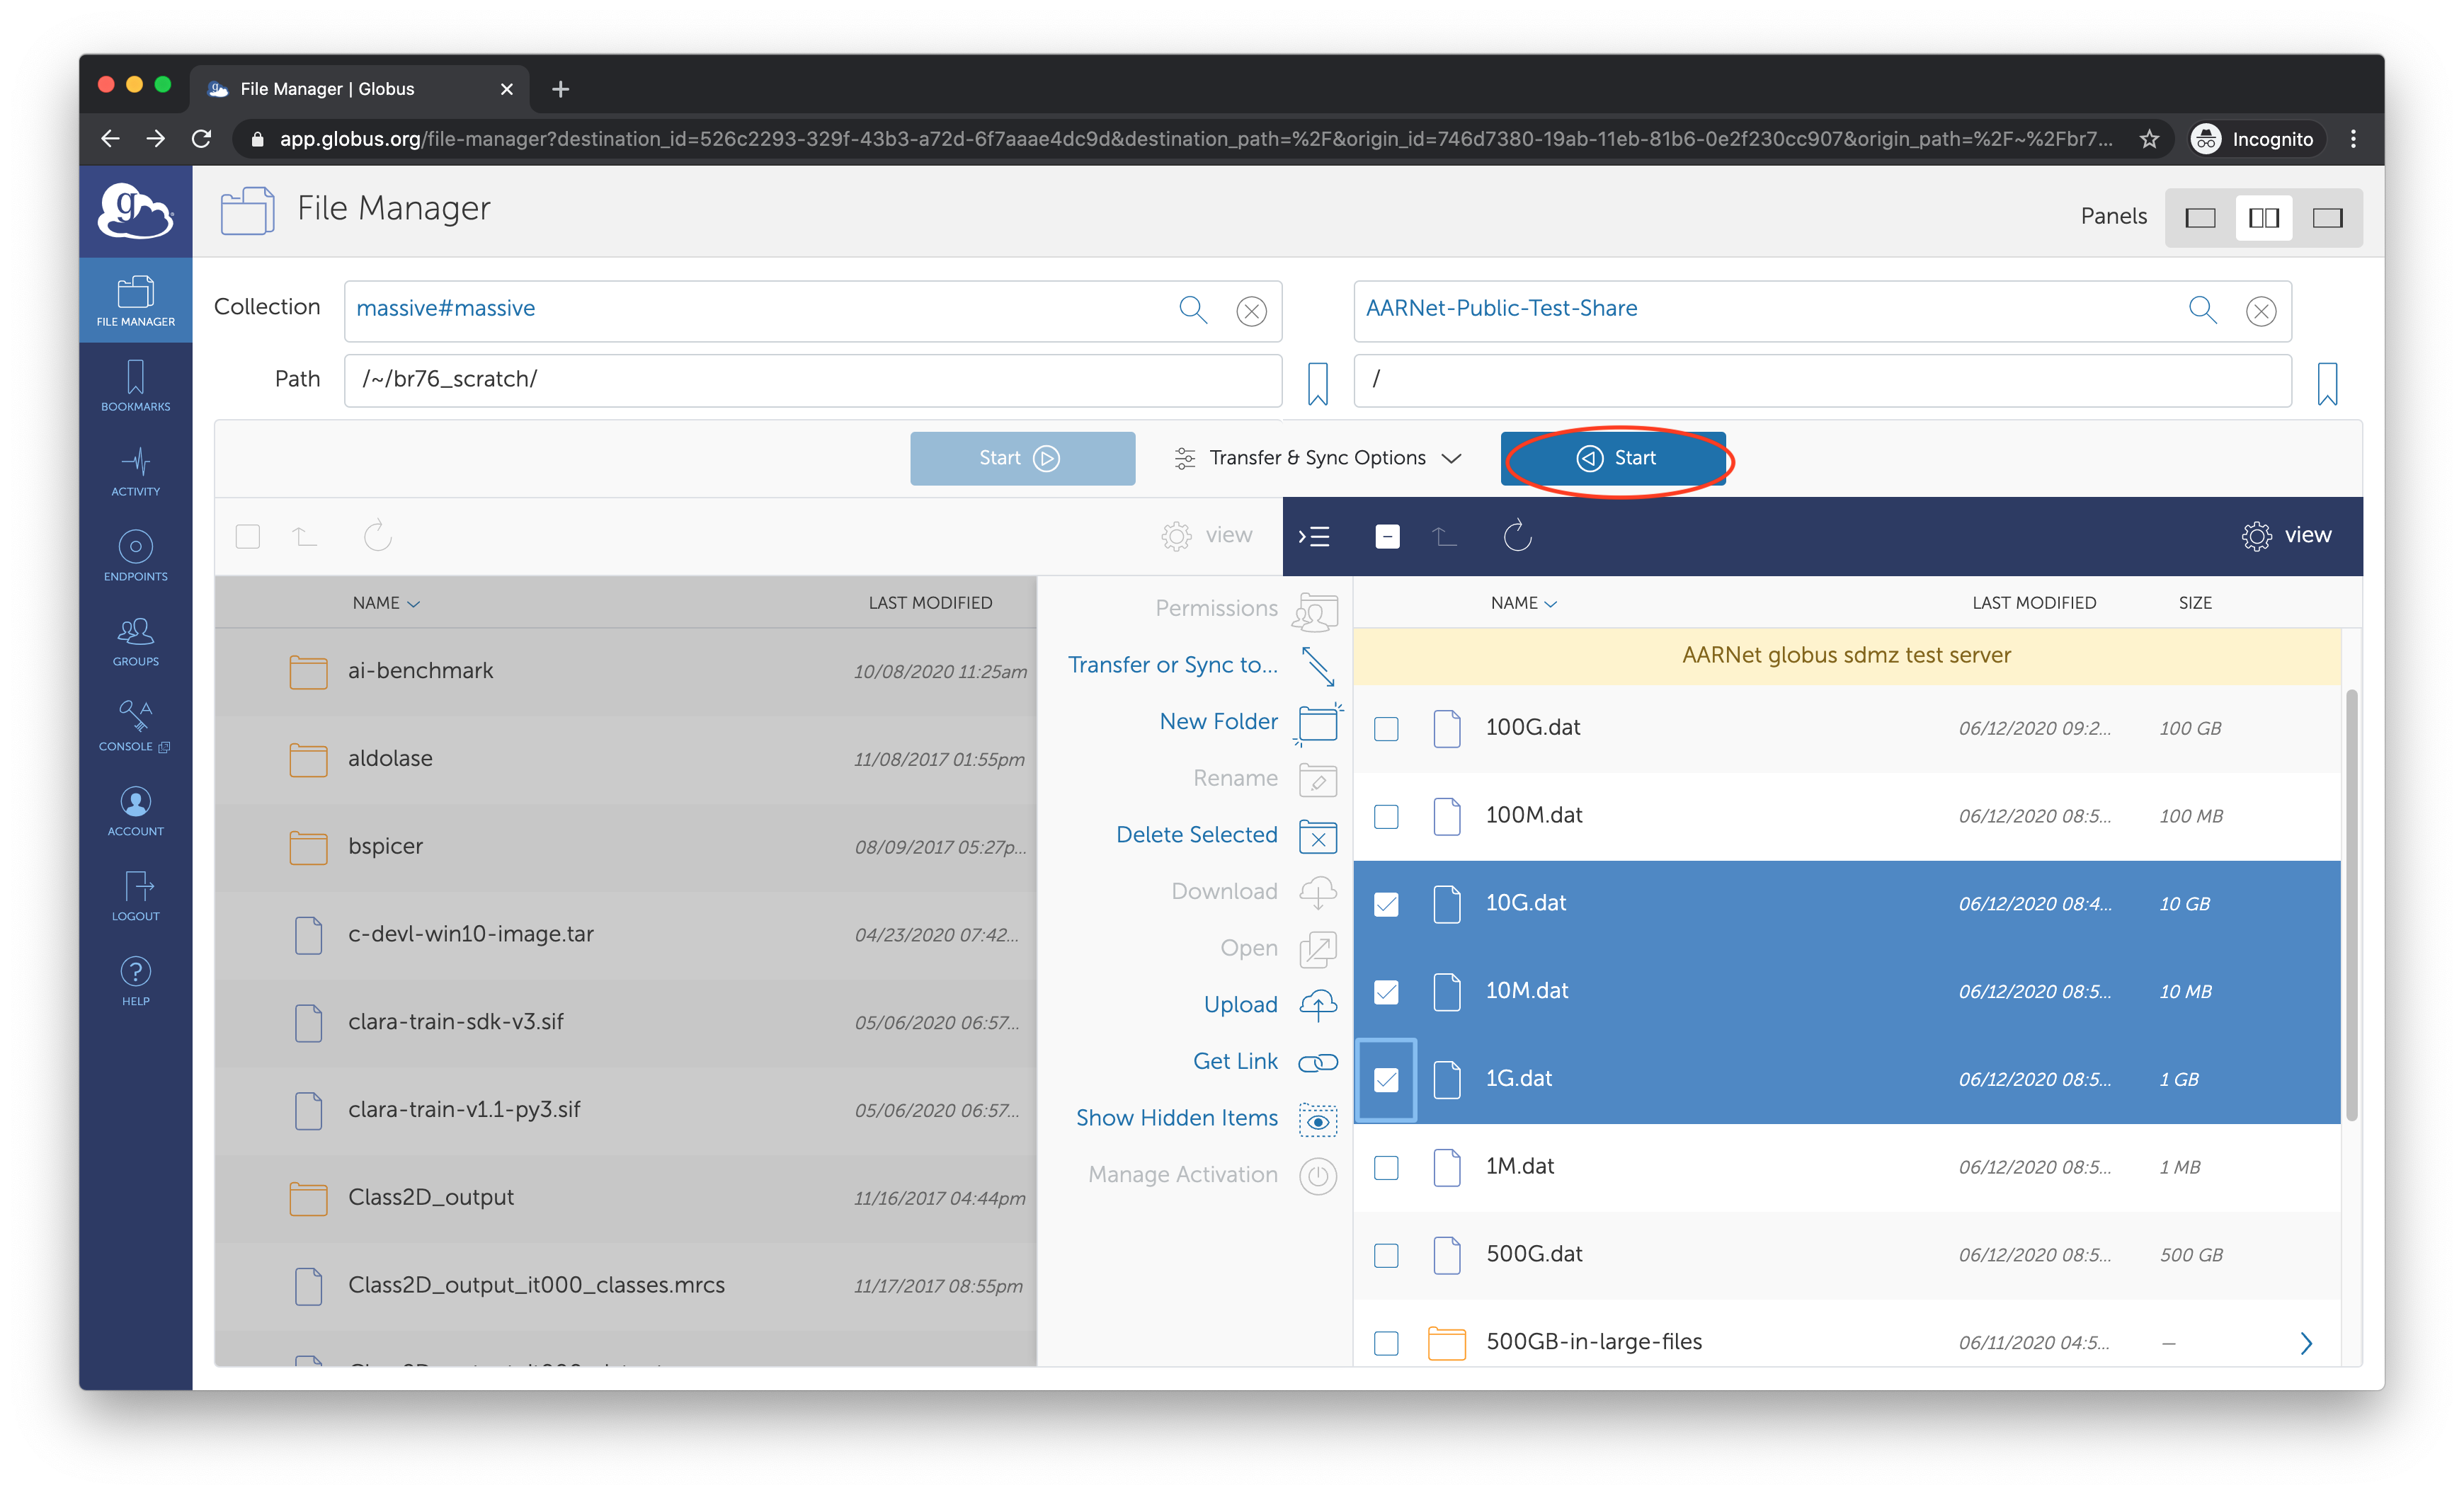
- Click on Start.
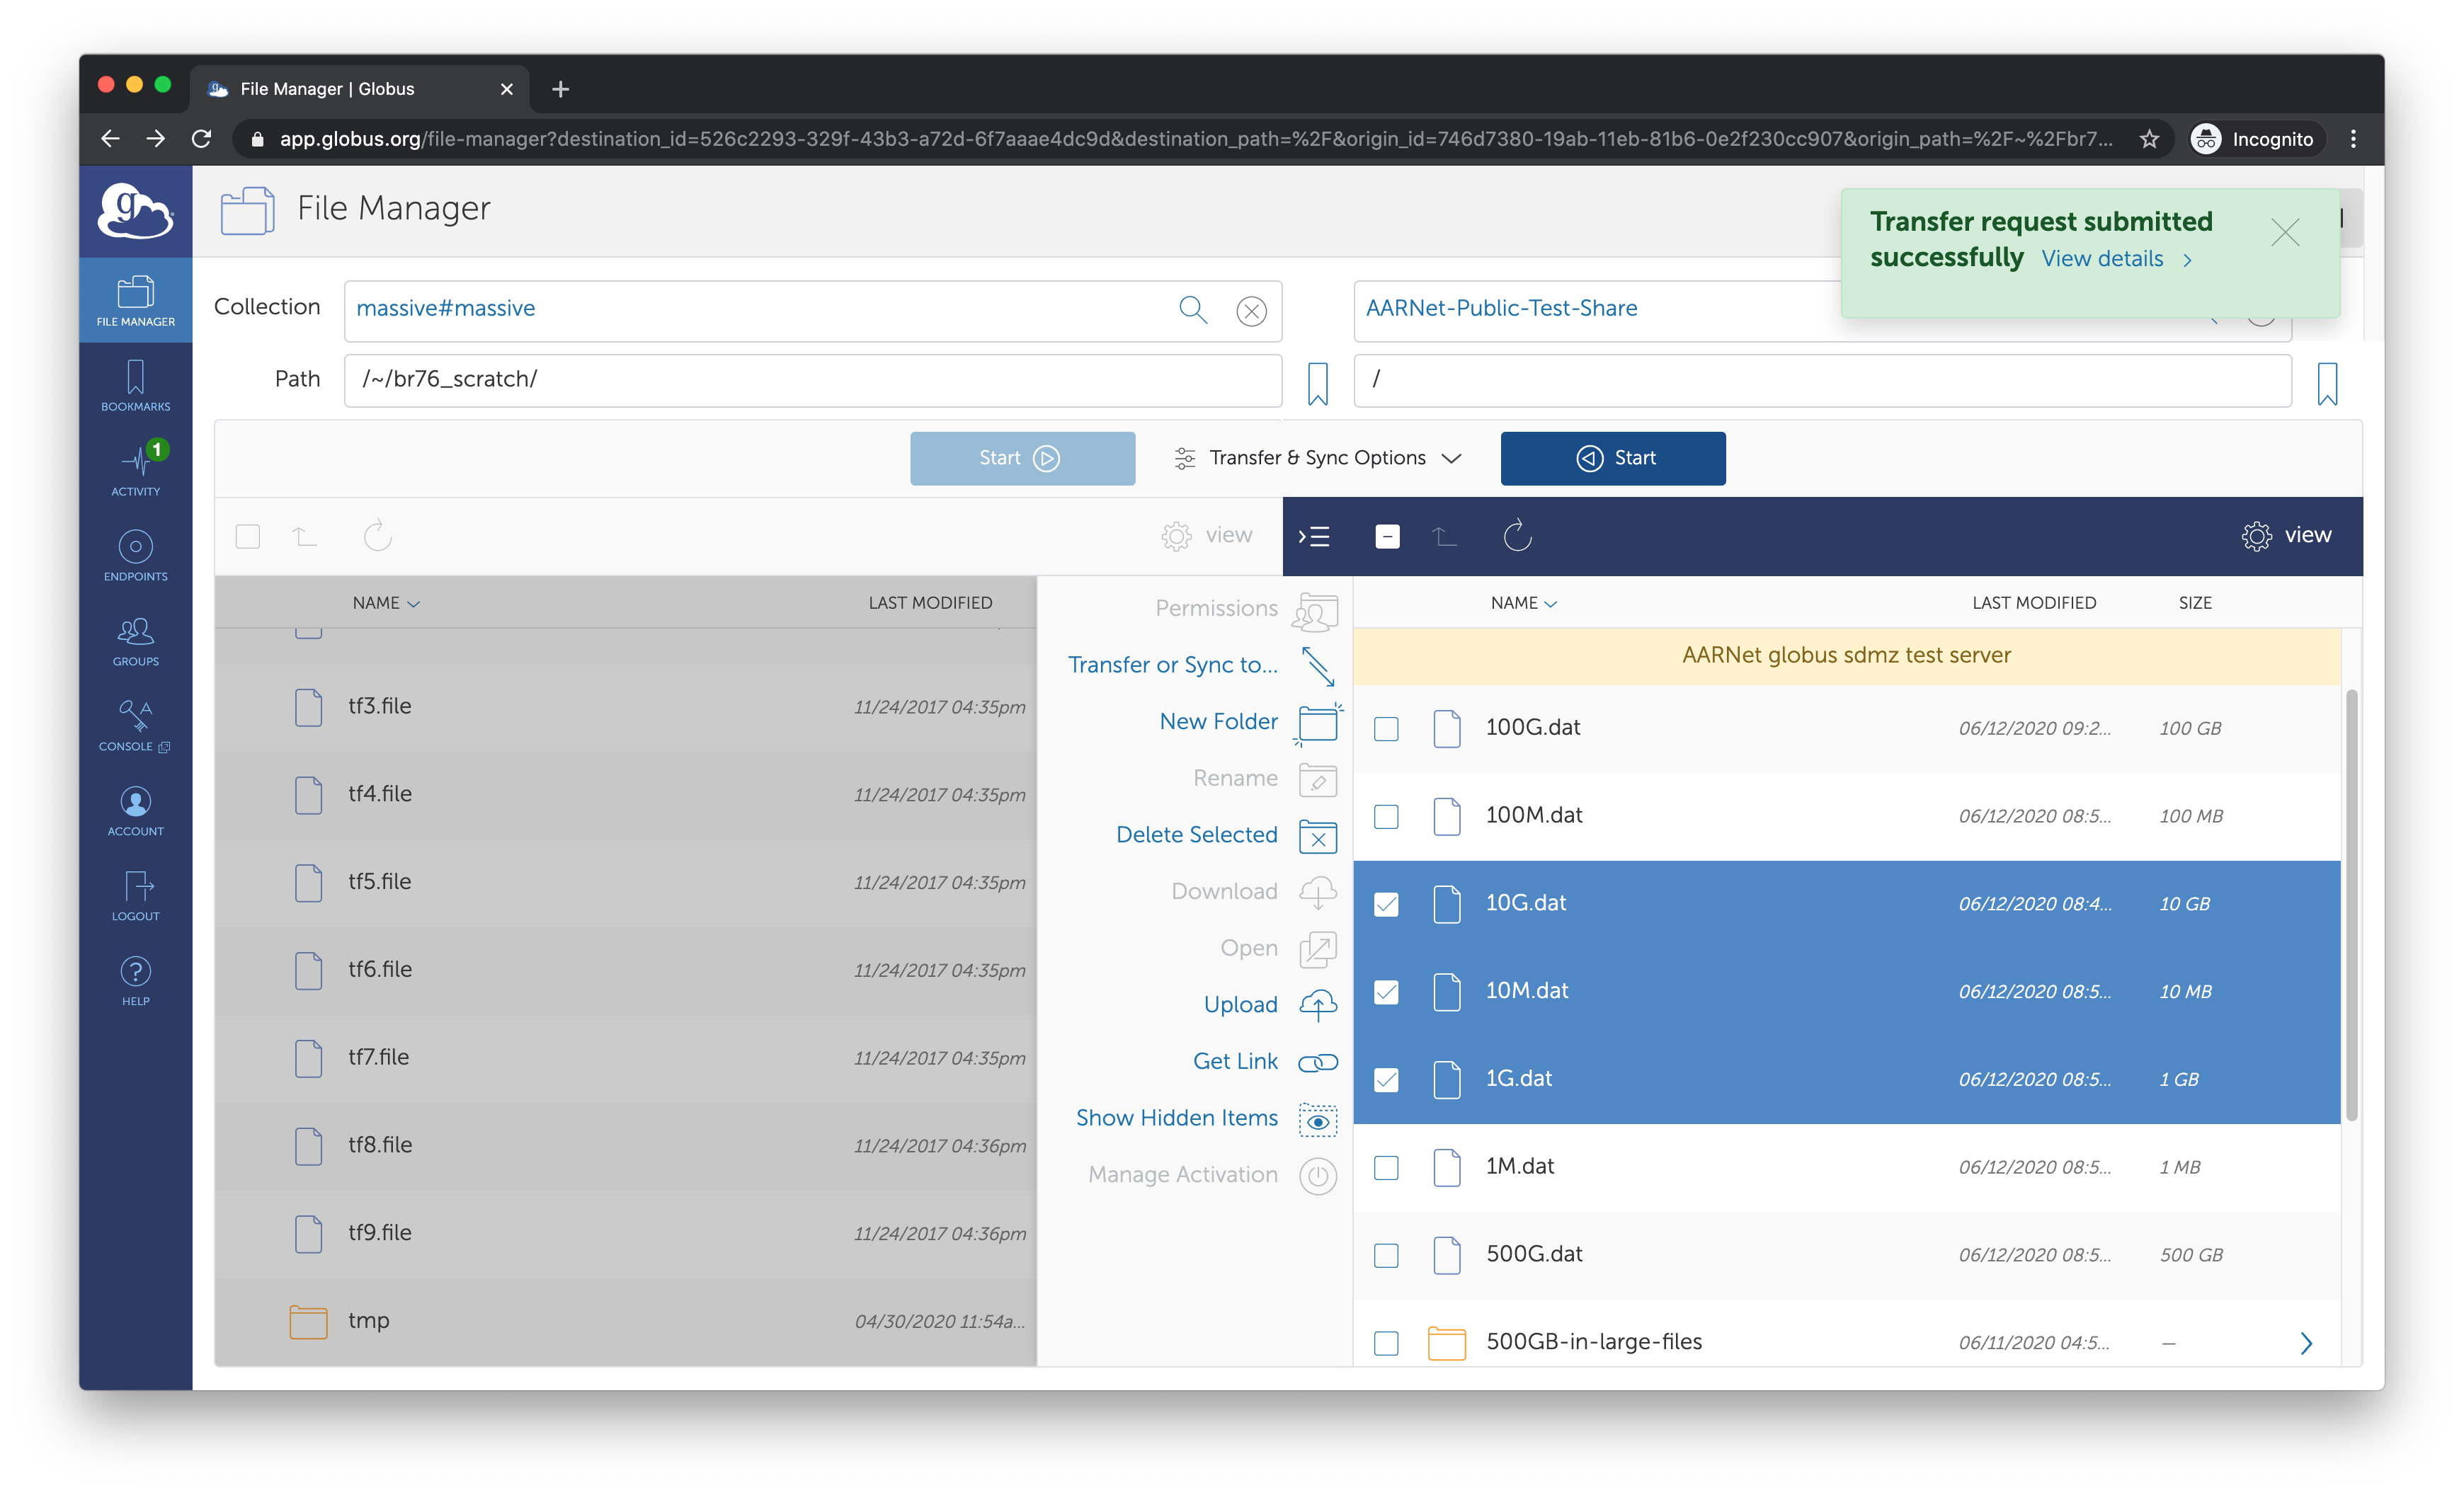
- To view the transfer progress, click on 'View Details'.
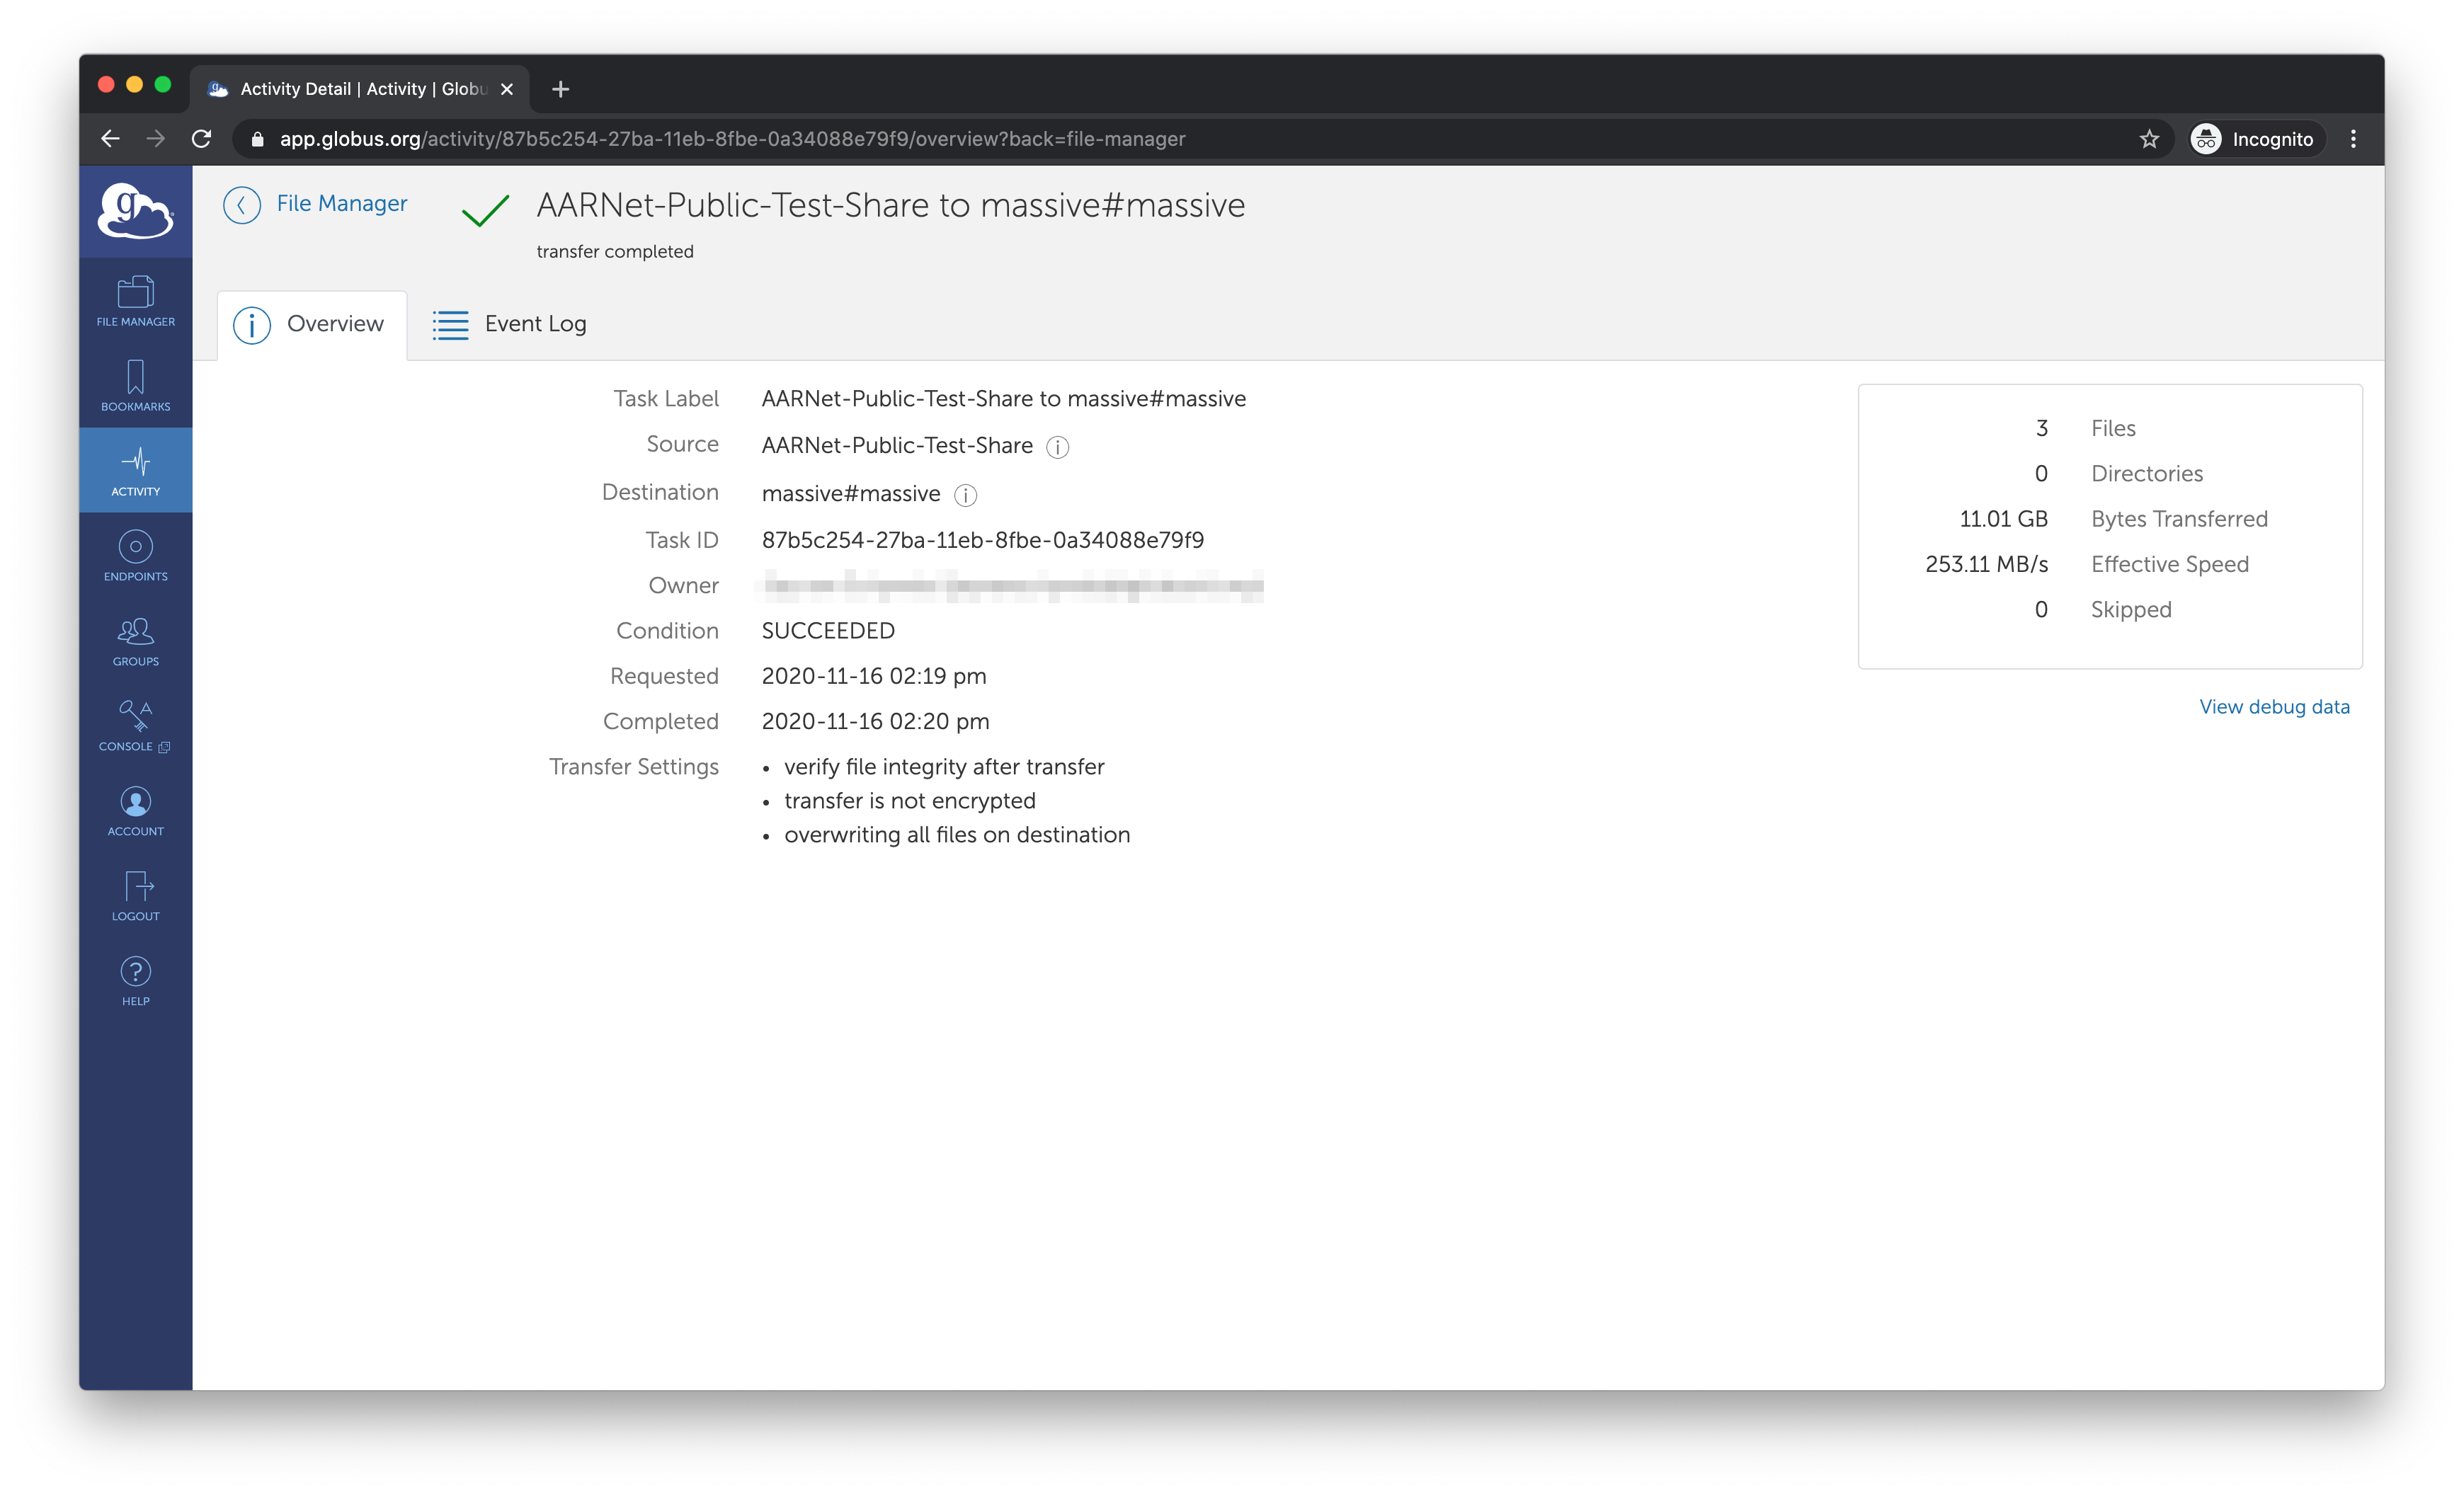
To monitor all transfers click on 'Activity' on the left hand side.
Sharing Data with your Collaborators
By default, sharing via Globus is not enabled. To apply for access to share
via Globus, log in to the HPC ID system and
navigate to the Software section of your profile. Click on Add Software,
locate GlobusAllow and apply for access. Once approved you will be able to
create a Globus collection following the below link. You can also contact our help desk.
Please refer to the Globus documentation. Sharing using Globus on MASSIVE is enabled only for read-only access.
Any Lustre folders shared must be considered to be a DMZ (demilitarized zone), and special attention given to the fact that no sensitive data should ever be stored there, as it might accidentally be released to external parties.
Do not ever share your HOME folder (and in particular ~/.ssh, which can contain sensitive ssh keys).
Additional help
This is a brief introduction on how to use Globus to transfer data. For additional information, please refer to https://docs.globus.org/how-to/.
Globus - Command Line Interface
The Globus CLI software has been installed on MASSIVE.
[user@m3-login1 ~]$ module load globus-cli/2.0.0
Loading globus-cli/2.0.0
  Loading requirement: singularity/3.7.1
[user@m3-login1 ~]$ globus
Usage: globus [OPTIONS] COMMAND [ARGS]...

  Interact with Globus from the command line

  All `globus` subcommands support `--help` documentation.

  Use `globus login` to get started!

  The documentation is also online at https://docs.globus.org/cli/

Options:
  -v, --verbose                  Control level of output
  -h, --help                     Show this message and exit.
  -F, --format [unix|json|text]  Output format for stdout. Defaults to text
  --jmespath, --jq TEXT          A JMESPath expression to apply to json
                                 output. Takes precedence over any specified '
                                 --format' and forces the format to be json
                                 processed by this expression

  --map-http-status TEXT         Map HTTP statuses to any of these exit codes:
                                 0,1,50-99. e.g. "404=50,403=51"


Commands:
  bookmark        Manage endpoint bookmarks
  config          Manage your Globus config file. (Advanced Users)
  delete          Submit a delete task (asynchronous)
  endpoint        Manage Globus endpoint definitions
  get-identities  Lookup Globus Auth Identities
  list-commands   List all CLI Commands
  login           Log into Globus to get credentials for the Globus CLI
  logout          Logout of the Globus CLI
  ls              List endpoint directory contents
  mkdir           Create a directory on an endpoint
  rename          Rename a file or directory on an endpoint
  rm              Delete a single path; wait for it to complete
  session         Manage your CLI auth session
  task            Manage asynchronous tasks
  transfer        Submit a transfer task (asynchronous)
  update          Update the Globus CLI to its  latest version
  version         Show the version and exit
  whoami          Show the currently logged-in identity
The CLI allows users to access Globus data movement functionality via the command line. For more details please refer to: https://docs.globus.org/cli/
For Globus CLI examples: https://docs.globus.org/cli/examples/. This link contains a good list of examples. e.g. find an endpoint, file manipulation, single item transfers, batch transfers and deletions, share endpoints, safe resubmissions.
Globus - Platform as a Service
See https://www.globus.org/platform.
The Globus Platform enables developers to utilise Globus functionality within their own research data applications and services.
Globus Juptyer Notebooks
See https://github.com/globus/globus-jupyter-notebooks.
The notebook Platform_Introduction_Native_App_Auth.ipynb contains examples of
using the functionality available.
Transfer_API_Exercises.ipynb has examples on transferring files,
checking for errors, cancelling transfers under certain conditions, monitoring
transfers.
Data Portals
Sample research data portals can be viewed here: https://docs.globus.org/modern-research-data-portal/.
These illustrate what can be achieved by using the Globus API.
For further information on the functionality available through the Globus API please refer to: https://docs.globus.org/api/
Command Line Interface - Linux and OS X Users
rsync
Use rsync to synchronise file systems and to transfer large amounts of files,
with the ability to stop and restart the file transfers. rsync will
replicate all files in a folder from one spot to another. It first analyses
both file systems to find the difference and then transfers only the changes.
A typical command to synchronise files from a local folder to M3 is:
rsync -auv -e ssh adirectory username@m3-dtn.massive.org.au:~/destinationdirectory/
rsync is very powerful and has many options to help transfer data. For
example it can delete unwanted files (--delete), compress data before
transfer (-z) or can you let you see what command options might do without
actually executing them (--dry-run). For more info on rsync try man rsync.