Market Storage User Guide
Overview
In order to access Market storage, shares must be mapped on each individual machine. Once mapped, Market shares can be accessed similarly to local storage and will support standard actions like dragging and dropping files or directories. There are two types of Market shares:
- Windows (SMB) shares, and
- NFS shares
Windows (SMB) shares
SMB is widely used and shares can be mapped on most operating systems. Access is controlled by one or more secure access groups, each of which contains a list of authorised users. Access groups can be updated by group owners via Monash’s GroupAdmin Tool. Because users must enter their Monash account credentials when mapping a share, it is recommended that users only mount SMB shares on their own machines rather than on shared devices such as instrument PCs. If a share does need to be mounted on a shared machine, then the RDS team can provide support and determine the most appropriate options.
NFS shares
NFS is natively supported on Mac and Linux machines, but can also be used on some versions of Windows. NFS is often used on dedicated servers such as virtual machines (VMs) and shares are only accessible to devices with specific hostnames or IP addresses. Because NFS shares do not require user-based authentication, they are often used to make remote storage available to machines hosting services or web applications.
Accessing Market Shares
The process for accessing Market storage varies depending upon the storage type and the operating system being used. Note that NFS shares can be mounted on some versions of Windows such as Windows 10 and 11, but additional adjustments may be required. If NFS is required for a Windows device please contact the RDS team.
SMB:
- Mapping SMB shares on Windows
- Accessing SMB shares on Mac
- Accessing SMB shares on Linux
- Command line SMB access with rclone
NFS:
Mapping SMB shares on Windows
- Open the Windows Explorer.
- Right-click on "Computer" on the left-hand side.
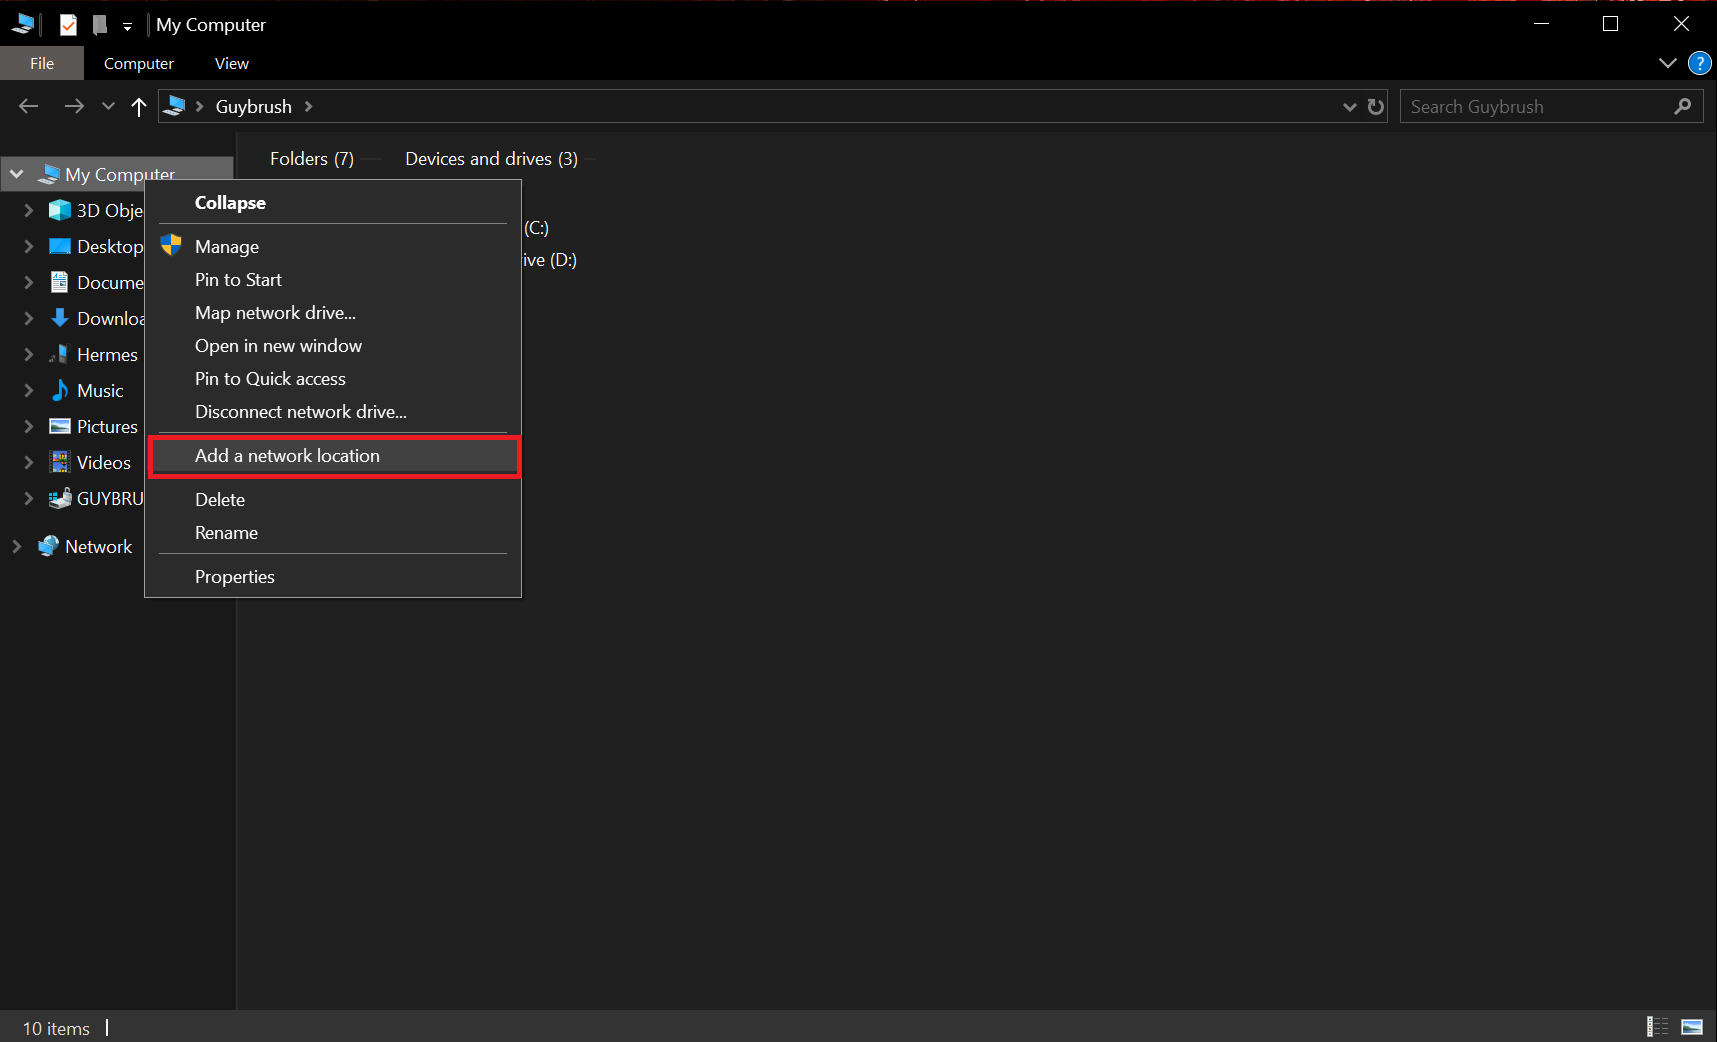
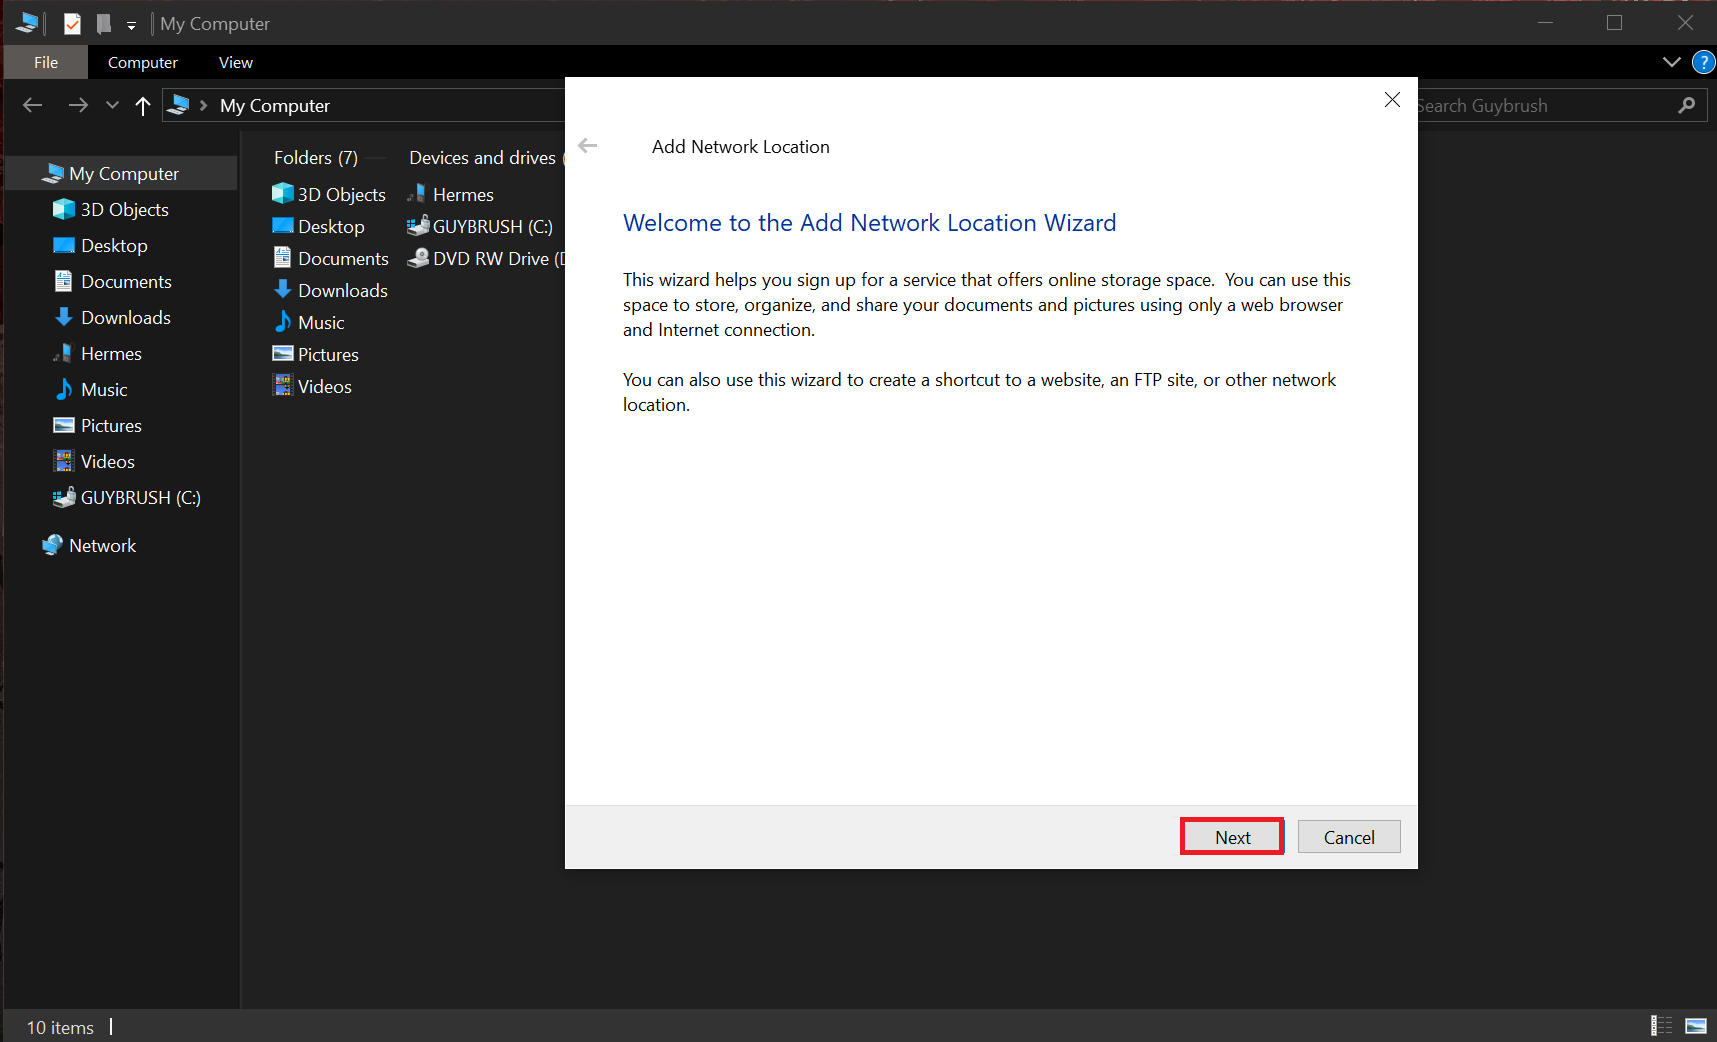
- Select "Add a network location" and then click on "Next".
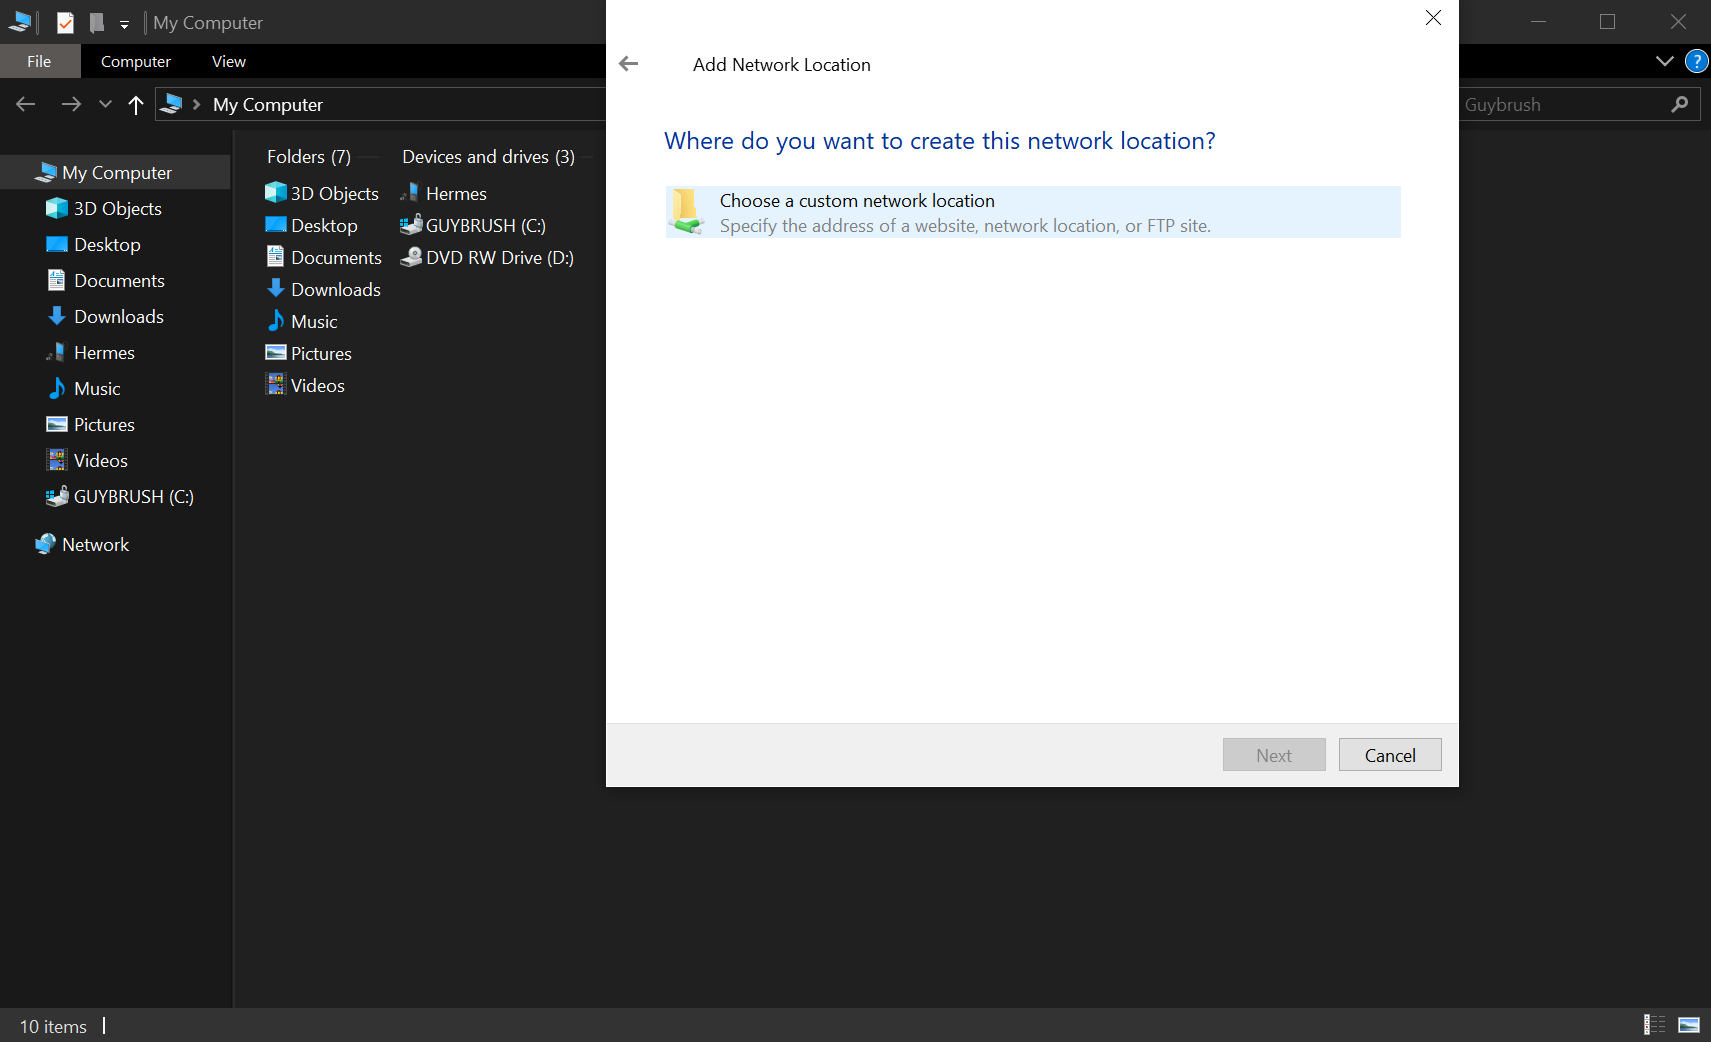
- Select "Choose a custom network location" and then click on "Next".
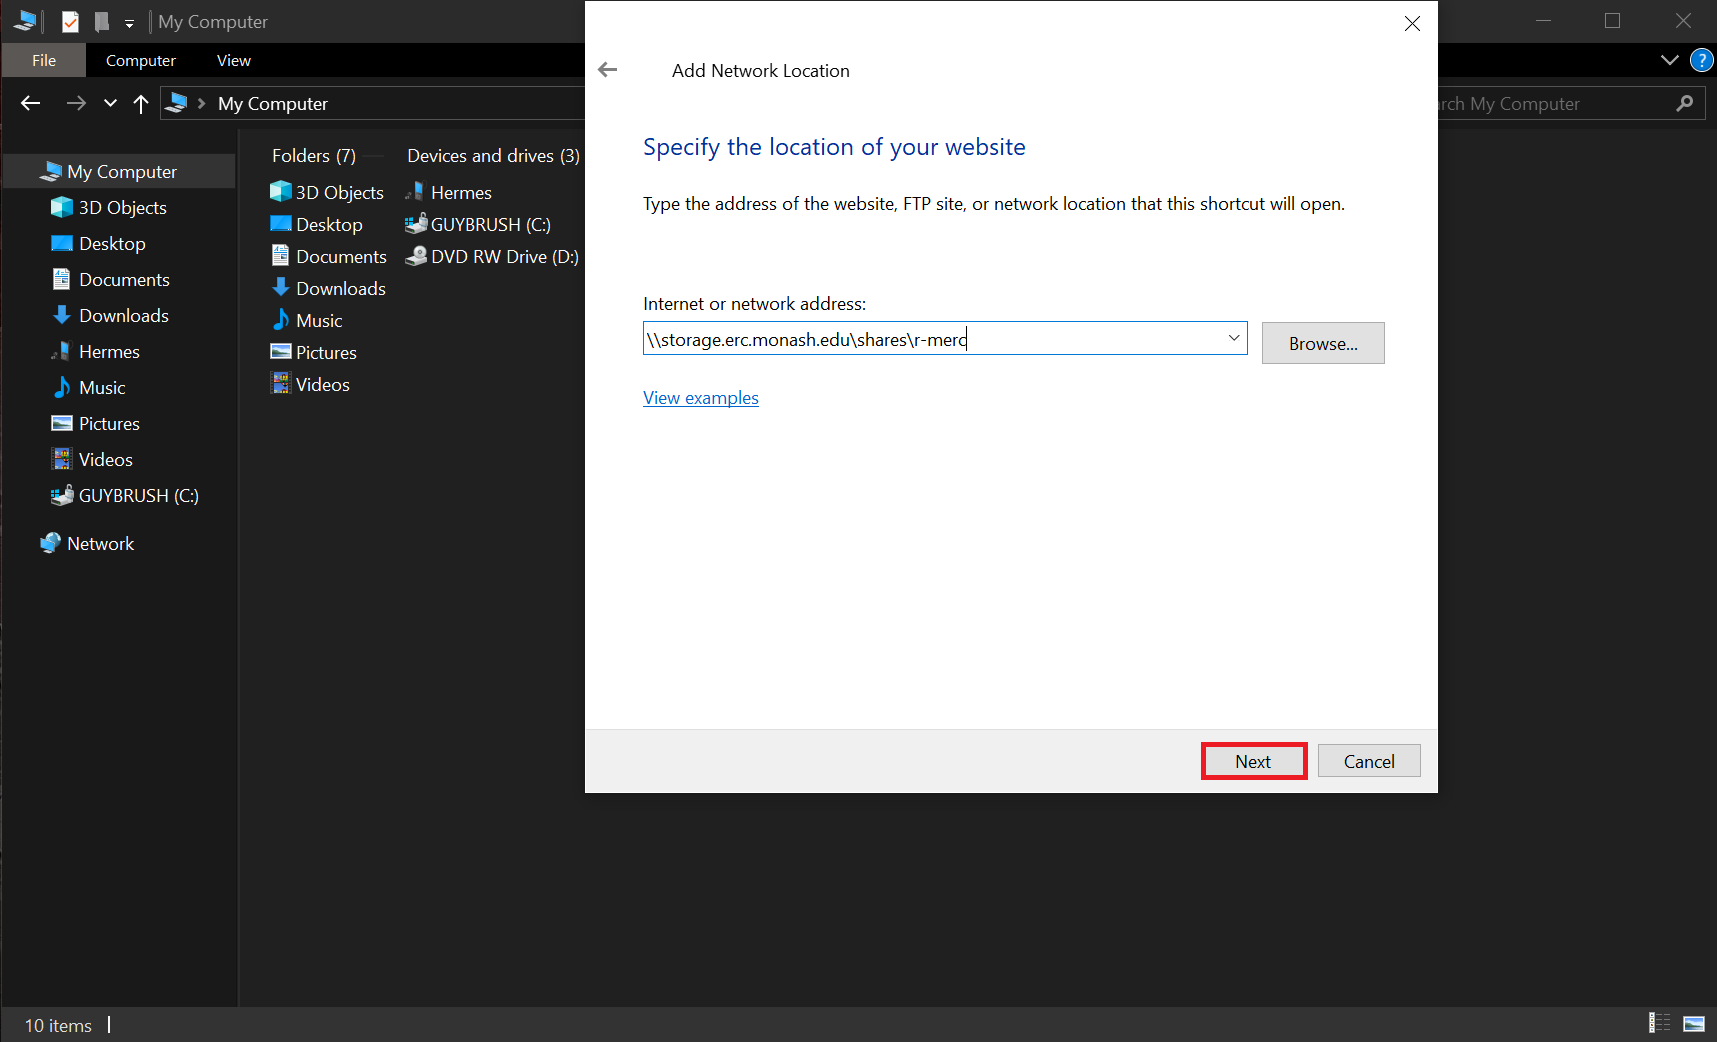
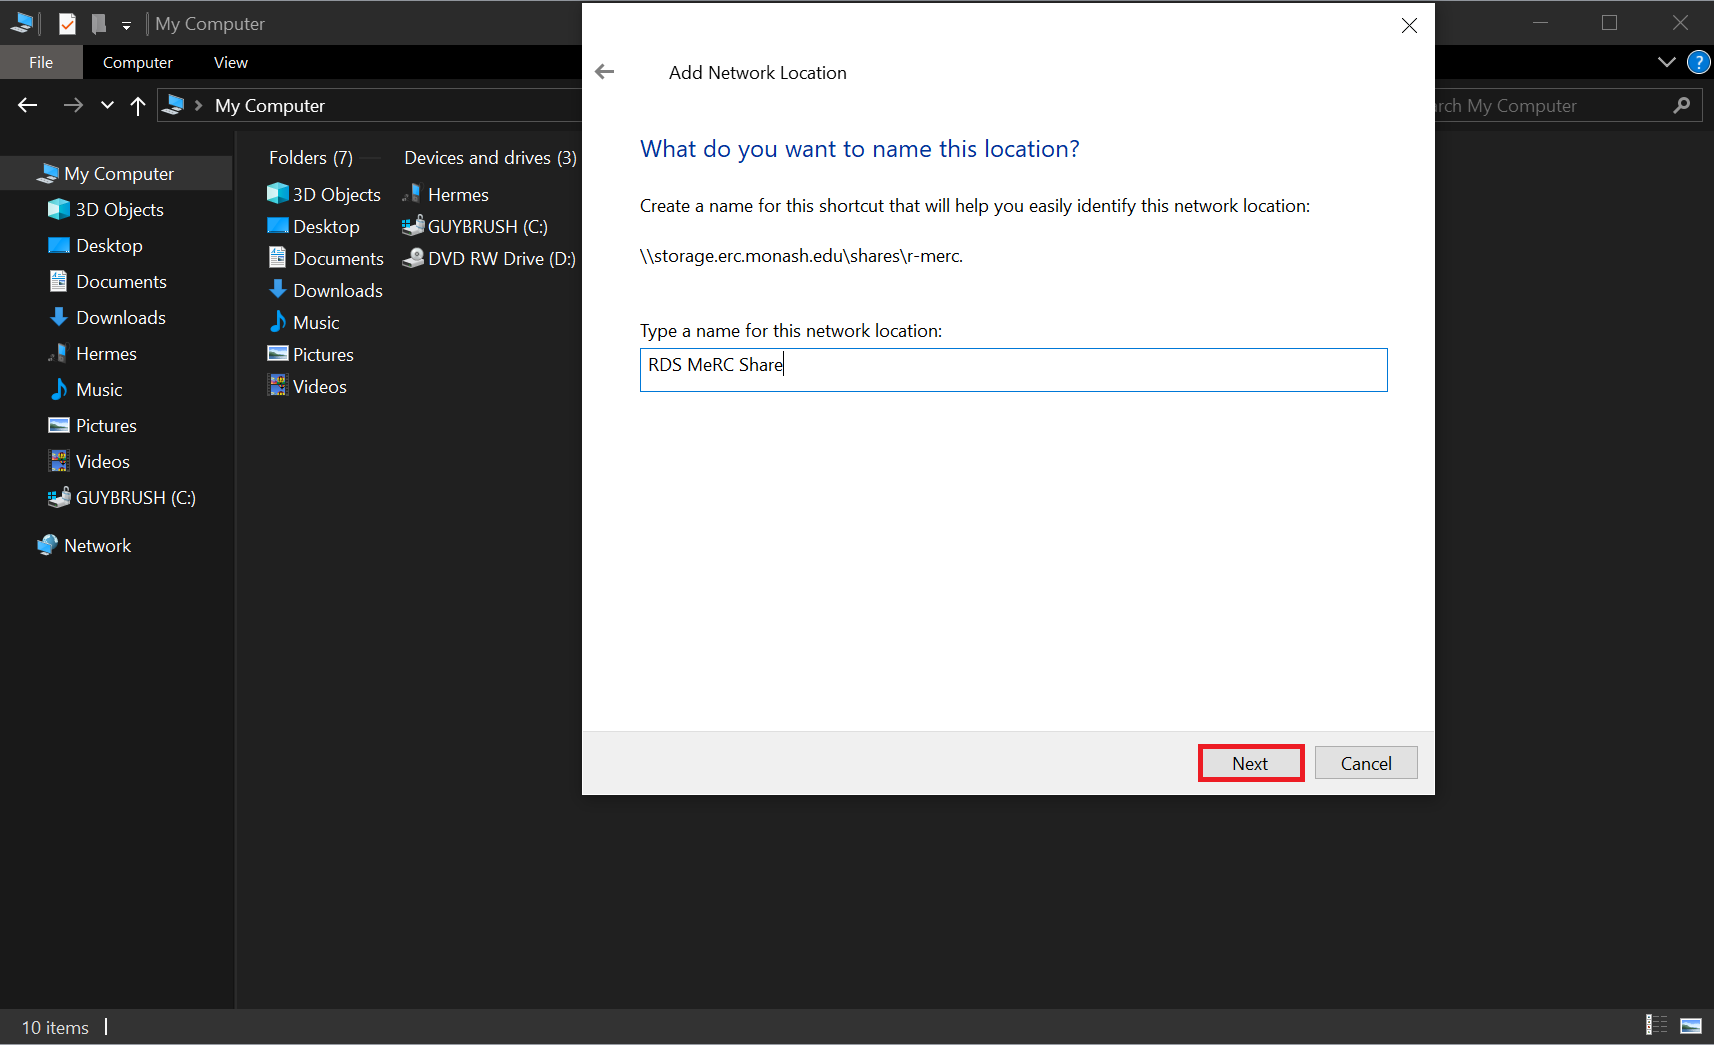
- Enter the provided URL (e.g.
\\storage.erc.monash.edu.au\shares\<SomeShare>) and then click on "Next".
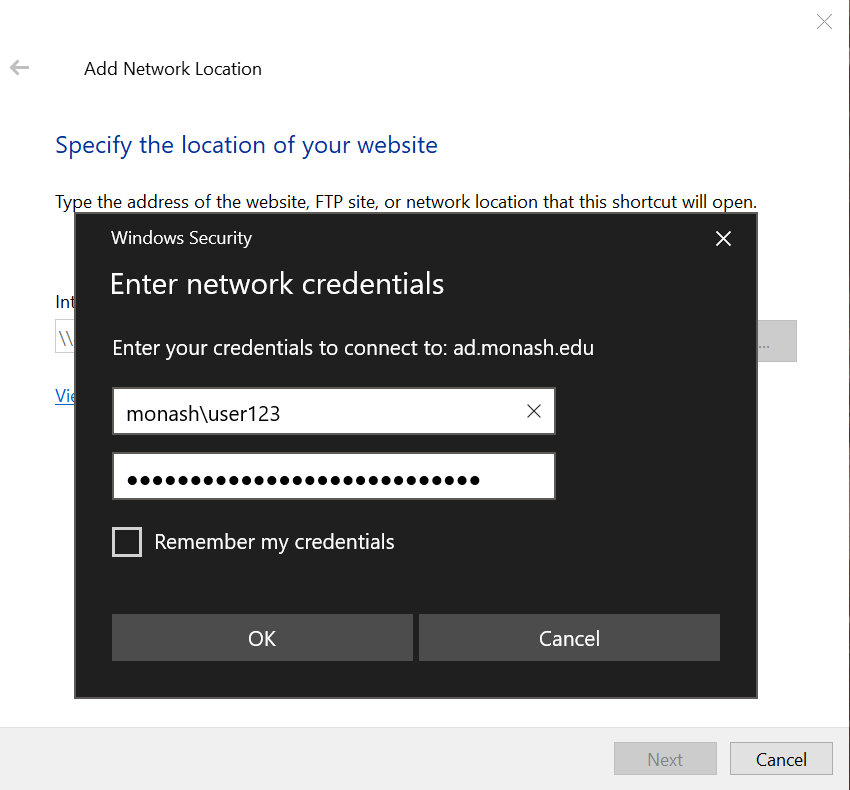
- Enter your Monash ID and password (if prompted). Note that if you are not using a Monash SOE (Monash-supplied and configured) machine, you will need to add "
MONASH\" to your Monash username (e.g.MONASH\user123).
- Enter a name of your choice, e.g. "RDS SomeShare" and click on "Next".
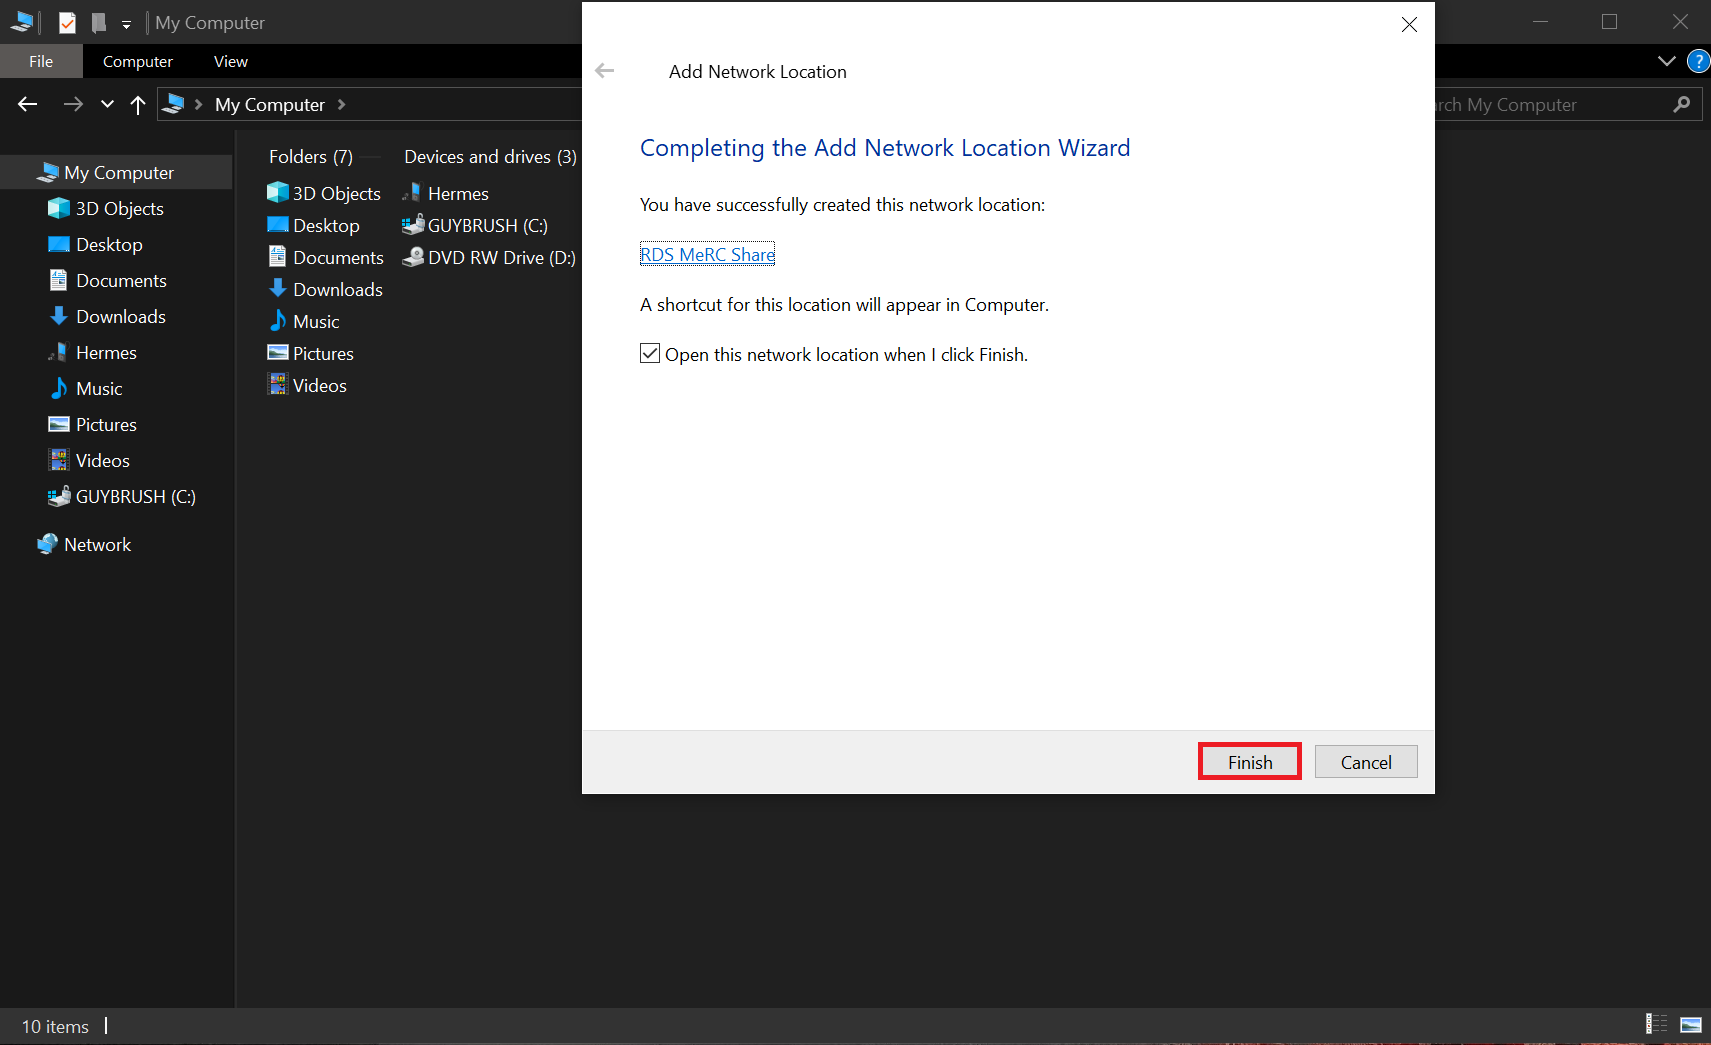
- Review the information presented and then "Finish".
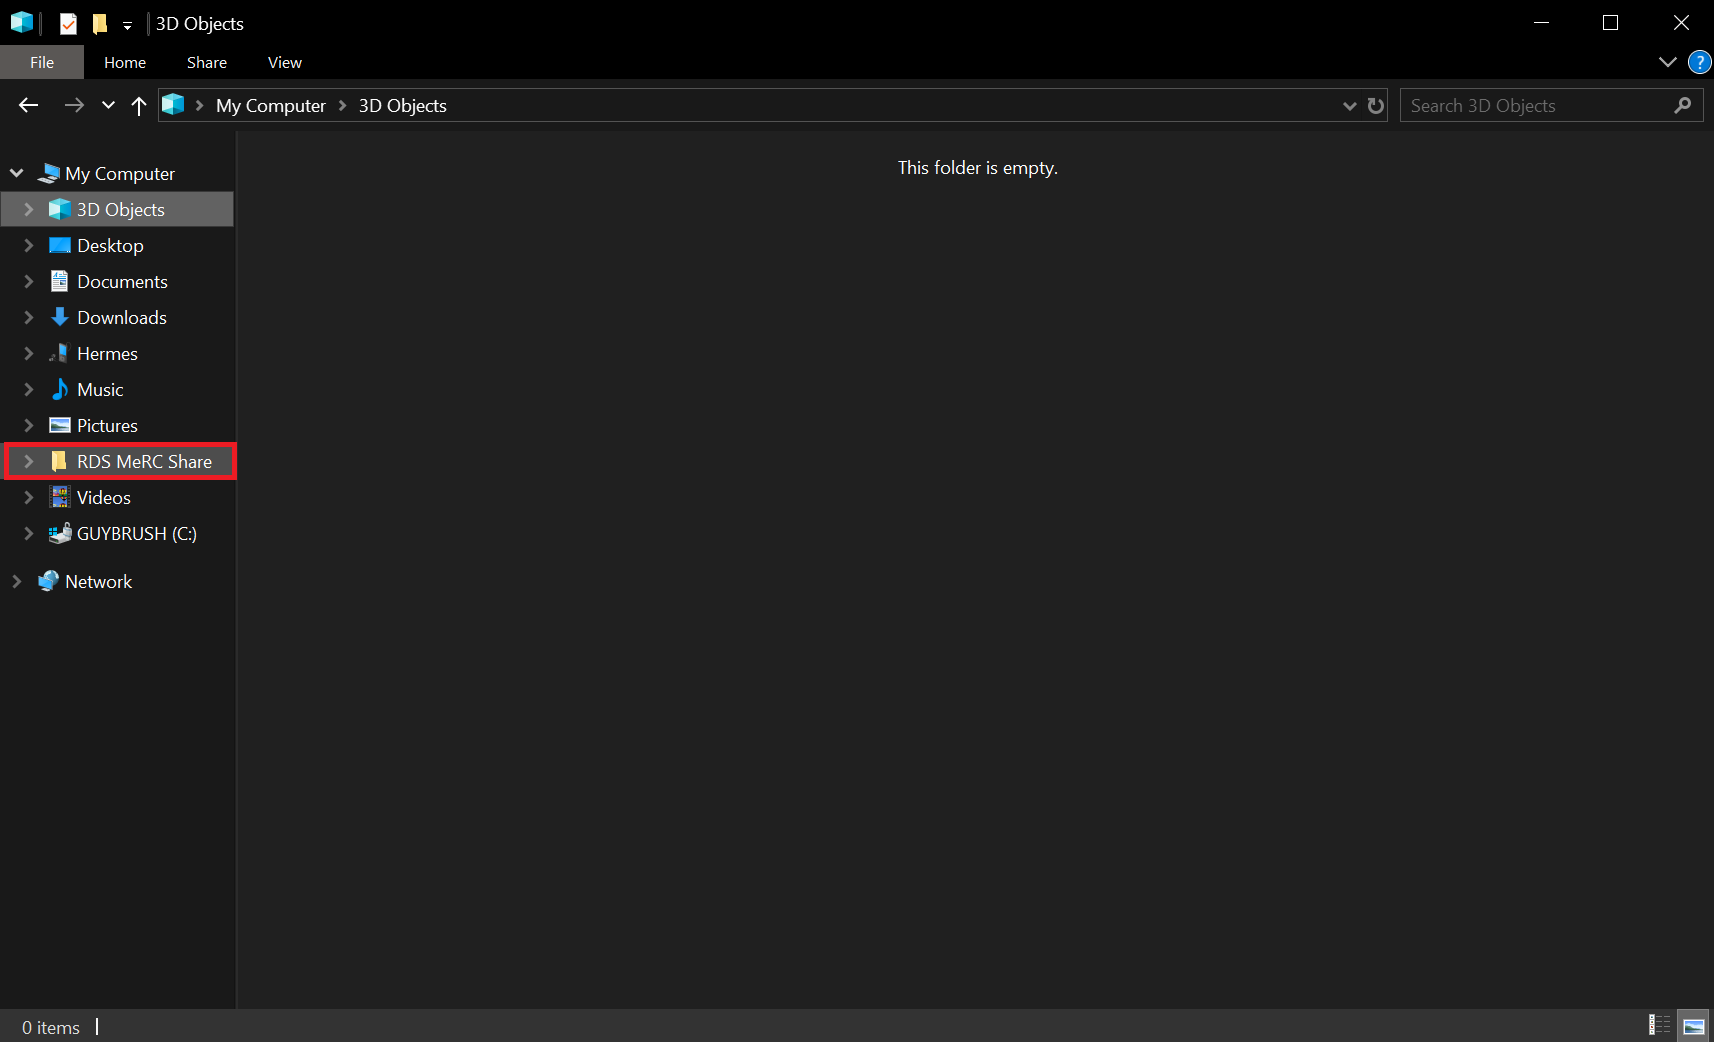
- The newly-mapped share will then appear as a folder in the Windows Explorer.
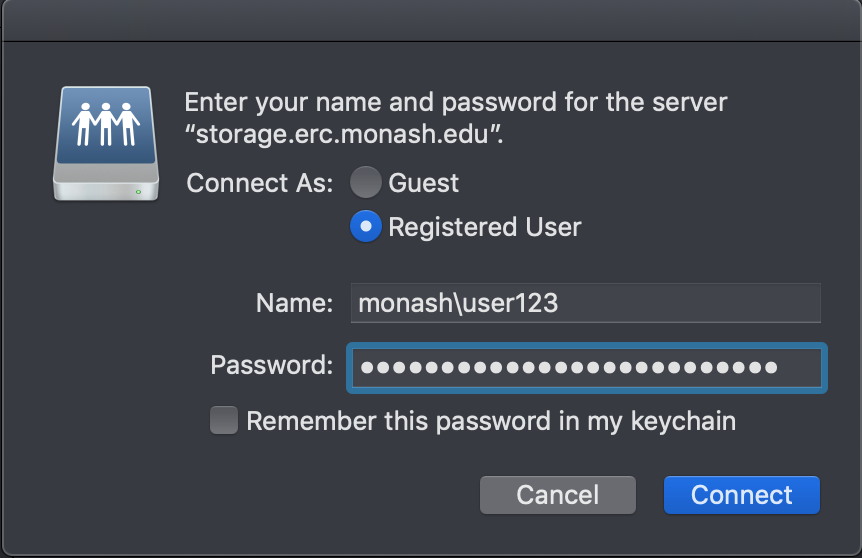
Accessing SMB shares on Mac
- Access the "Go" menu which is available at the top of the screen from the desktop.
- Click on "Connect to Server".

- Enter the provided URL (e.g.
smb://storage.erc.monash.edu.au/shares/<SomeShare>) into the textbox. - Click on "Connect".

- Enter your Monash ID and password details (if required) and click on "Connect". Note that if you are not using a Monash SOE (Monash-supplied and configured) machine, you may need to add "
MONASH\" to your Monash username (e.g.MONASH\user123).
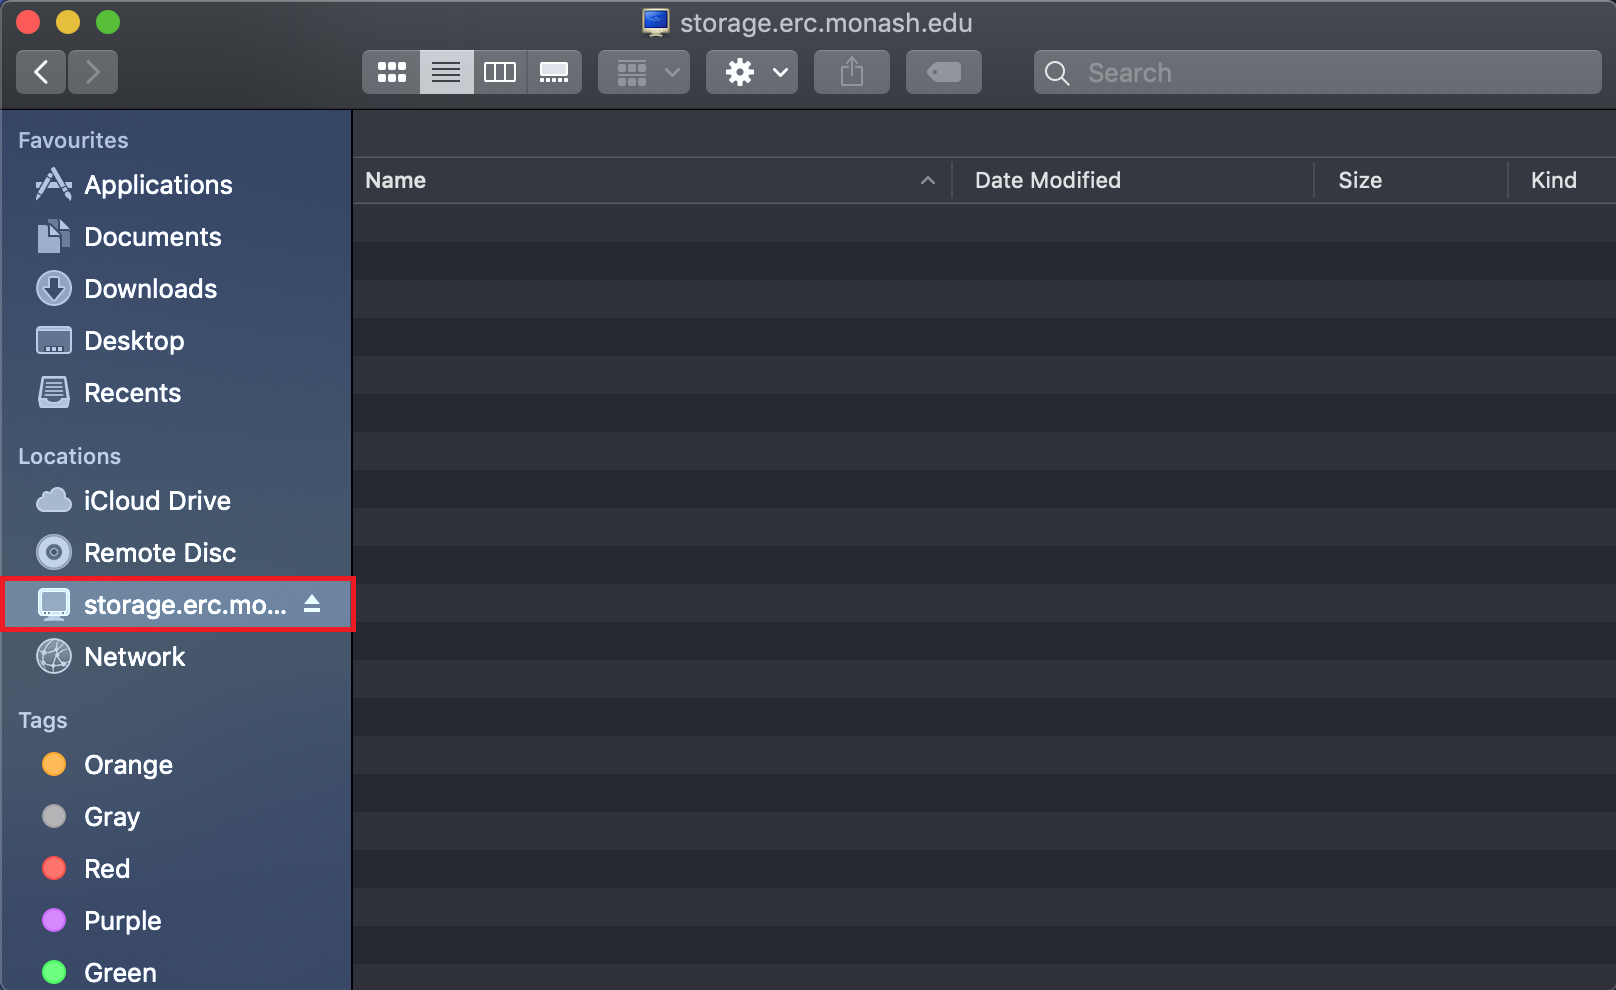
- The newly-mapped share will then appear as a folder in the macOS Finder.
Accessing SMB shares on Linux
Accessing SMB shares on Linux As root
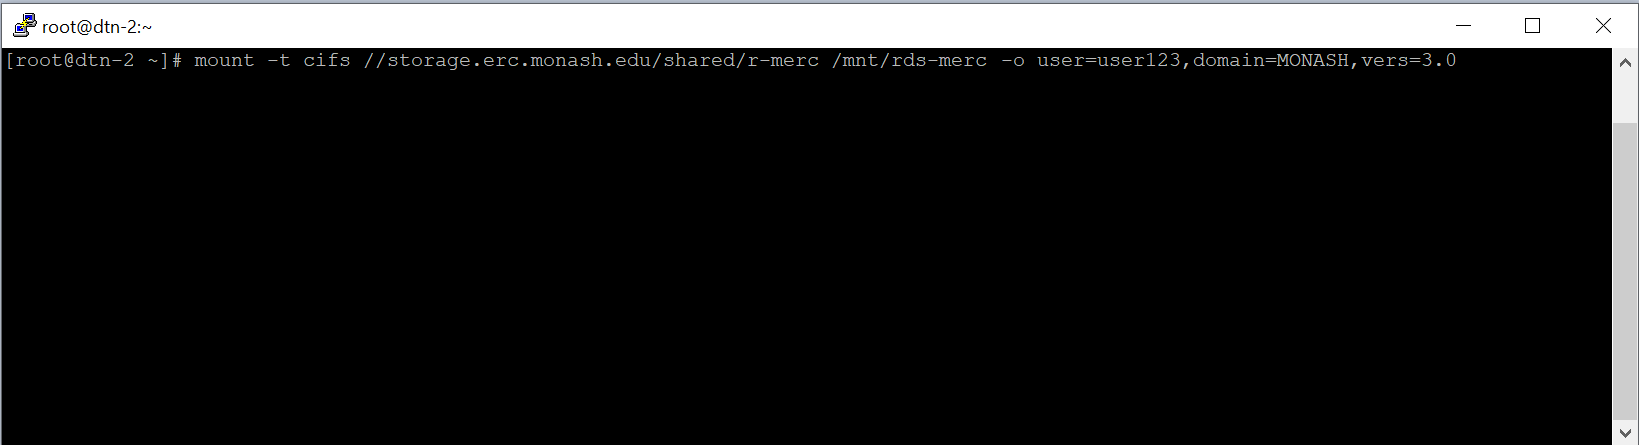
From the command line, SMB shares can be mapped with the mount(8) command with the following syntax (all on one line, split here for readability):
mount -t cifs //storage.erc.monash.edu/shares/<SomeShare> /<LocalDirectory> \
  -o user=<Username>,domain=MONASH,vers=3`
Note that the each share needs to be mapped to a local directory (/<LocalDirectory> above) which should be created before the above command is used.
- Enter your Monash password and press Enter.
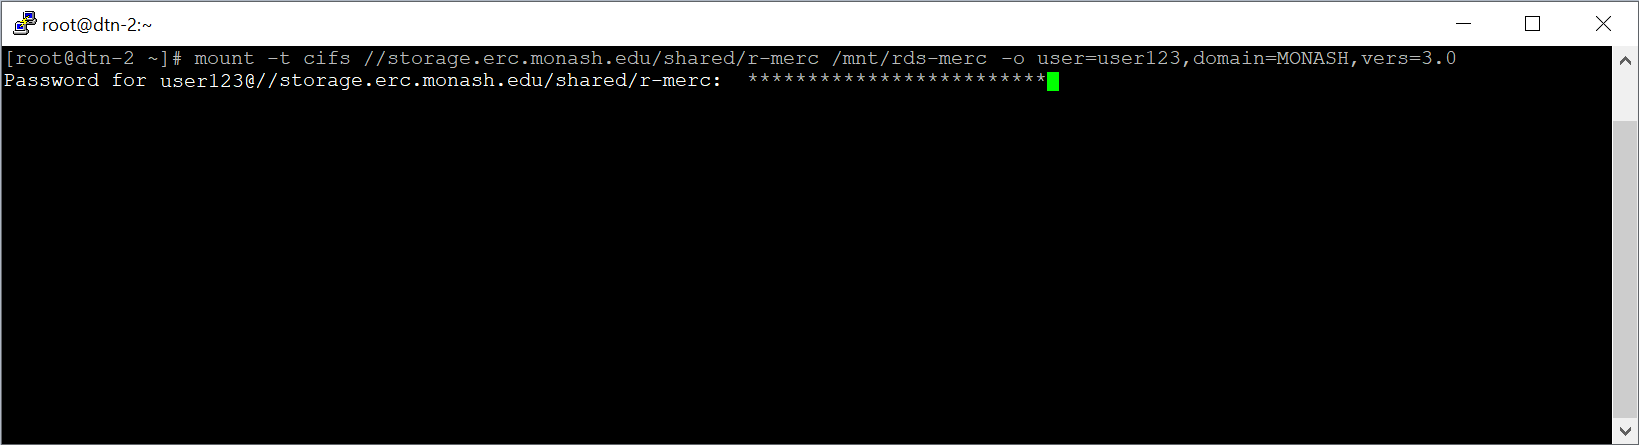
- Unless an error message is displayed, the share has been mapped properly and will be available via the nominated directory (
/<LocalDirectory>). - Depending on the client system, you may wish to mount the storage as a specific local user or group using the uid and gid options, or to use a file of credentials to avoid having to specify username, domain and password on the command line. e.g. to mount the share
//storage.erc.monash.edu.au/shares/vicnodeinto the local filesystem at/mnt/rdswith local user and group IDs of 1000 and 1020:
mount -t cifs //storage.erc.monash.edu.au/shares/vicnode /mnt/vicnode \
' -o credentials=/root/.secrets,uid=1000,gid=1020,vers=3
The username and password for the account in the Monash AD are held in the file /root/.secrets (with no spaces after "=") as:
domain=MONASH
username=user123
password=secretpwd
- If you encounter any problems, please contact the RDS team.
- Shares can be unmounted with the umount(8) command: e.g.
umount /<LocalDirectory>
Accessing SMB shares on Linux as user
The RDS SMB shares can be accessed by user-mode accounts through the Gnome desktop or via command line utilities gio(1) or smbclient(1). This may be used from systems such as MASSIVE where user accounts do not have root privileges to mount filesystems.
Users can mount their storage with the following and have it visible in the Gnome desktop, or use the gio list and gio copy commands to manipulate files from the command line:
gio mount smb://storage.erc.monash.edu.au/shares/<sharename>`
or on older linux distributions without gio(1):
gvfs-mount smb://storage.erc.monash.edu.au/shares/<sharename>
e.g.
fred@ubuntu:~$ gio mount smb://storage.erc.monash.edu.au/shares/vicnode
Password required for share shares on storage.erc.monash.edu.au
User [user123]:
Domain [MONASH]:
Password:
Command line SMB access with rclone
The rclone(1) utility can be used on client systems for copying files to and from the market storage without requiring the storage to be mounted. It is available for Windows, Macintosh and Linux platforms from https://rclone.org/. Configuration and use is from the command line, with requirement that you use the server name holding your fileshare, and not the logical name storage.erc.monash.edu. A typical configuration will be generated via the command rclone config create market smb --all then answering the following prompts (options "port" and "spn" can be left at their default). Note, use your Monash account name and password
Option host.
SMB server hostname to connect to.
E.g. "example.com".
Enter a value.
host> cephfs-smb-rds.erc.monash.edu
Option user.
SMB username.
Enter a string value. Press Enter for the default (user1).
user> user123

Option pass.
SMB password.
Choose an alternative below. Press Enter for the default (n).
y) Yes, type in my own password
g) Generate random password
n) No, leave this optional password blank (default)
y/g/n> y
Enter the password:
password:
Confirm the password:
password:

Option domain.
Domain name for NTLM authentication.
Enter a string value. Press Enter for the default (WORKGROUP).
domain> MONASH

:
[market]
type = smb
host = cephfs-smb-rds.erc.monash.edu
user = user123
pass = *** ENCRYPTED STRING ***
domain = MONASH
The fileshares can then be accessed with commands such as rclone ls market:Share-Name, e.g. "rclone ls market:R-Eng-xyz" or "rclone copy market:R-Eng-xyz/video1.mpg ."
Mapping NFS shares on Windows
- If NFS access on Windows is required, please contact the RDS team.
Accessing NFS shares on Mac
- Access the "Go" menu which is available at the top of the screen from the desktop.
- Click on "Connect to Server".
- Enter the provided URL (e.g.
nfs://storage.erc.monash.edu:/rds1/<SomeShare>) into the textbox. - Click on "Connect".
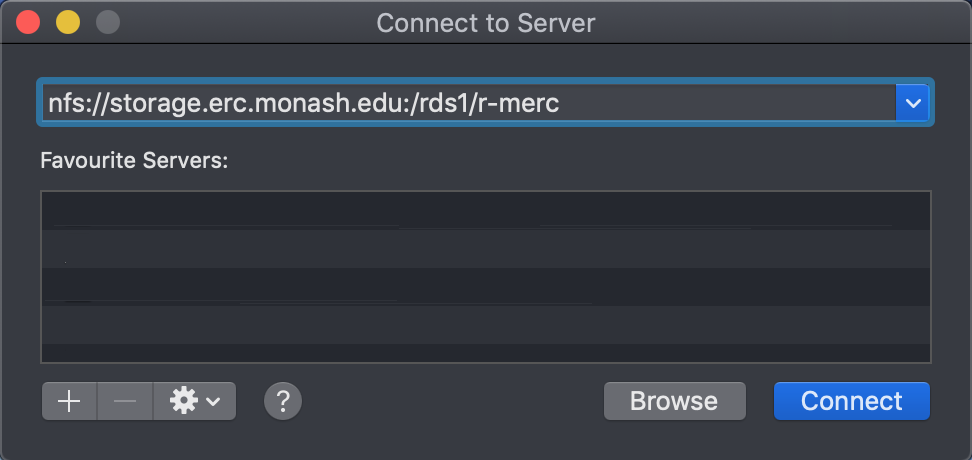
- The newly-mapped share will then appear as a folder in the macOS Finder.
Accessing NFS shares on Linux
Accessing NFS shares on Linux Using X
- The mapping process via X is essentially the same as for macOS
Accessing NFS shares on Linux Using the command line
- NFS shares can be mapped using the mount(8) command which uses the following syntax:
mount -t nfs //storage.erc.monash.edu:/rds1/<SomeShare> /<LocalDirectory>
- Note that the each share needs to be mapped to a local directory (
/<LocalDirectory>above) which should be created before the above command is used.

- Unless an error message is displayed, the share has been mapped properly and will be available via the nominated directory (
/<LocalDirectory>). - Shares can be unmounted with the umount(8) command: e.g.
umount /<LocalDirectory