Data Dashboard User Guide
Overview
The Data Dashboard is a web-based interface that allows researchers to apply for storage on Monash University's research data storage infrastructure, request extensions if more space is required and monitor their usage. New storage applications are lodged as requests which are then submitted, approved and provisioned before being made available for use. Each request is referred to as a 'storage allocation' and each allocation has a quota that can be increased if required (subject to approval). Most allocations are lodged to support the storage needs of a specific research project or research group, but allocations for individual research can also be requested.
Applying for Research Data Storage
Use a web browser to access Data Dashboard and click on 'Log in'

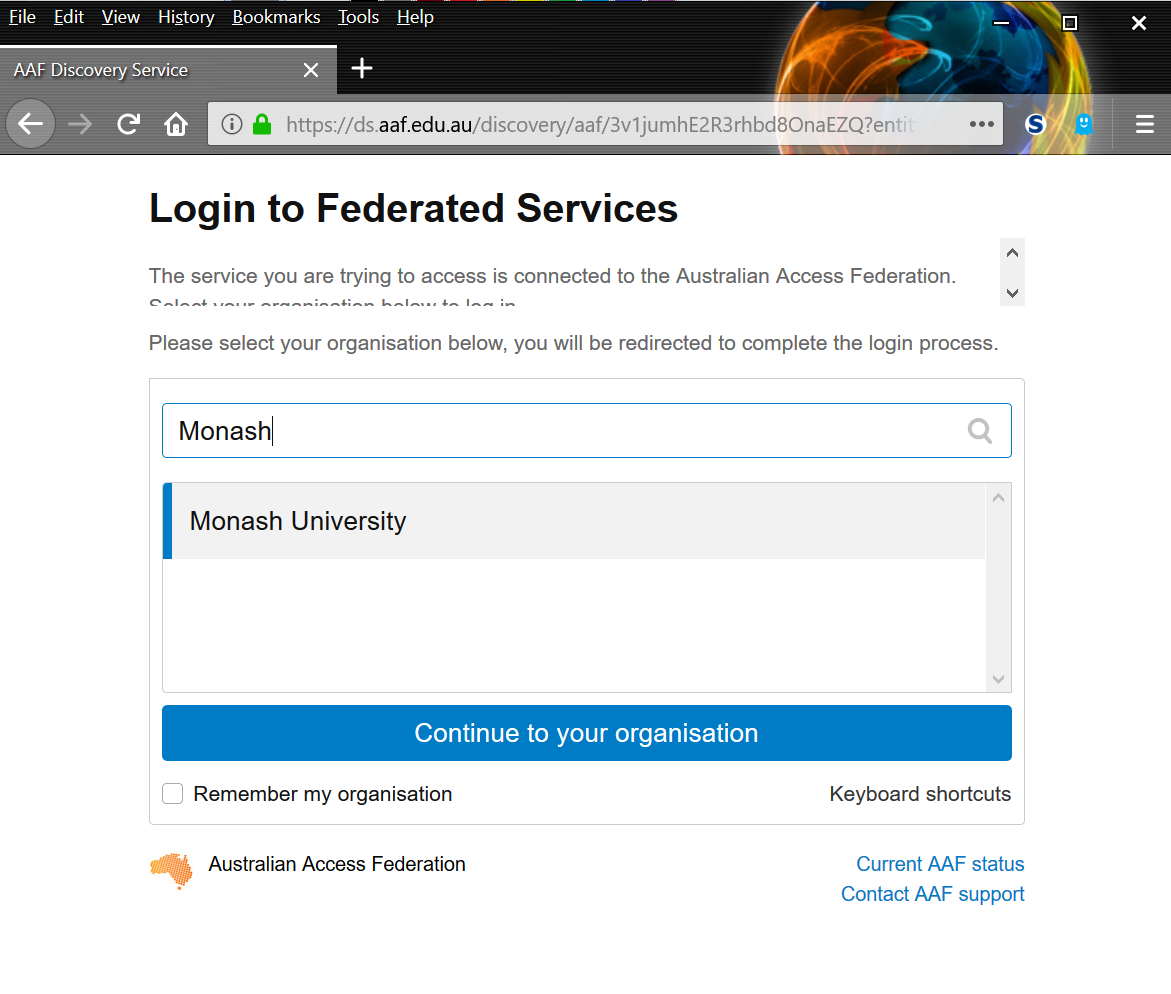
Type in 'Monash' or scroll through the list to 'Monash University' and then click on the text to select it. Once that is done, click on 'Continue to your organisation'.
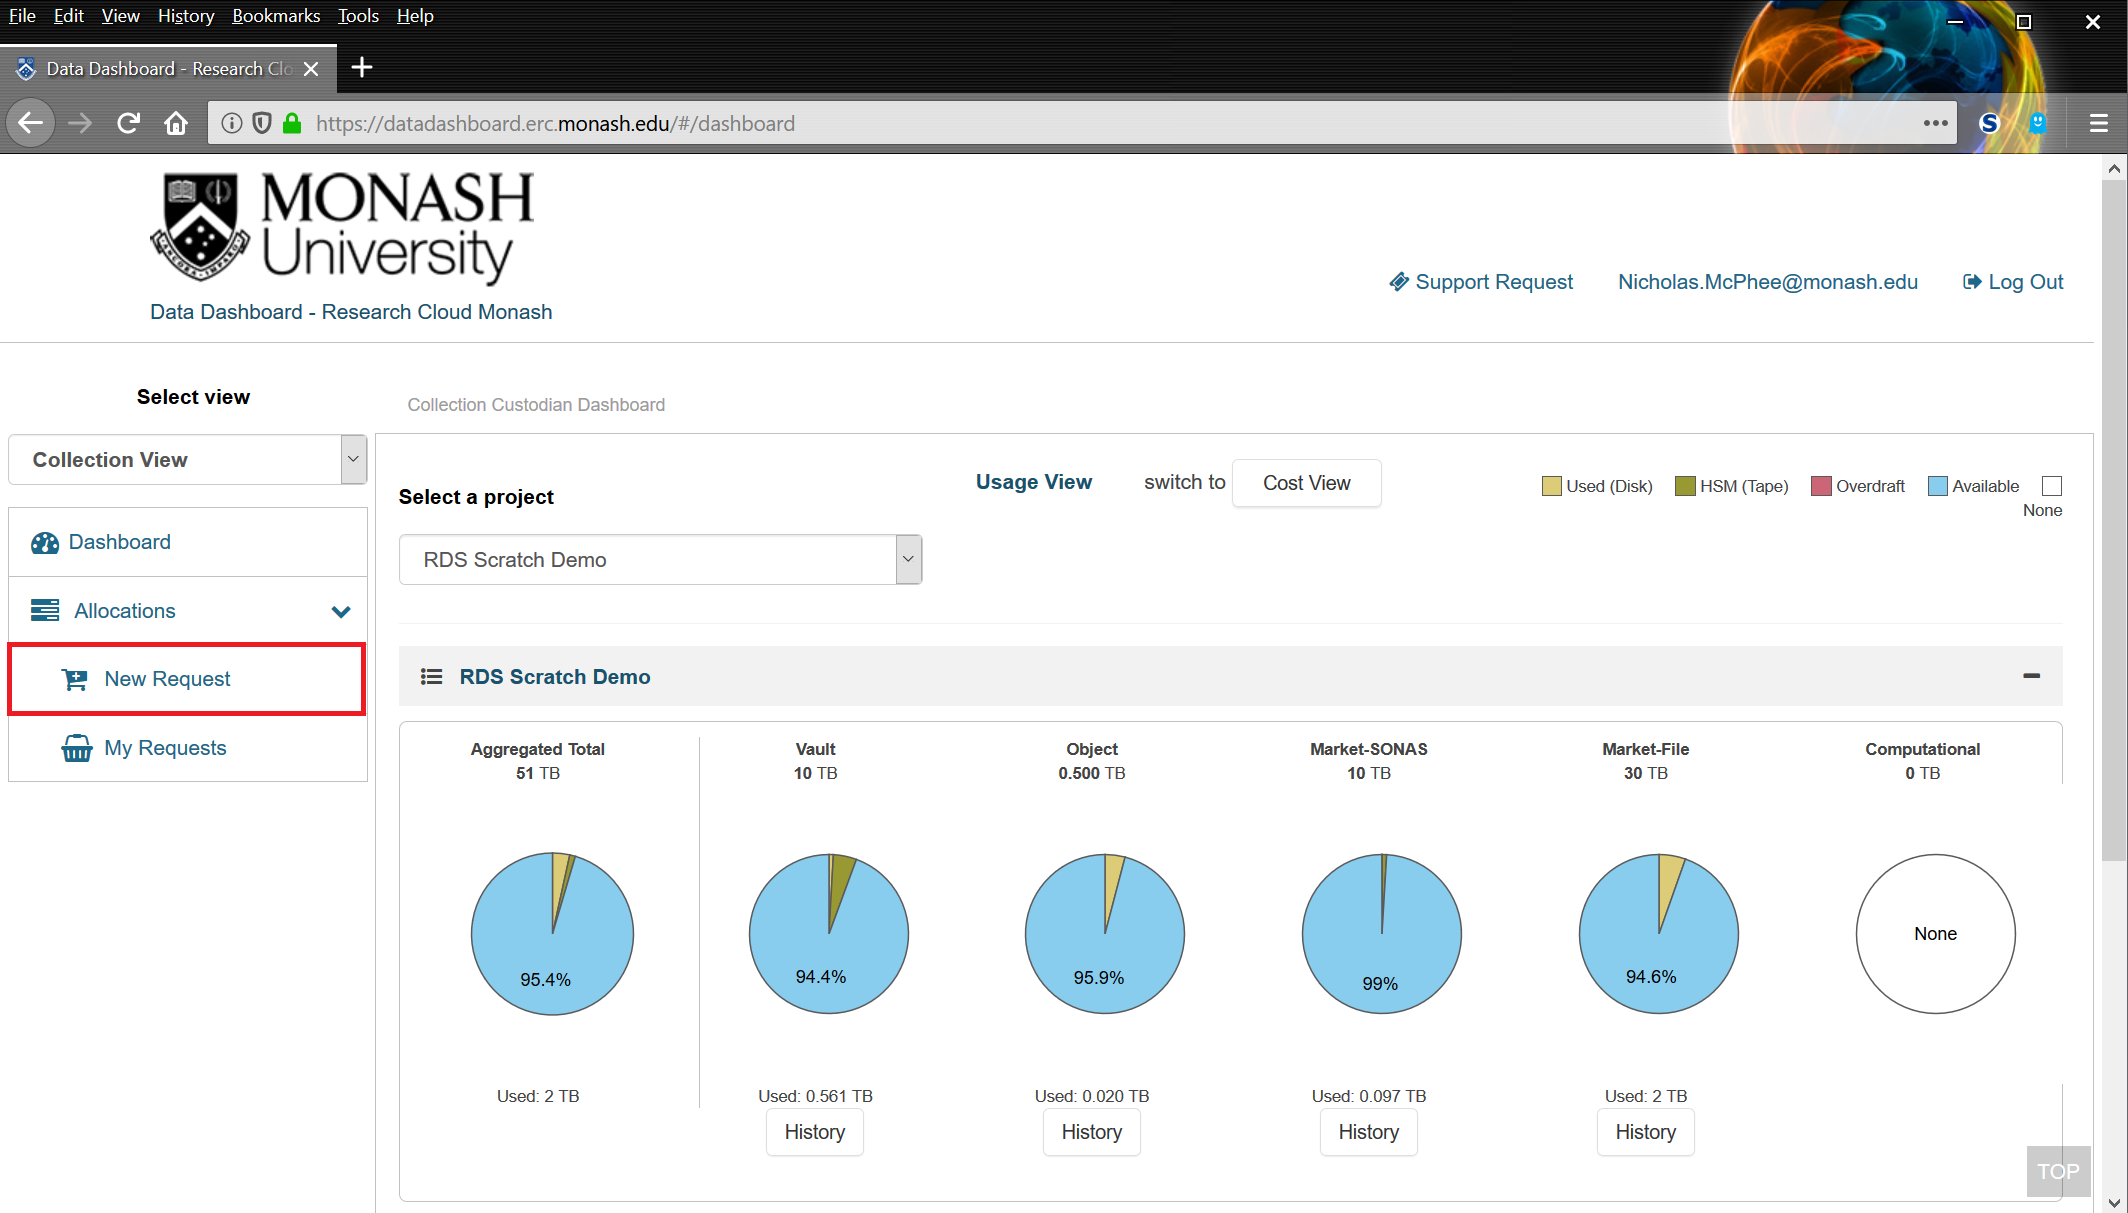
If you have already authenticated using Okta, for example by logging into the My.Monash portal, you will be logged in automatically. Otherwise, enter your Monash username and password and then click on 'Log in'. From the home page of the Dashboard, click on the 'Allocations' button in the left menu and then click on 'New Request'.
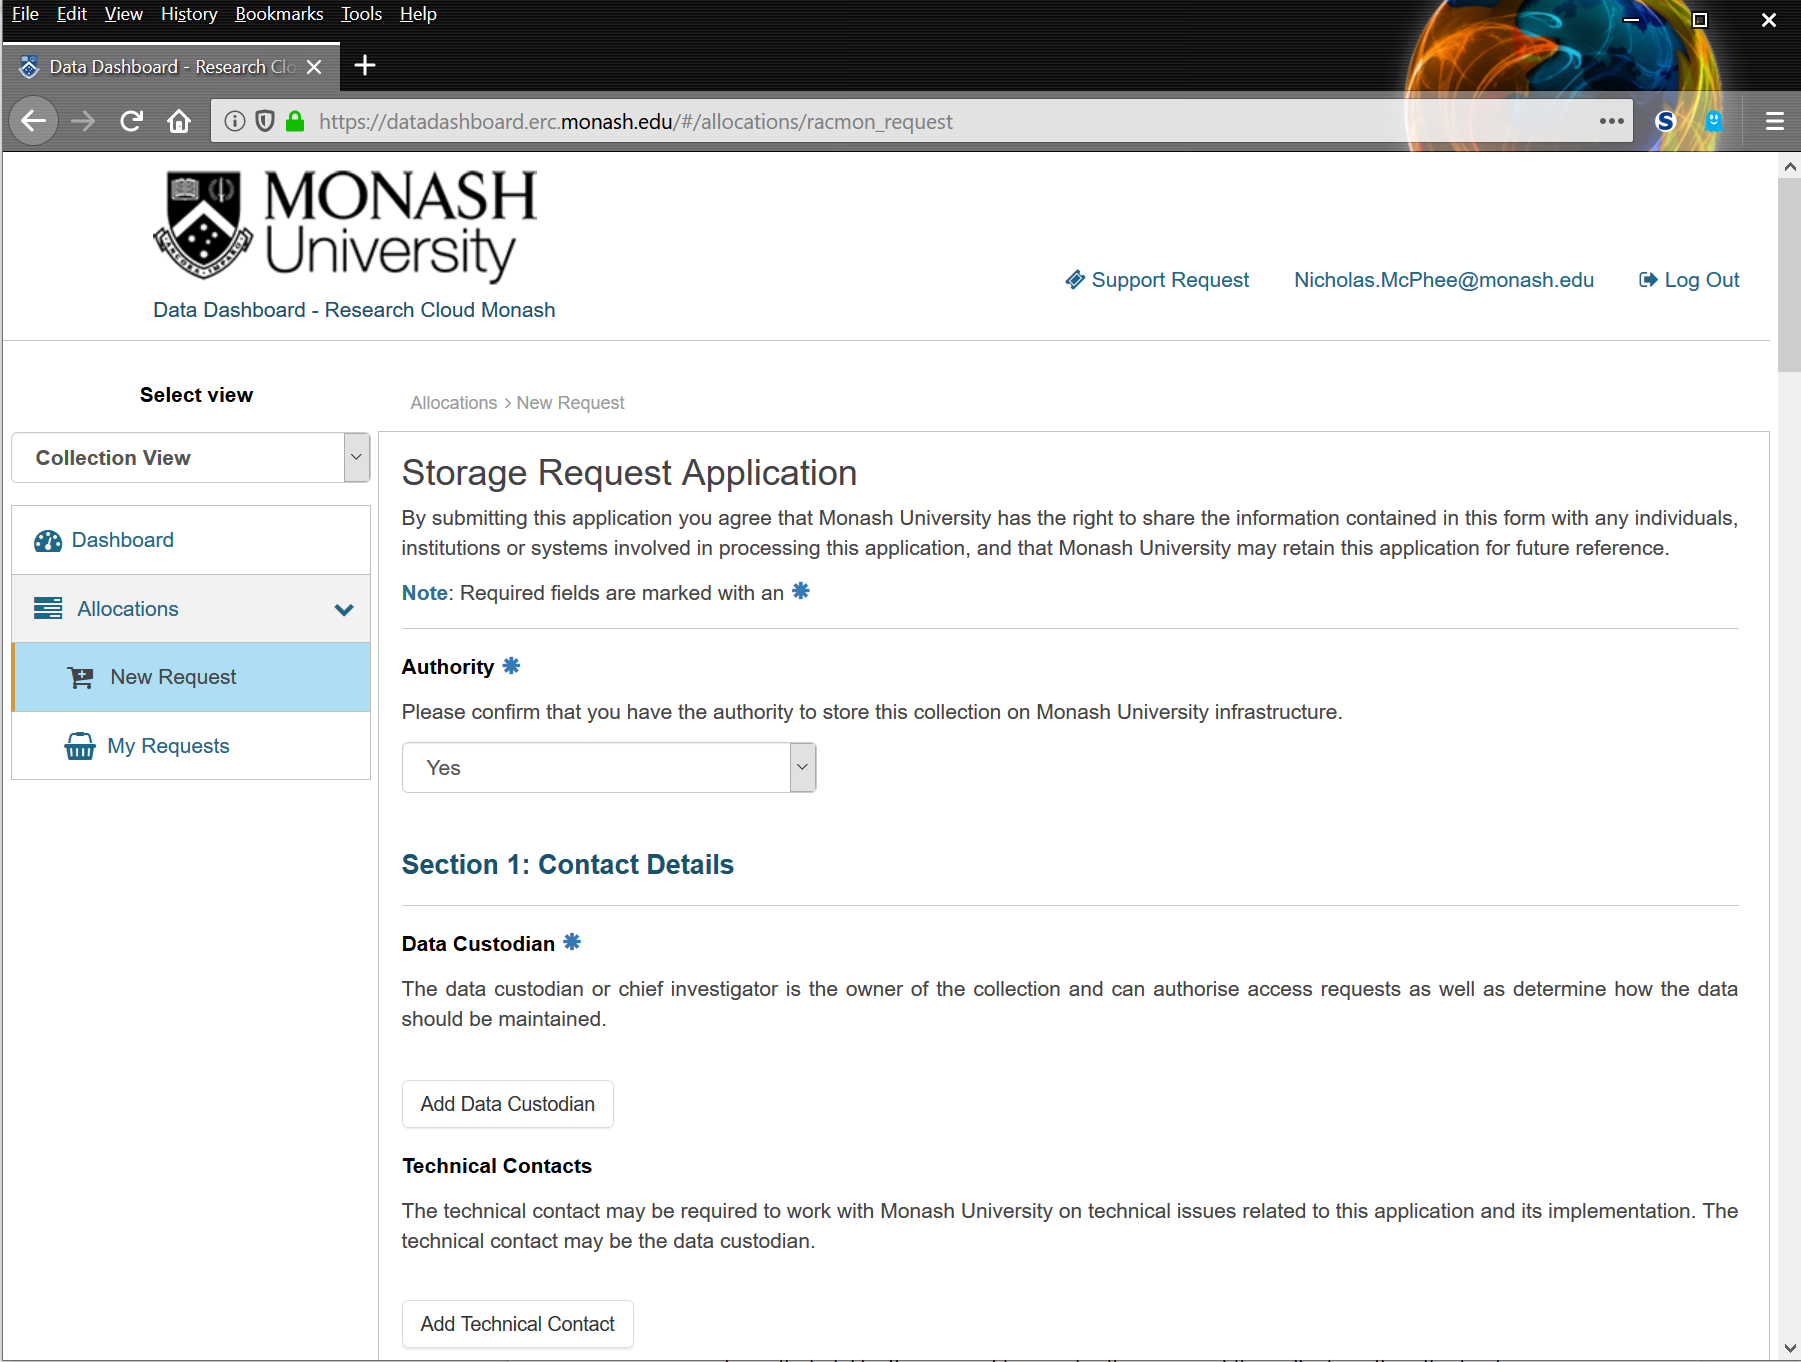
Storage Request Application
Section 1 - Contact Details
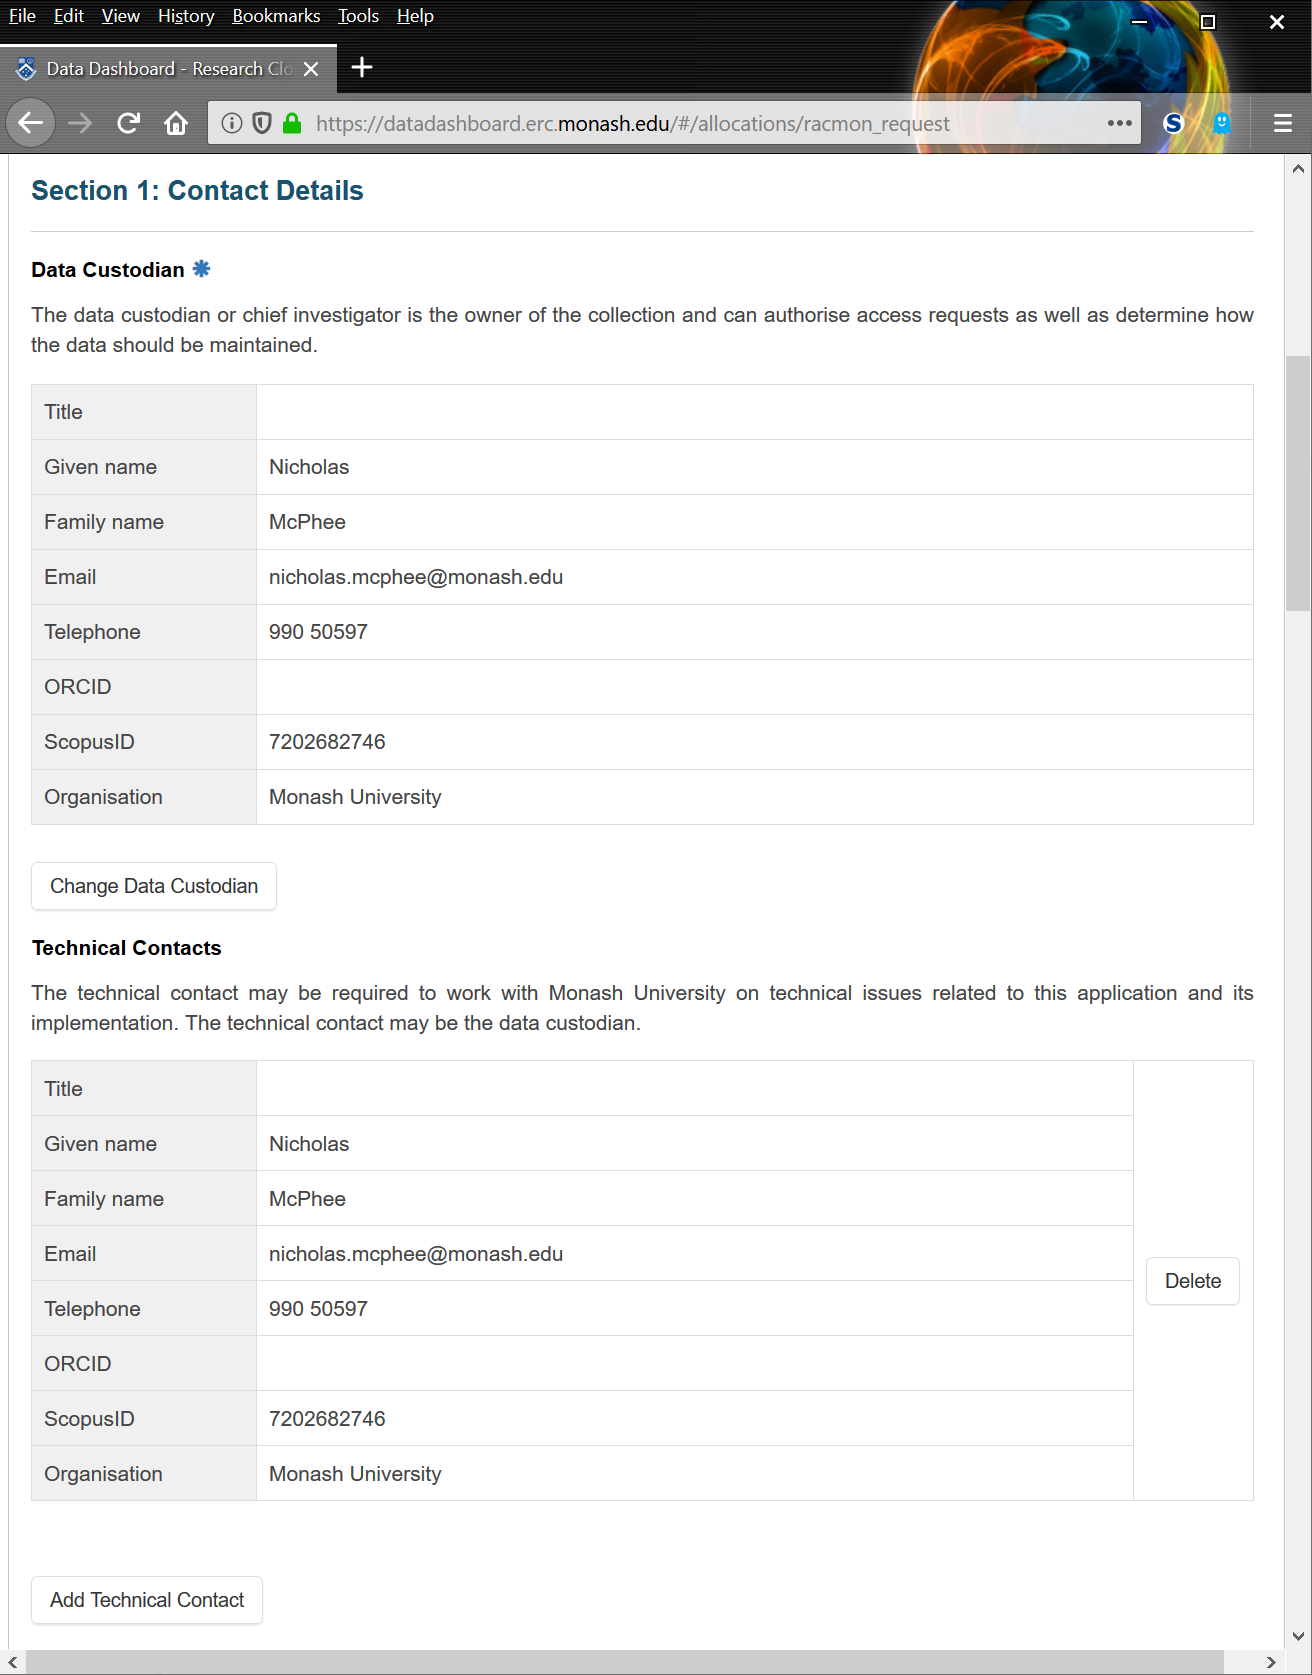
The Storage Request Application form is divided into five sections. In Section 1, the owner of the data (Data Custodian) and the individual with technical knowledge of the data (Technical Contact) need to be added. The Data Custodian and Technical Contact can be the same person, and usually are for personal allocations, but for groups or specific projects the Data Custodian is most commonly the CI (Chief Investigator) or the head of the group. The Technical Contact should be an individual that can work with the RDS team and ensure that the data is being stored, accessed and used appropriately. More than one Data Custodian or Technical Contact can be added by clicking on 'Add Data Custodian' or 'Add Technical Contact'.
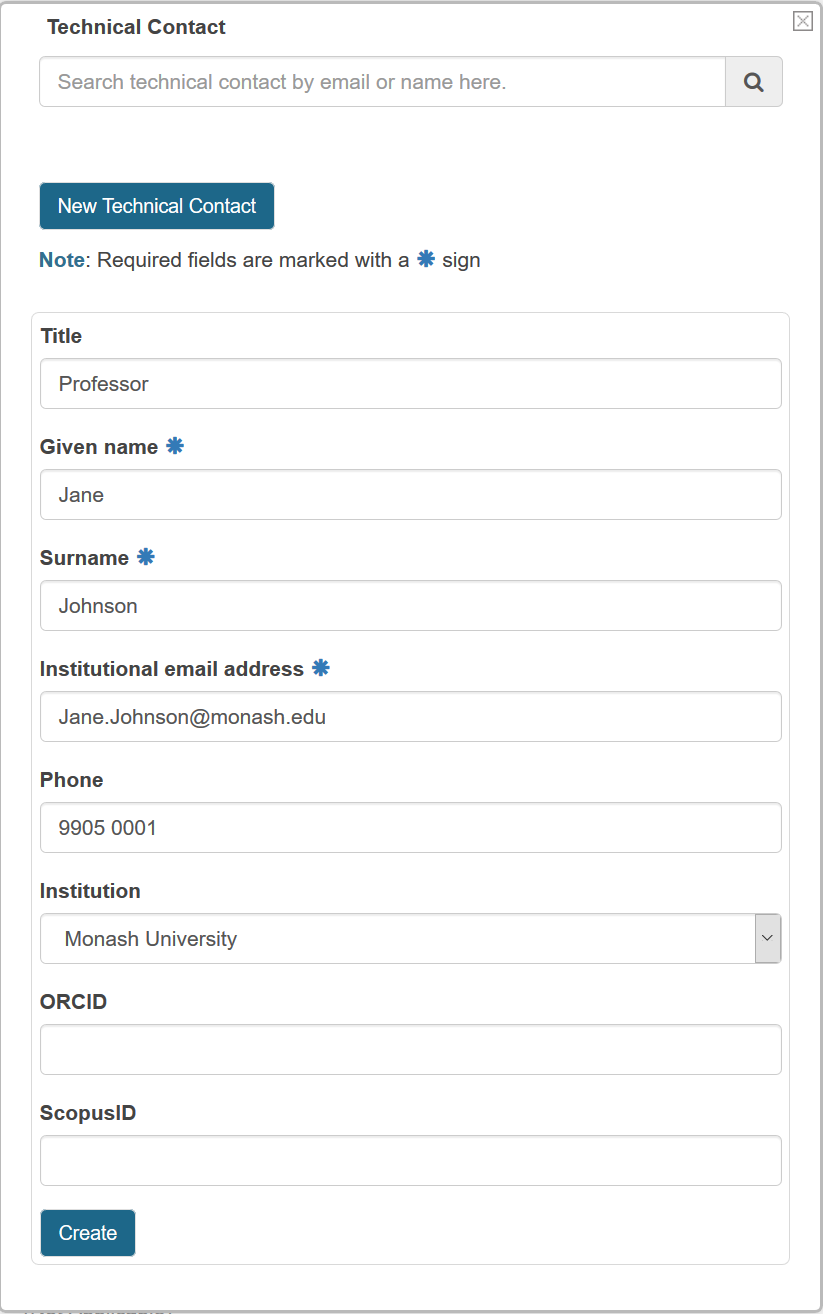
Data Custodians and Technical Contacts are added by clicking on the 'Add Data Custodian' or 'Add Technical Contact' buttons and then entering a name into the textbox. If the individual cannot be located, a new contact entry can be added by clicking 'Add New Data Custodian' or 'Add New Technical Contact'. This will open a new form within the page which should be populated with the relevant information and then submitted by clicking on 'Create'. It is important to note that the person lodging the Request will not have the ability to view the future allocation's storage use through the Dashboard home page, unless they add themselves as a Data Custodian or Technical Contact. If you need to monitor the usage of an allocation, then the best way is to add yourself as an additional Technical Contact.
Section 2 - Collection Details
Once the Data Custodian and Technical Contact have been added, Section 2 must be completed. Section 2 should be populated with detailed information about the data, specifically the Collection Title and Collection Description. The title should ideally be short, accurate, unique and relate specifically to the allocation. The Description does not need to be extensive, but should contain information outlining what the data is, how it is produced and how it will be used. Ideally, the information and context should be detailed enough to allow individuals not involved in the specific discipline or field to understand.'
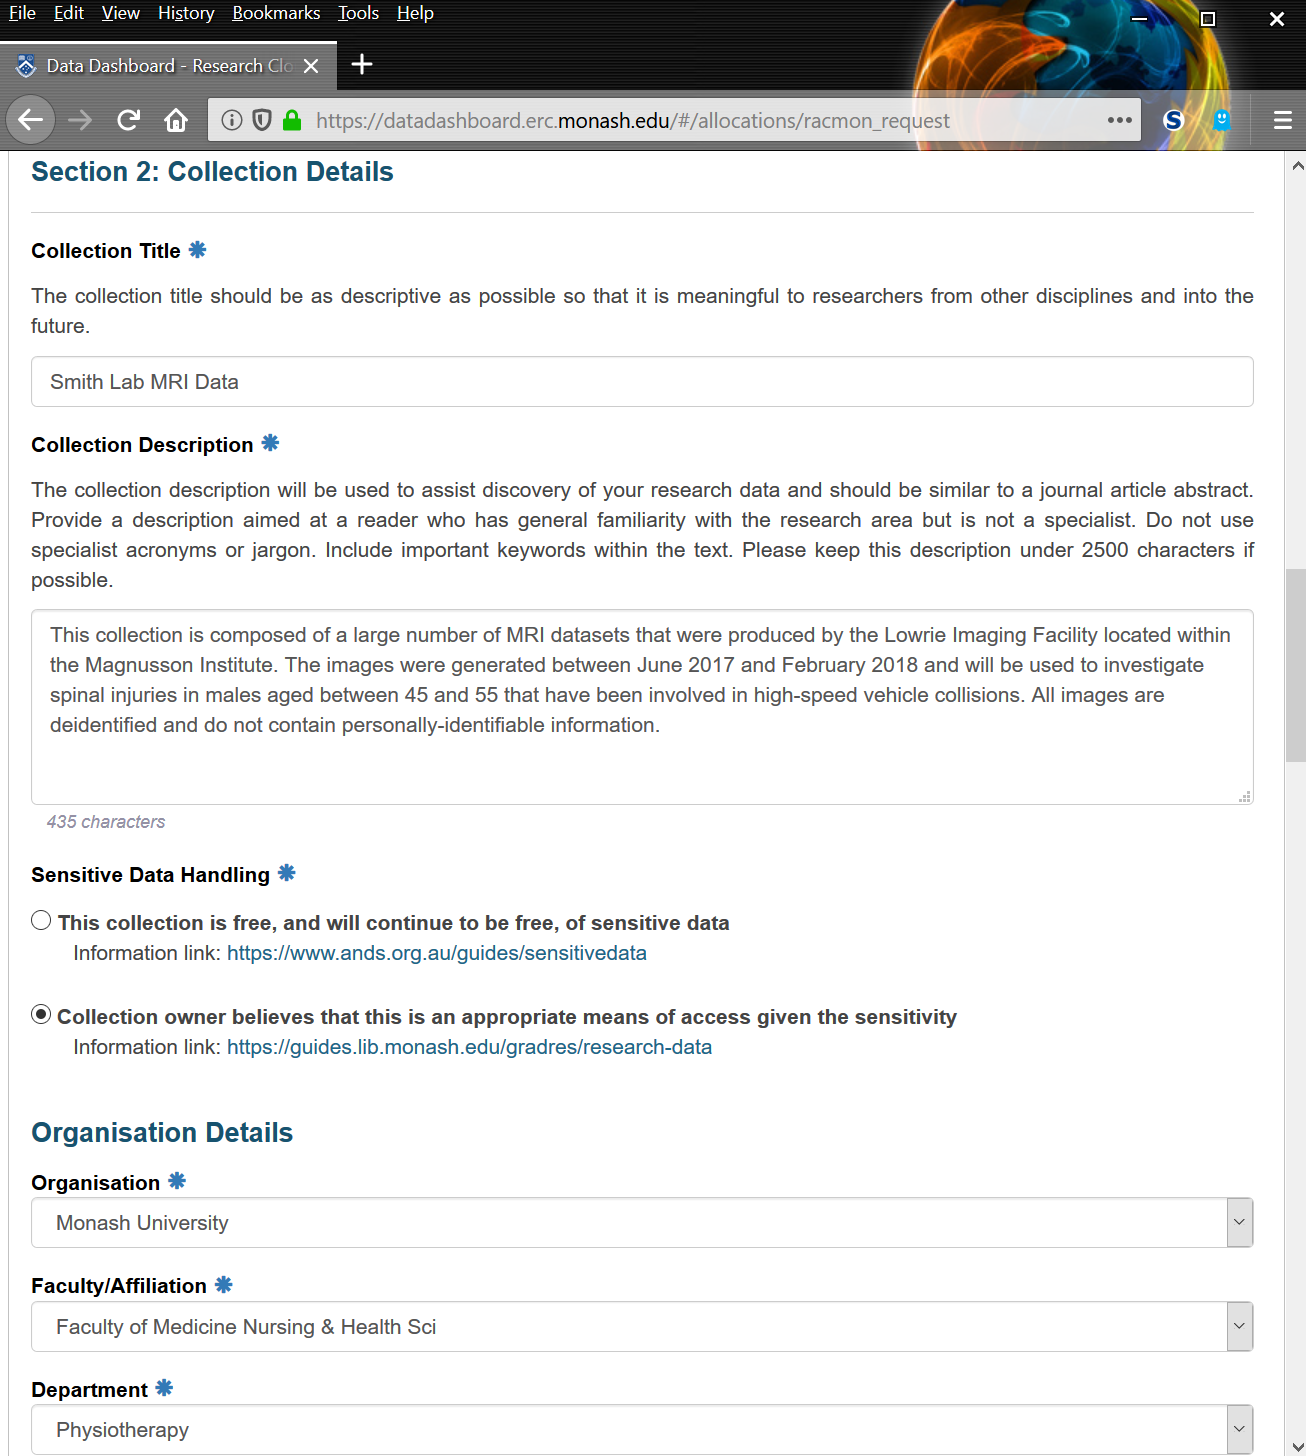
The Sensitive Data Handling section contains two questions that relate to the sensitivity of the data that will be stored within the allocation. If the allocation does not contain any sensitive data (sensitive data includes personally-identifiable datasets, etc) then the first option should be selected. If the allocation does contain sensitive data, the second option should be selected and the provided information links should be accessed in order to provide you with more information about how research data is classified and how to store your data appropriately. If you wish to discuss the sensitivity of your data in detail, you are also welcome to contact the RDS team using the 'Support Ticket' option (see Help and Support). The relevant Faculty and Department should also be added at this point using the dropdown lists located below the Sensitive Data Handling section.
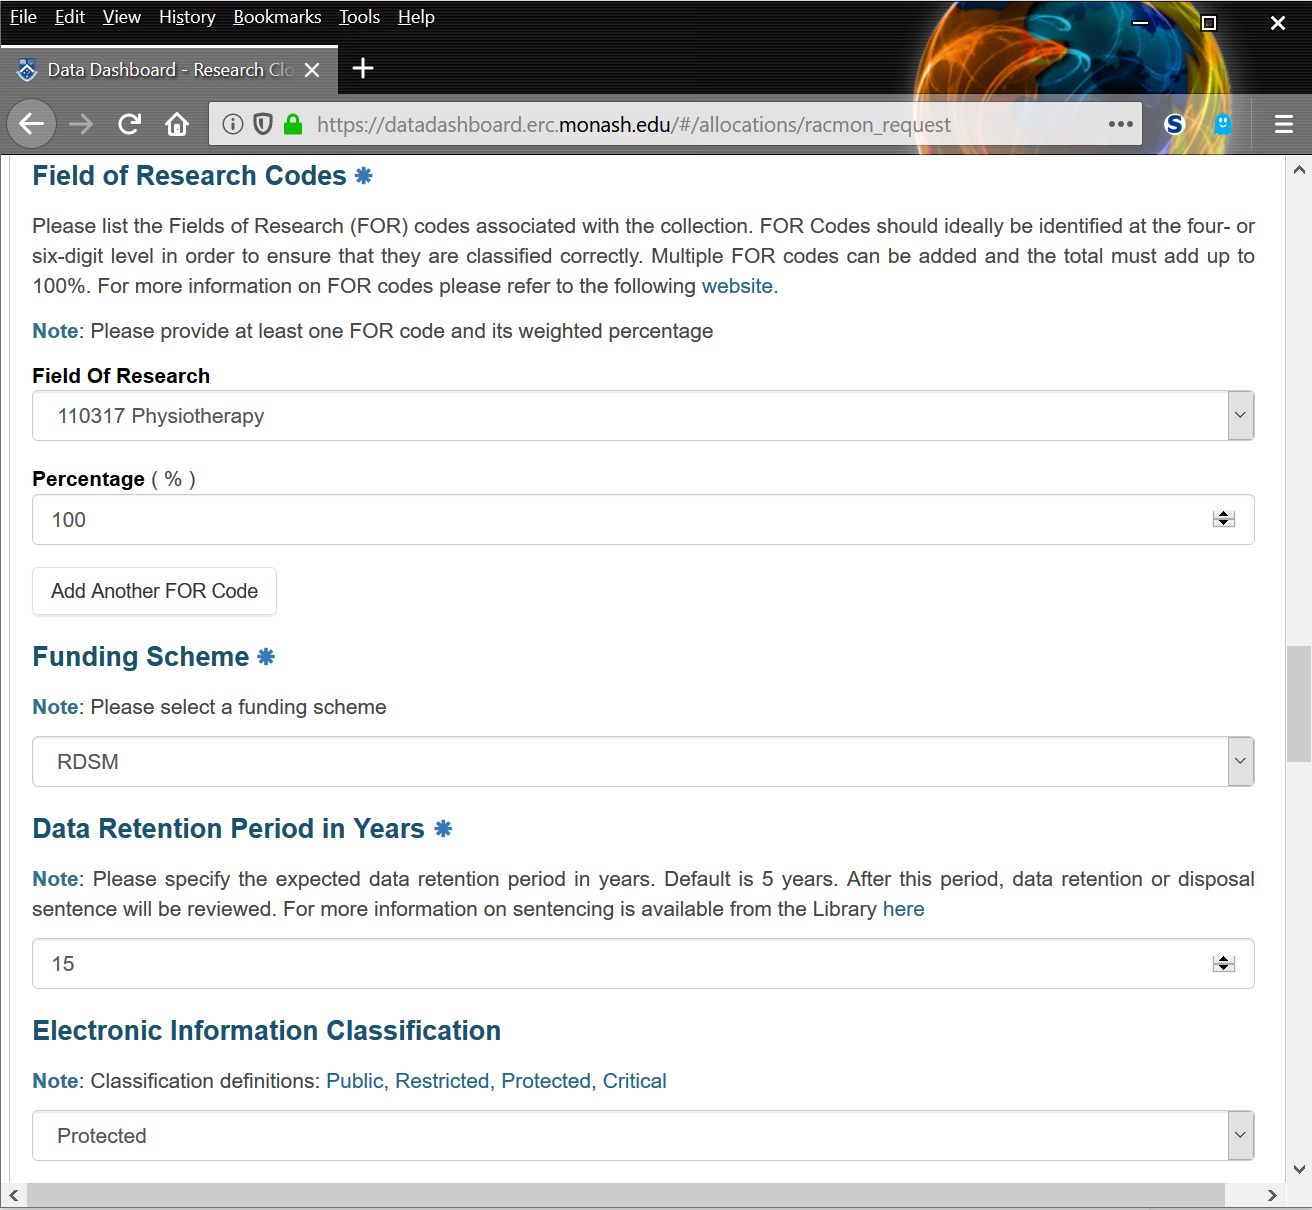
The remaining subsections in Section 2 relate to Field of Research Codes (FOR), funding, data retention and security classification. The relevant FOR code(s) should be entered by scrolling through the dropdown list or by typing the number when the dropdown list is open. Using the correct FOR codes will ensure that the data is classified correctly and is useful for reporting purposes. Once the code(s) have been added, the relevant percentage(s) should be checked to ensure that they add up to 100%. The Funding Scheme dropdown list will display 'RDSM' by default and should be used unless another funding scheme has been discussed with you. The Data Retention Period in Years textbox should be used to enter the number of years that the allocation data needs to be retained. The standard retention period for most research data is five years, but some data may need to be retained for longer periods, or indefinitely, depending upon the type of data and/or the relevant ethics agreement or contract with a third-party. If you are not sure, you can leave the default value of '0' and a member of the RDS team will contact you and identify the appropriate retention period. Please note that data will NOT be deleted at the end of the specified retention period, but you will be contacted in order to discuss the data and how it should be managed (published, archived, etc). The next subsection, Electronic Information Classification, relates to the security and sensitivity of the data. If the data contains, for example, personally-identifiable patient data then it is considered 'Critical' data. If the data is private and should be only be accessed by specific Monash staff, then 'Restricted' is the best option and is used in most cases. If you are unsure, the question can be ignored as it is not mandatory. The final subsection, Research Grant Information, is optional and can be used to include information about the grant(s) funding the project that is being undertaken and that will store data in the requested allocation.
Section 3 - Storage Requirements
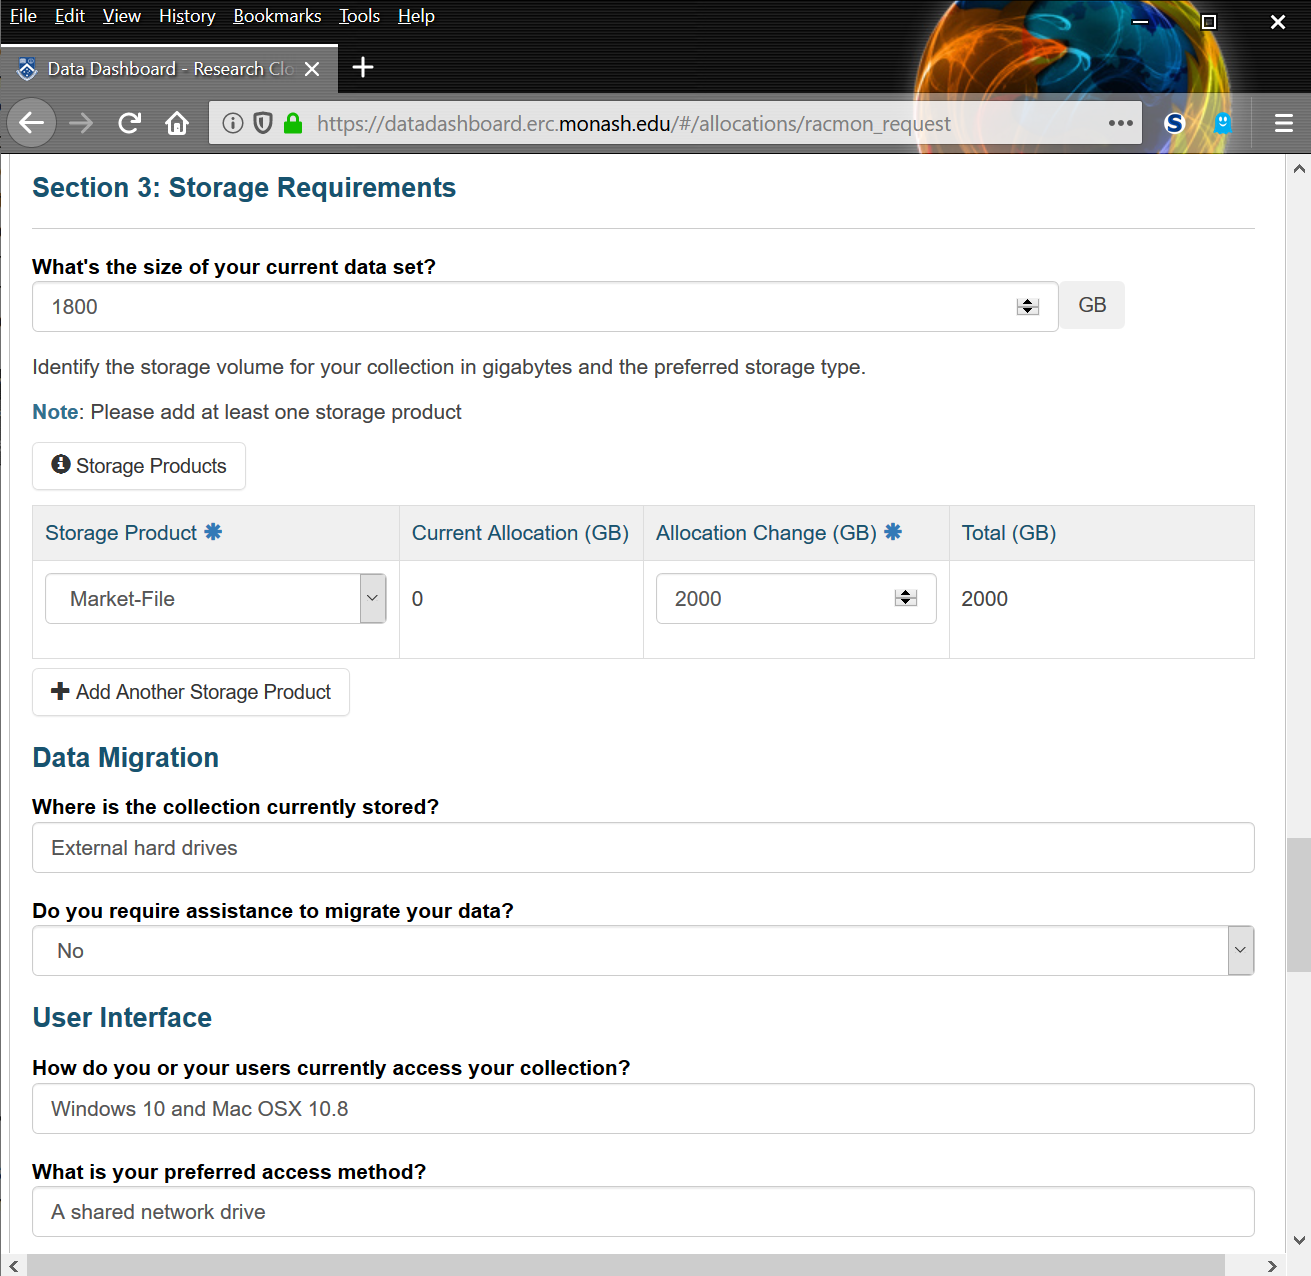
Section 3 relates to the amount of data that needs to be stored and also to specific information about the preferred storage type. The first textbox should be used to enter the current amount of data that needs to be stored in gigabytes (GB). If the Request is being lodged for a project that has not yet commenced, the default figure of 0 can be retained or a conservative estimate can be used (the amount can always be increased later). The next step is to select the appropriate storage type, or Storage Product, as each option has advantages and disadvantages and is recommended for different scenarios. The list of storage products and examples of how they are most commonly used can be found by clicking on the 'Storage Products' button. Note that more than one storage type can be requested by clicking on 'Add Another Storage Product'. Finally, complete the section (optional) by entering the current location of the data (if any) and entering the current and preferred methods of access. Access methods range from accessing the data locally on a computer or laptop using macOS or Windows to using specific software packages.
Section 4 - Technical Details
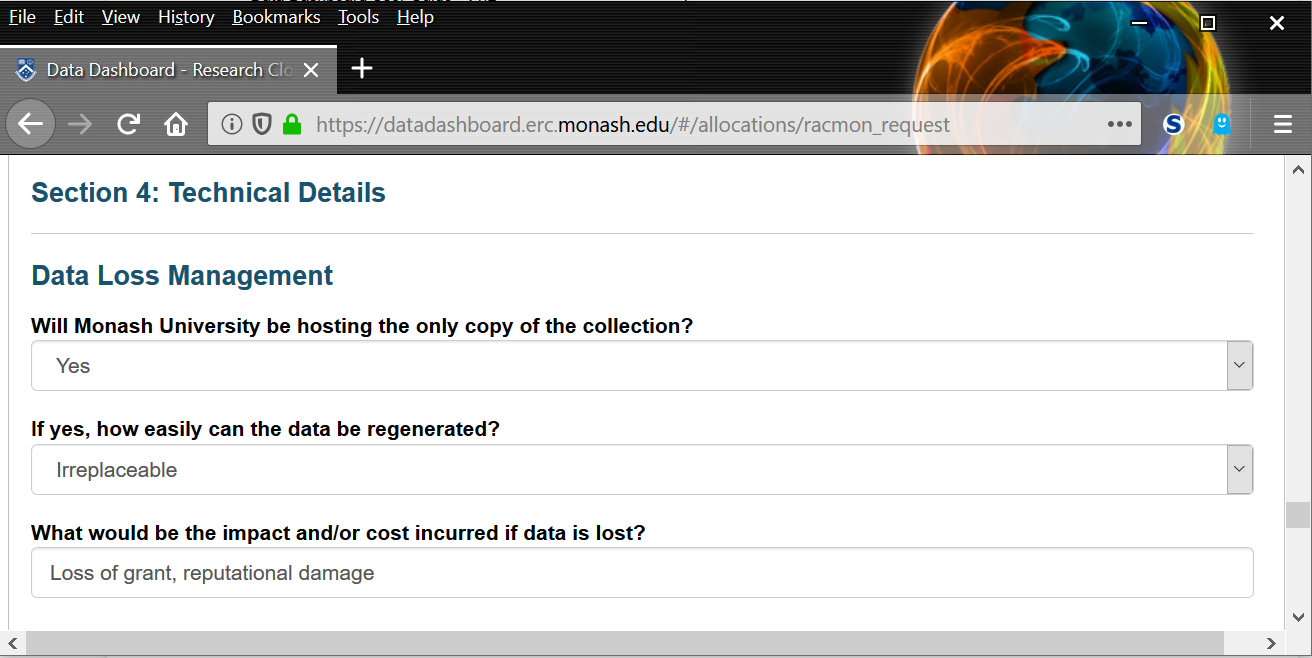
Section 4 relates to data loss and the impact that it would have upon the project or individual. The three questions are optional, so they can be skipped if preferred.
Section 5 - Privacy Notice
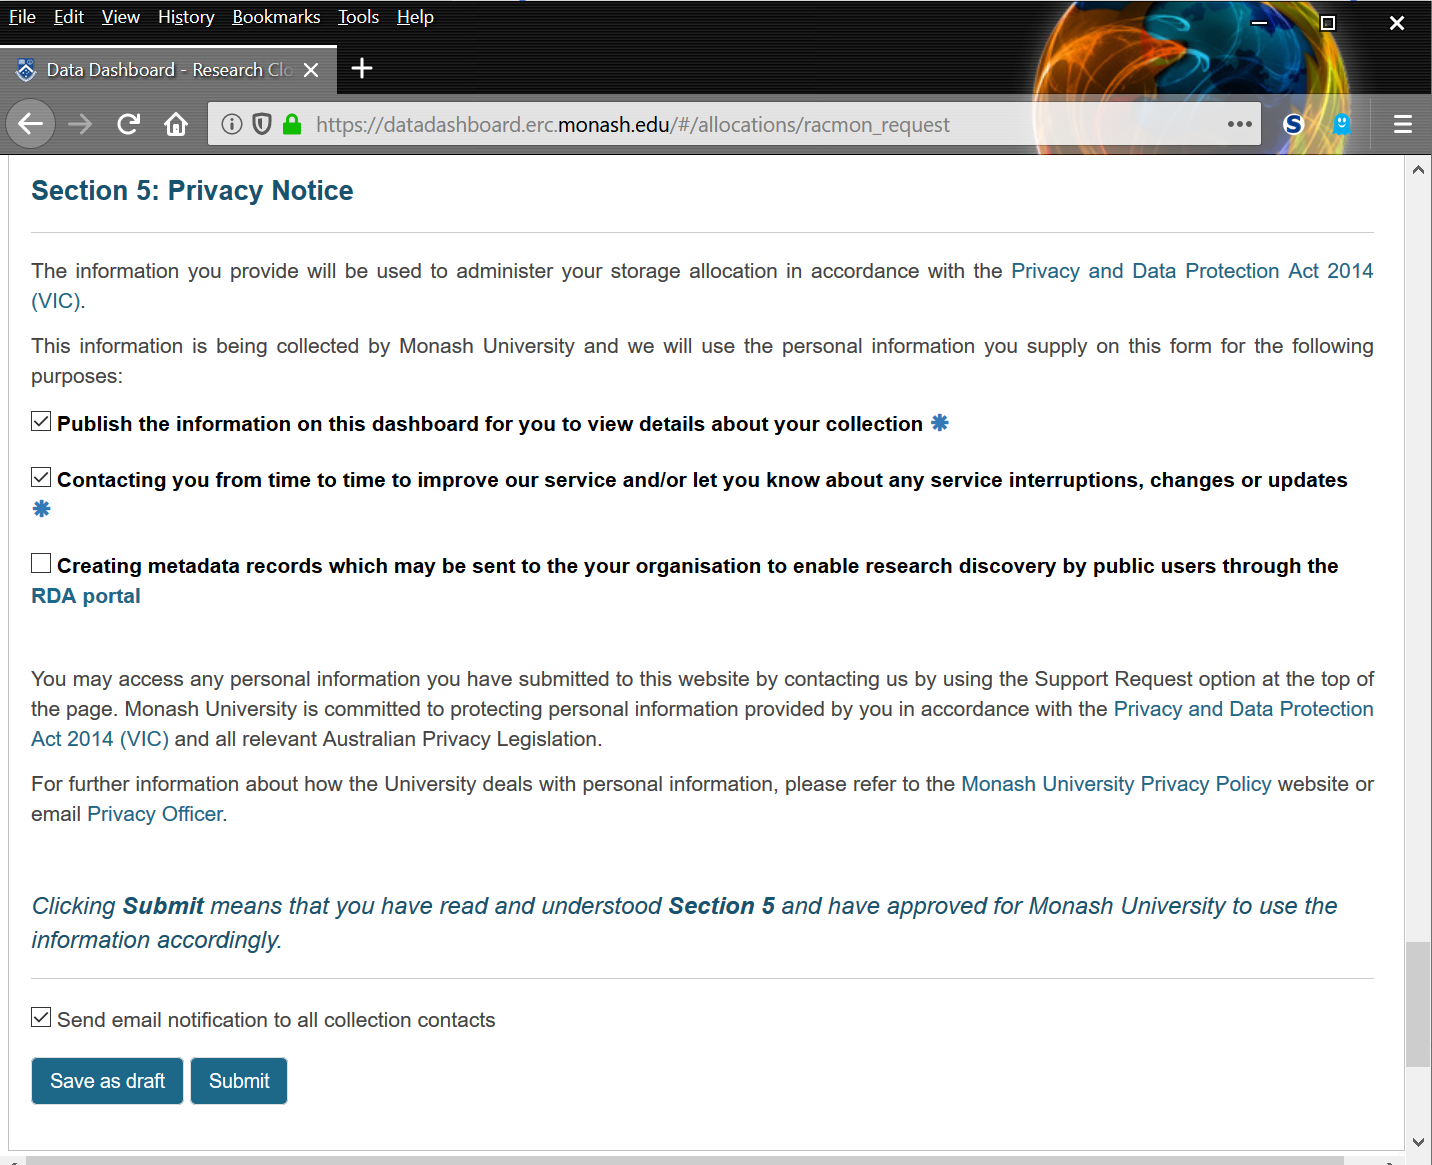
Section 5 details the privacy policy pertaining to the Data Dashboard and outlines the data that is collected and how it is used. The first two checkboxes need to be ticked before the form can be submitted using the 'Submit' button. The form, even if incomplete, can be saved at any time by clicking on 'Save As Draft'. After clicking on 'Submit' the form will verify that all of the mandatory questions have been completed and, if any errors are detected, the form will highlight them in red. Once the form is complete it can be submitted successfully. Note that there is a checkbox labelled 'Send email notification to all collection contacts' which is ticked by default. If preferred, you can clear the checkbox and no email notifications will be provided to the Data Custodian(s) or Technical Contact(s).
Requesting More Space and Updating Your Allocation
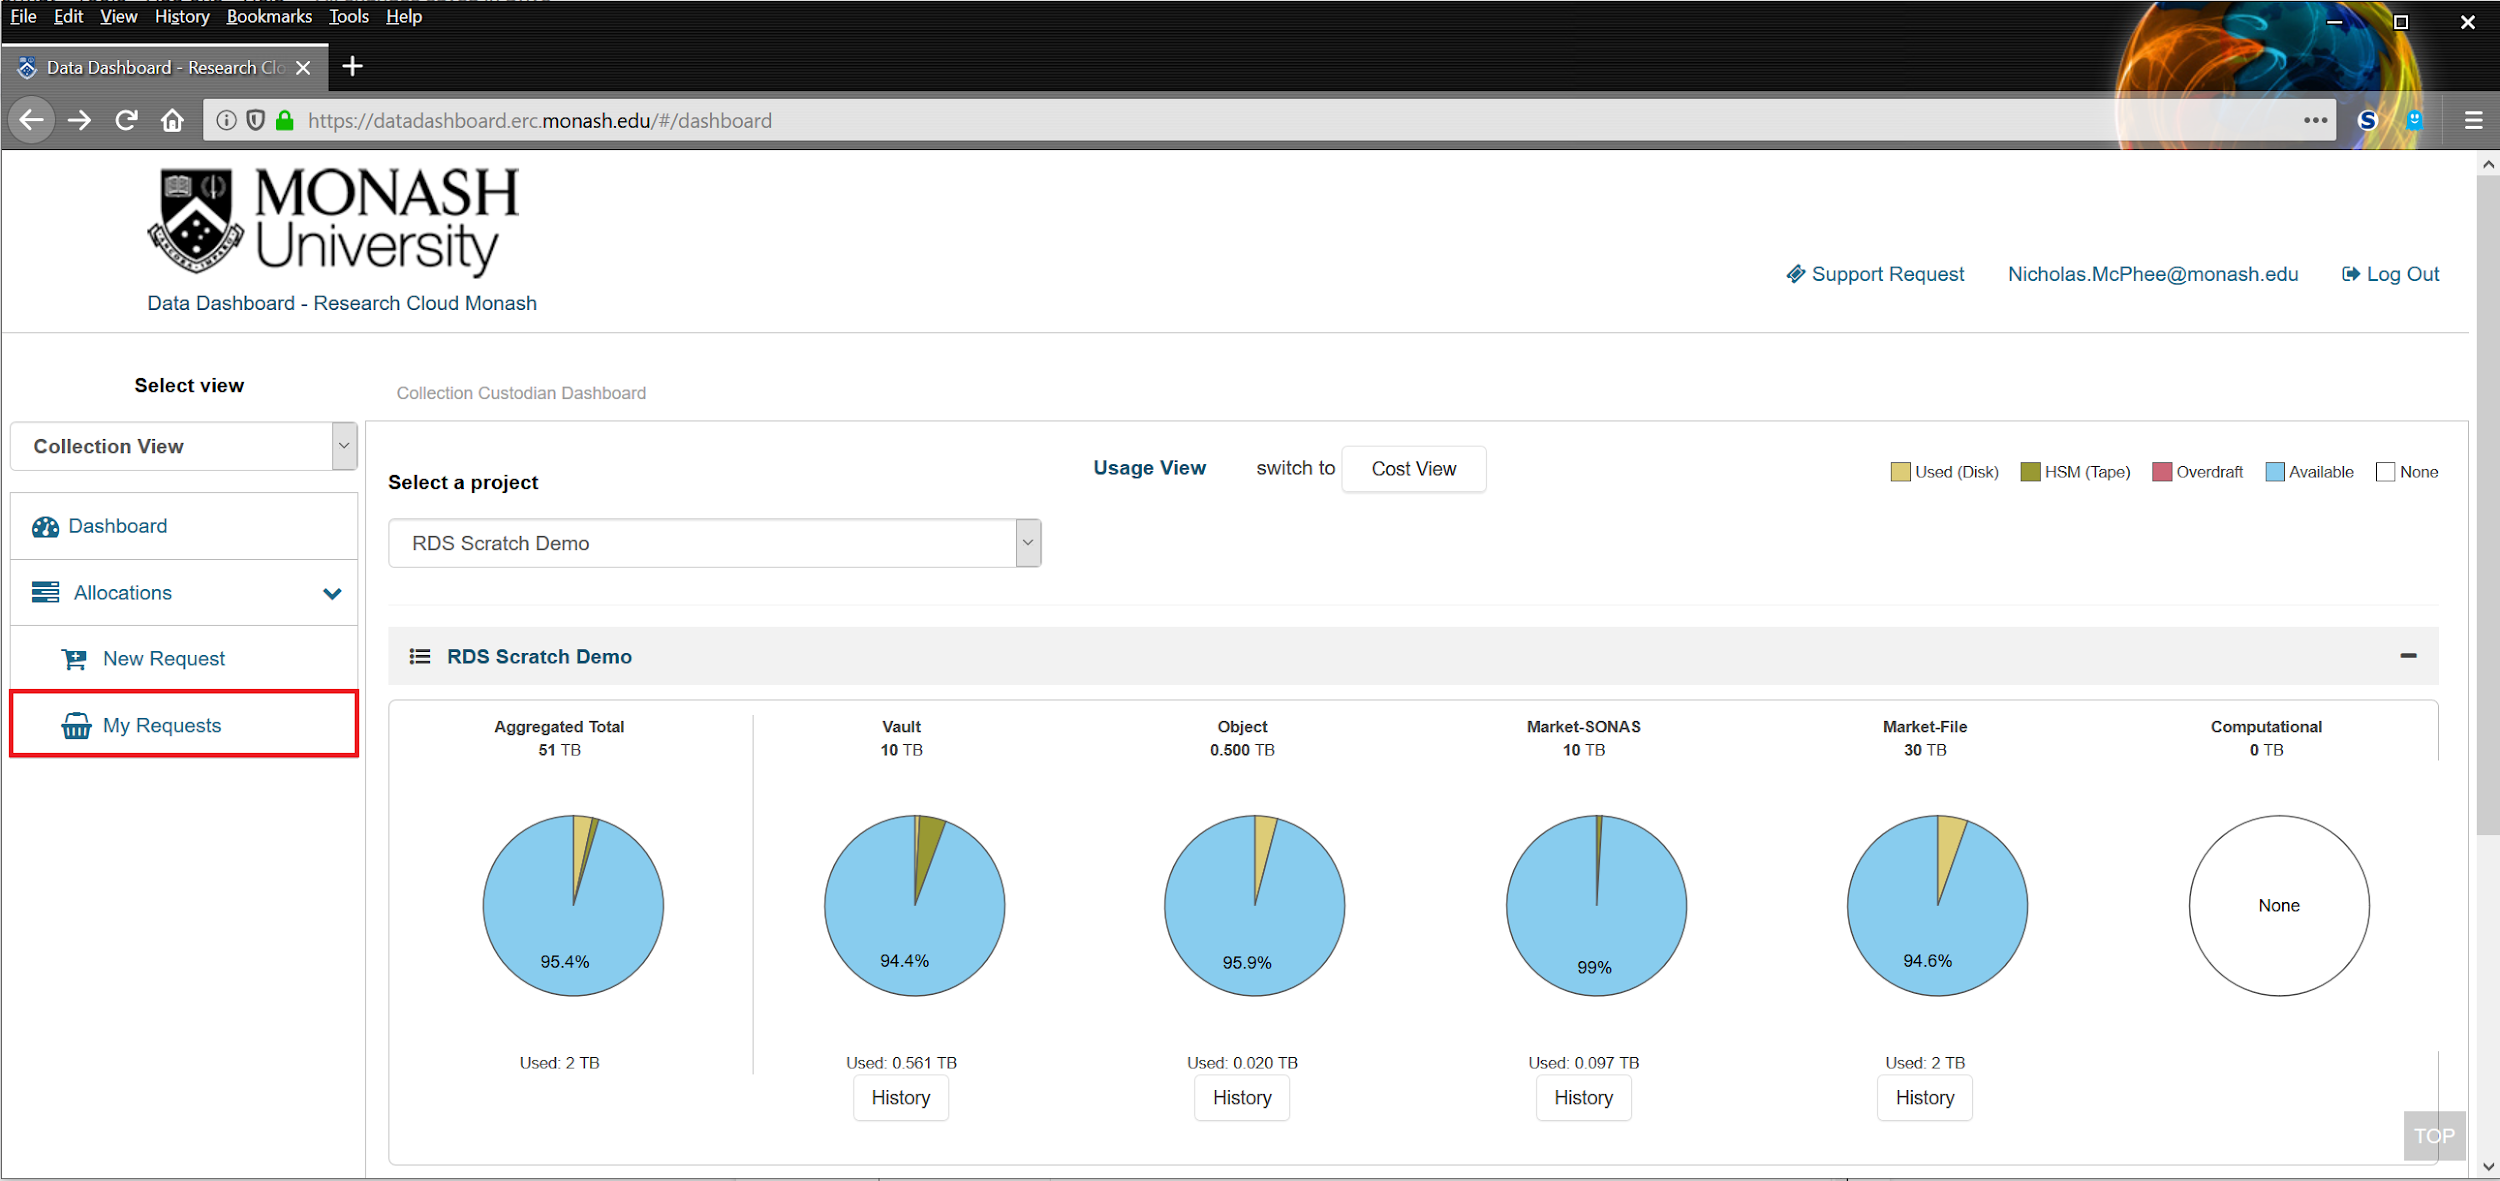
You can update any of your allocations at any time and allocations can even be updated when they have not yet been submitted (drafts). You can change the Collection Title and Collection Description as well as any other aspect of the allocation, including the Data Custodian, Technical Contact and the amount of storage. In order to update an allocation, click on the 'Allocations' button in the left menu and then on 'My Requests'.
A new page with a list of your allocations should be displayed and you can open an allocation record by clicking on the title of the allocation. Alternatively, you can click on the 'Amend/Extend allocation' link to the right of the relevant allocation.
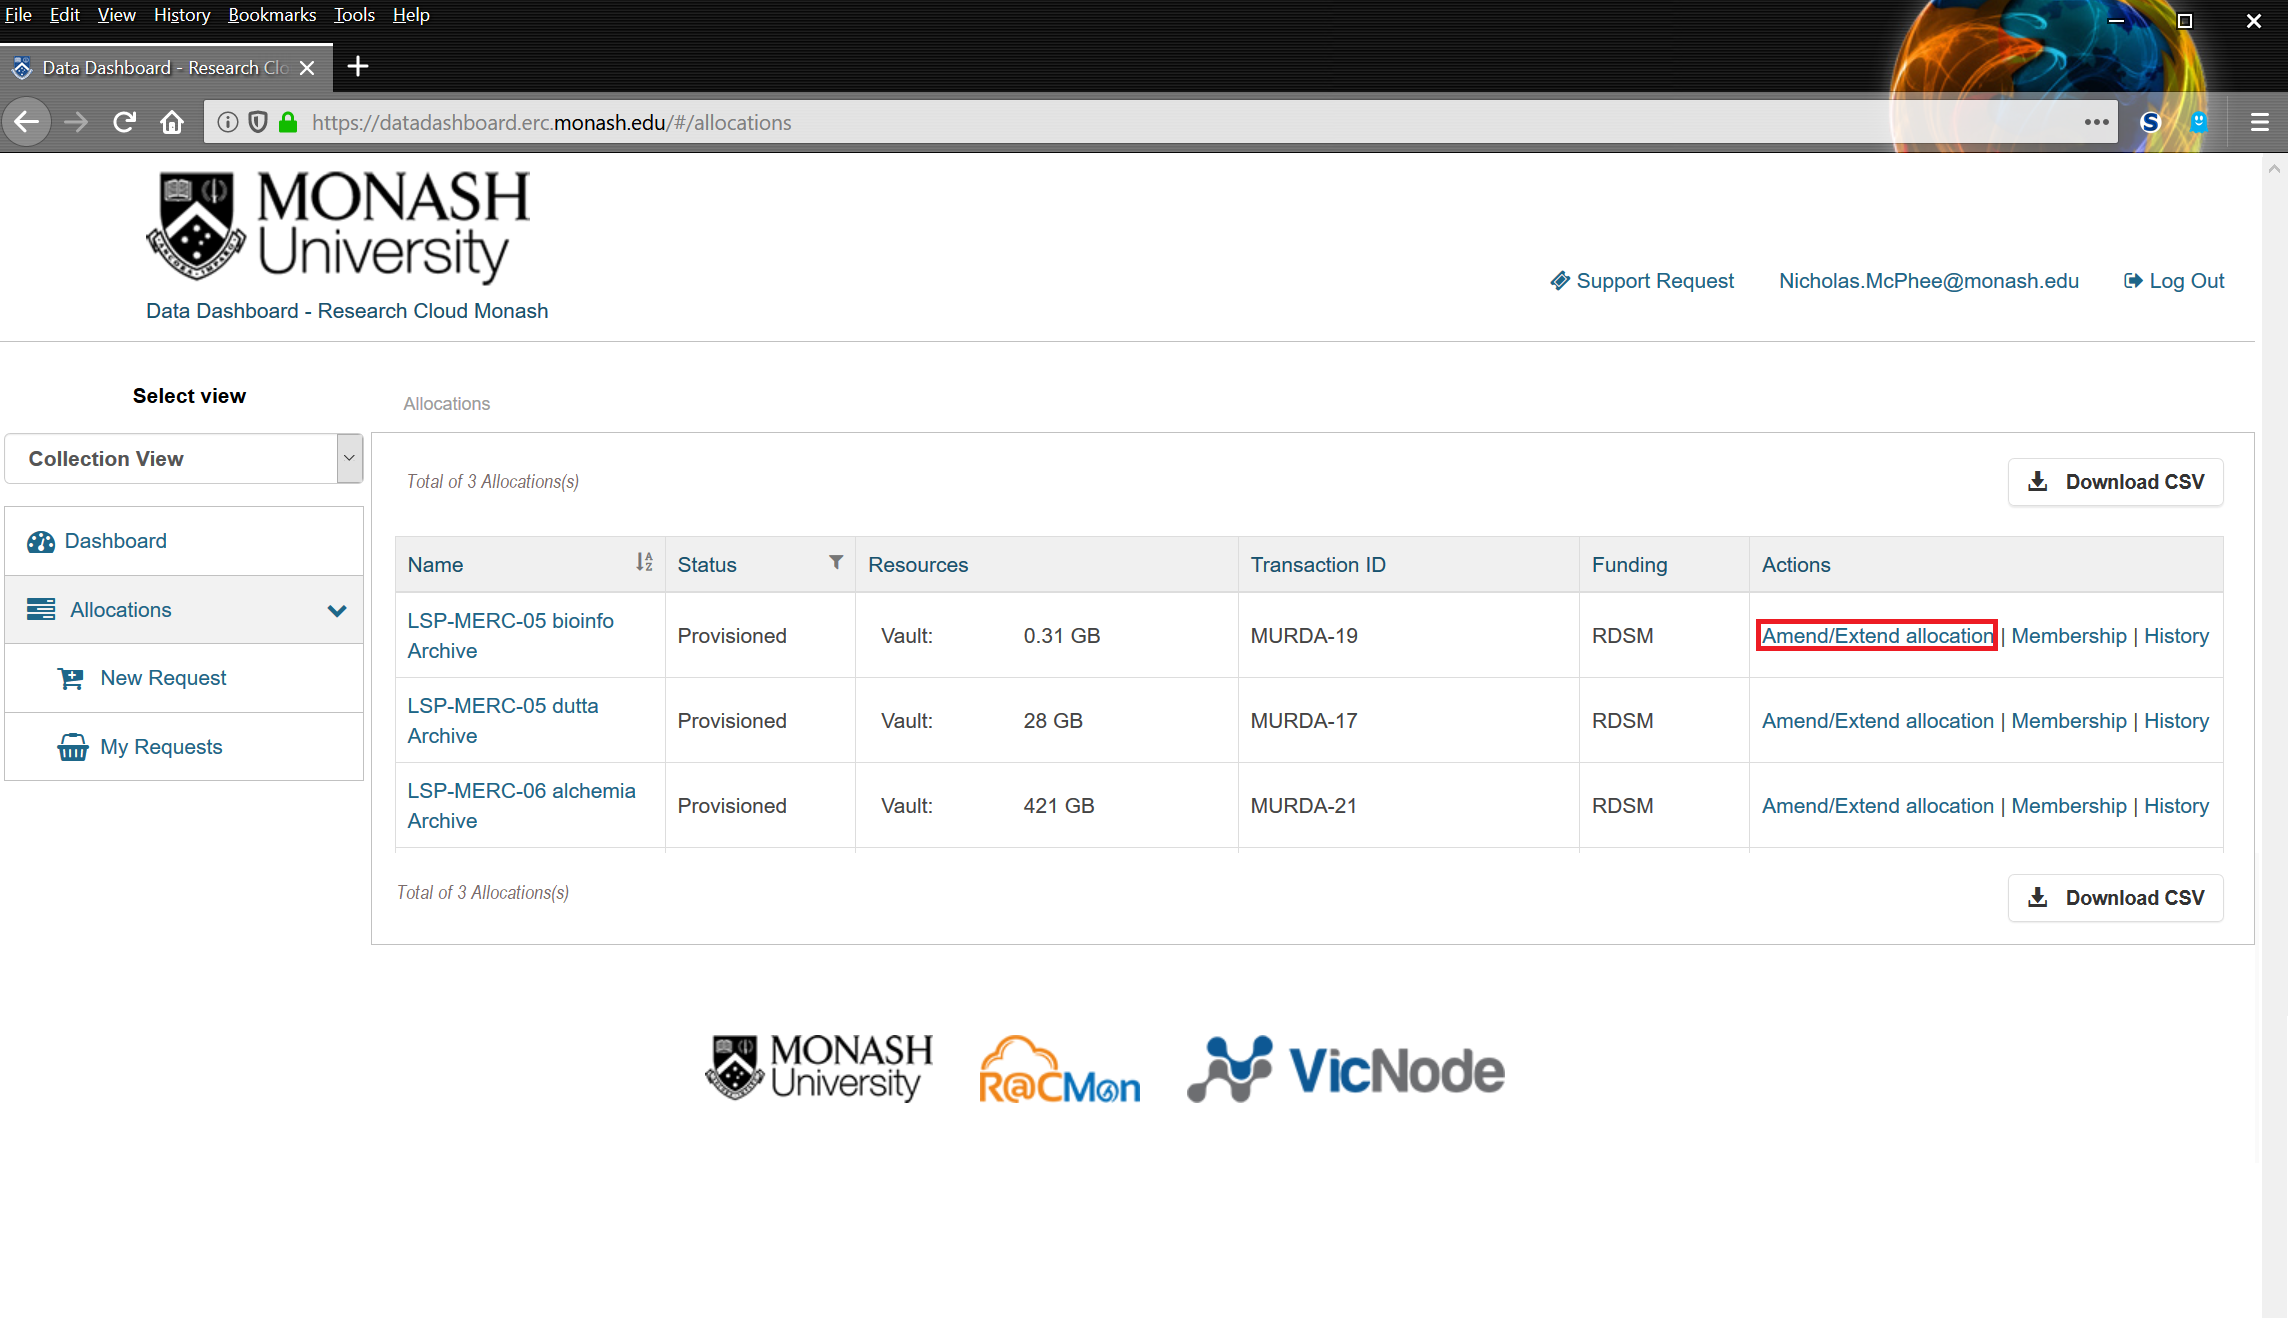
Clicking on 'Amend/Extend Allocation', located at the bottom of the page, will open the allocation for editing which can then be updated as needed. See Section #1 of this guide (Applying for Research Data Storage) for more information.
Using the Dashboard to Monitor Usage
The Collection Custodian Dashboard is the default page that is displayed whenever you log in to the Data Dashboard. It contains a list of the allocations that list you as either a Data Custodian or Technical Contact and provides a detailed breakdown of the various storage products that you are using. Allocations can be expanded or collapsed by clicking on the title of the allocation and you can use the dropdown list under 'Select a project' to display a single allocation. This is very useful if you have access to a large number of allocations.
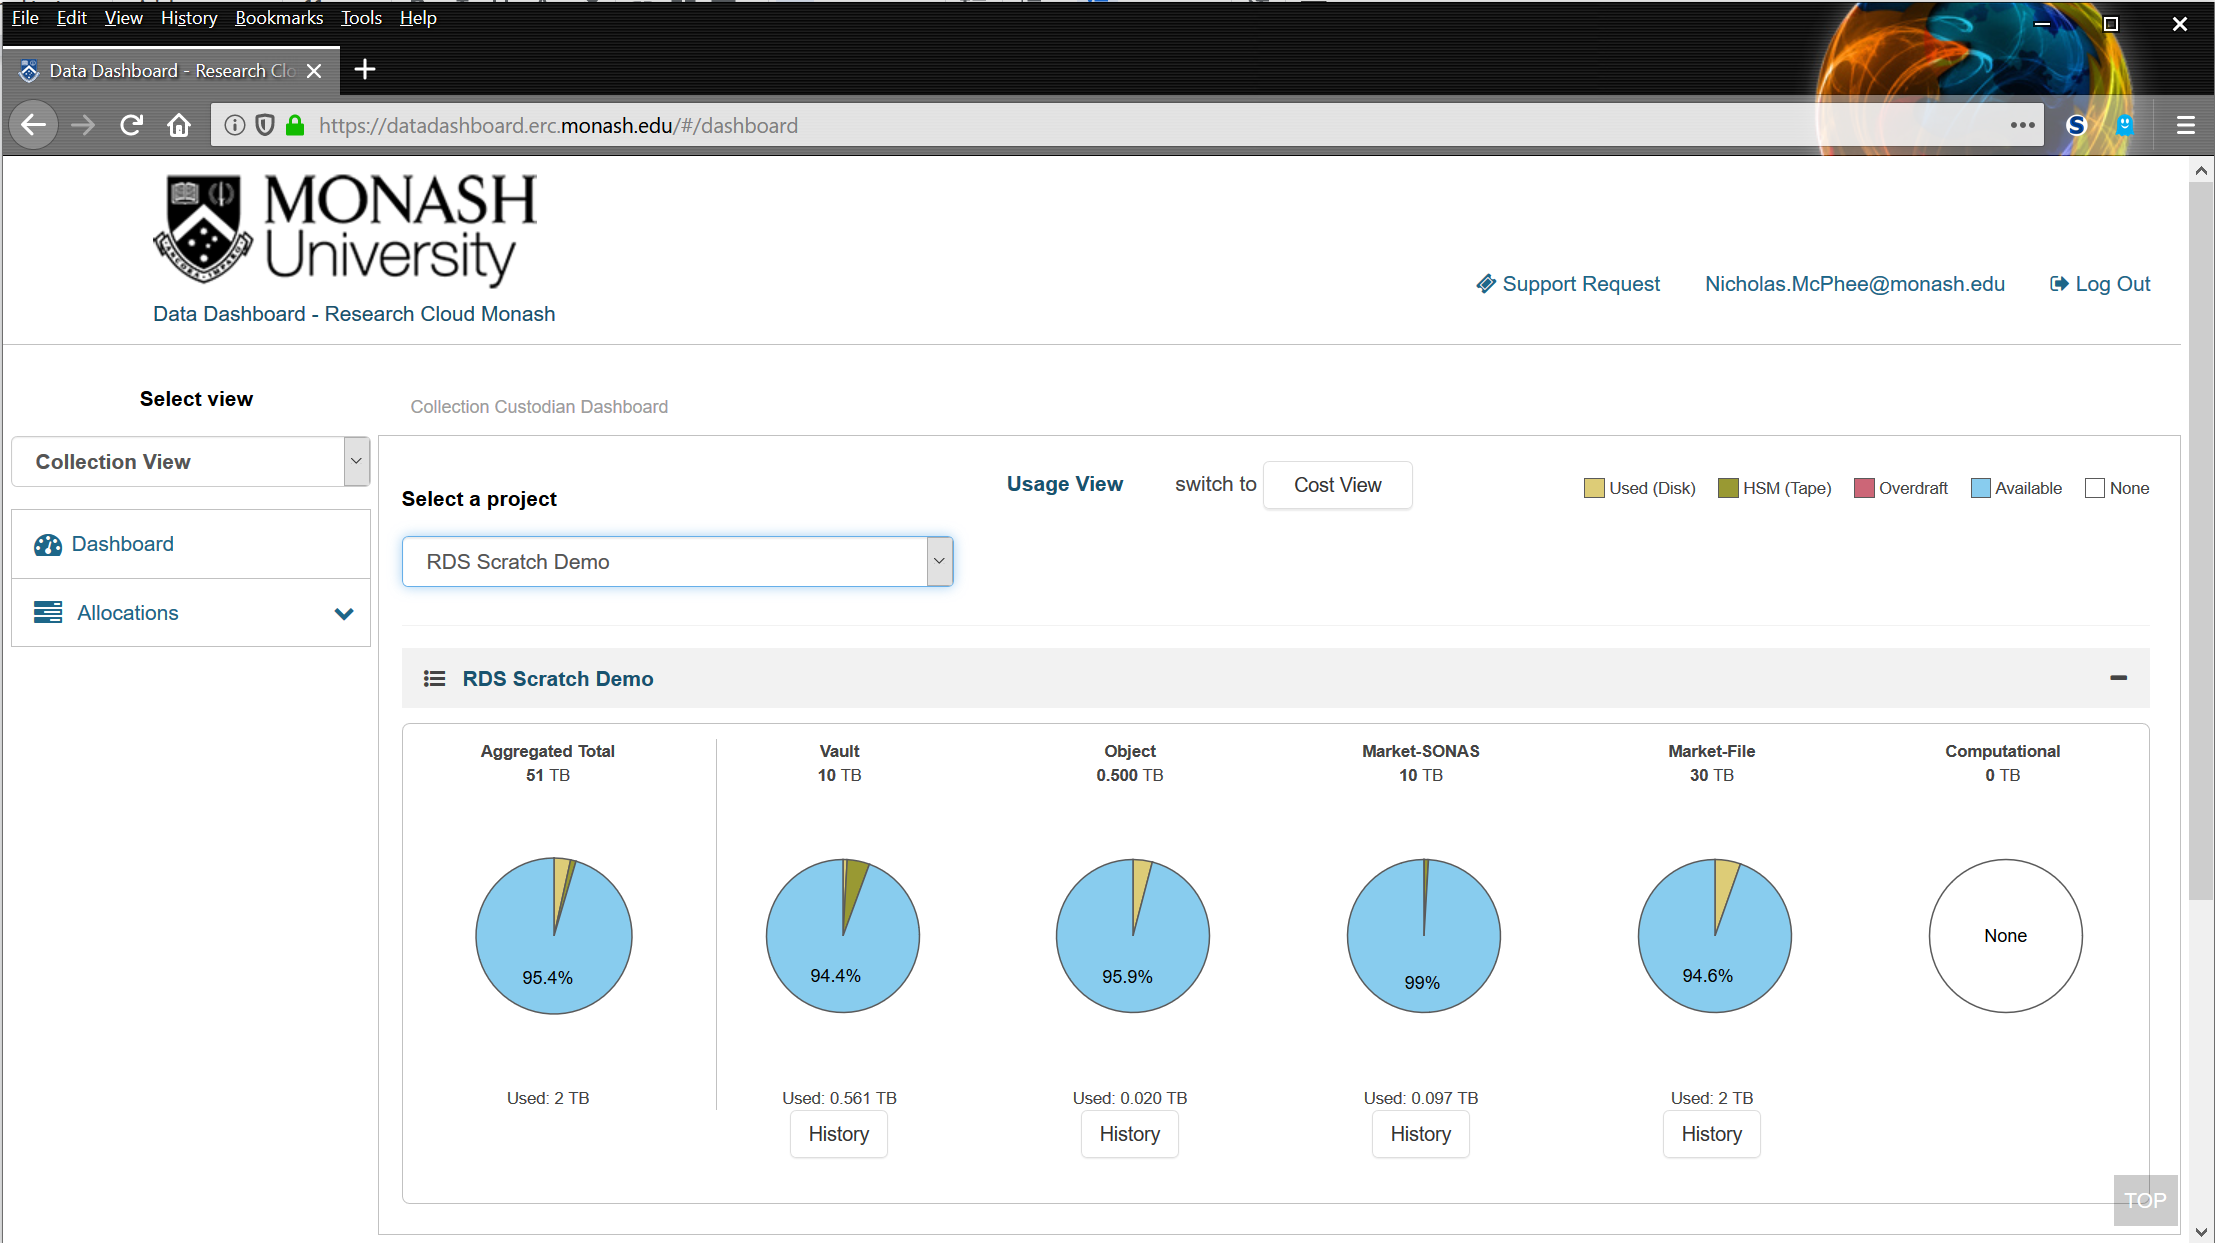
The column labelled 'Aggregated total' reflects the total amount of storage being used across all storage products, each of which is displayed in its own column to the right. The other five columns refer to specific storage products:
- Vault - A tape-based service used primarily to store data that is not accessed frequently, or needs to be retained in the long-term. It is best used for archiving.
- Object -A disk-based service best used for more static collections of data that will be accessed randomly and in any order by users.
- Market-SONAS - (Deprecated) A disk-based service that is best used for making data available to servers. It has since been replaced by Market-File and Vault.
- Market-File - A disk-based service used to store active and frequently-changing data. This is the storage type that most closely resembles other Monash storage services such as the
S:\ drive. - Computational - A disk-based and more volatile storage service best used as a 'scratch' space when running parallel computational jobs on the Research Cloud cluster.
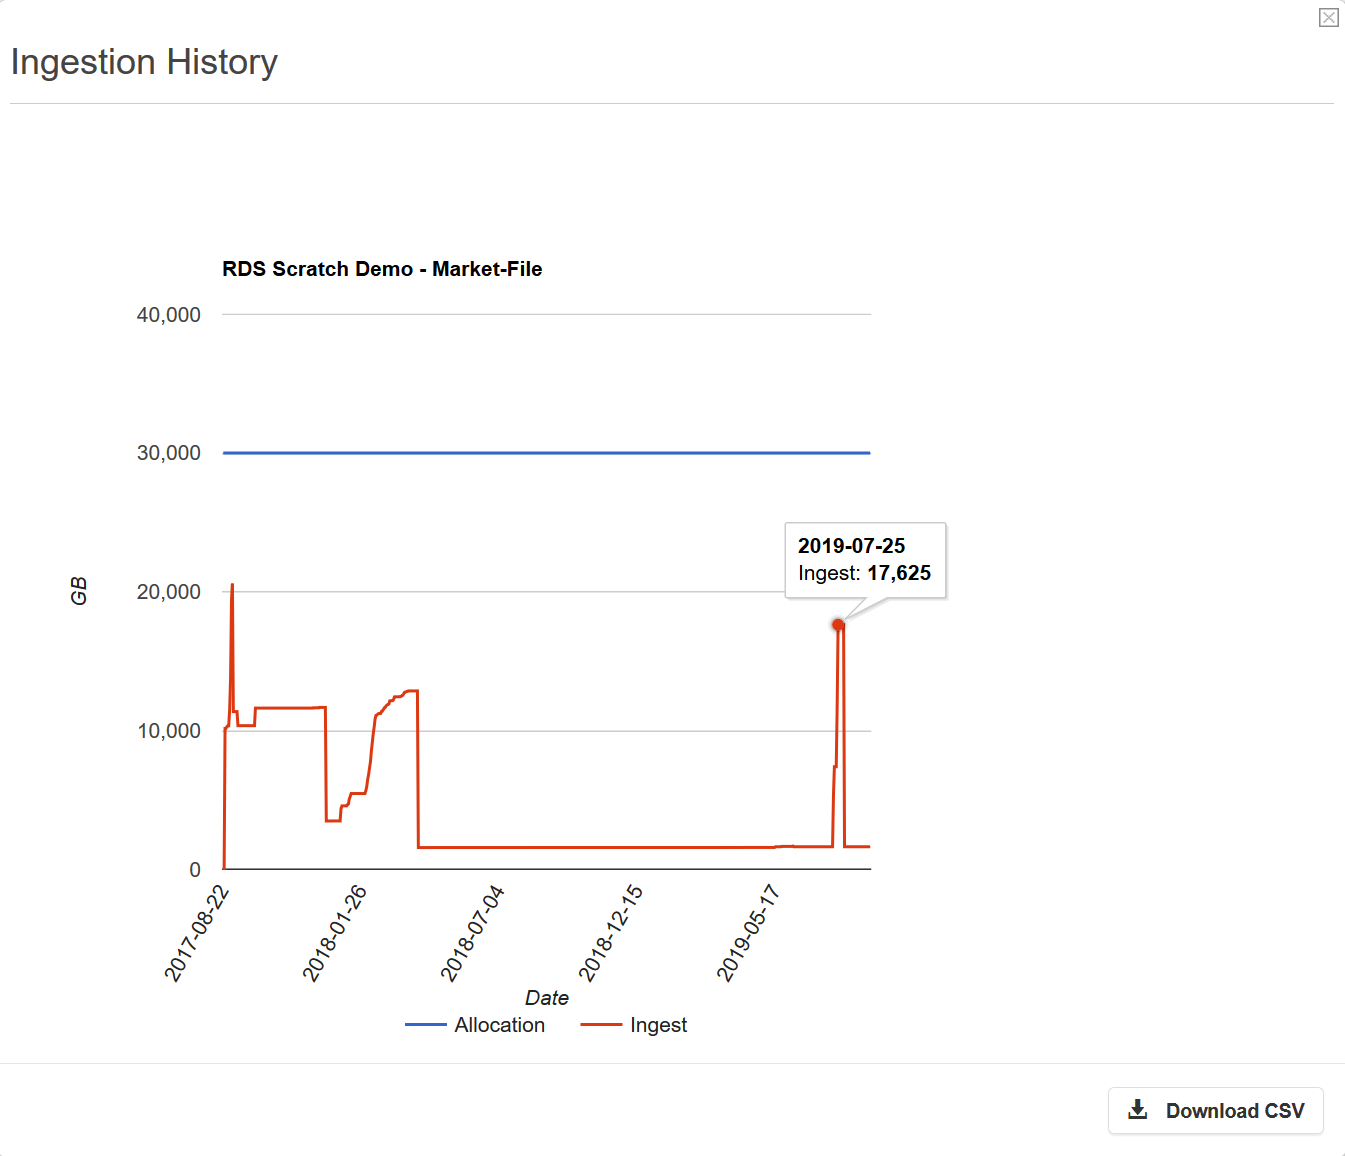
Below each of the storage products is a button labelled 'History' which displays a detailed graph of the allocation's data usage from the date that the allocation was provisioned. Using the mouse to hover over the lines in the graph will display the amount of storage consumed at that particular point in time. The 'Download CSV' button will allow you to download a CSV file for use in applications such as Excel among others and is primarily used to display more detailed figures and for reporting and storage planning.
The colours presented in the pie charts are defined in the top-right corner above the graphs. They show, from left-to-right, the amount of disk capacity being used, the amount of tape capacity being used, the amount of data that exceeds the current storage quota, the amount of storage available and storage allocations that have not been provided.
The 'Cost View' button is used to display the storage cost of an allocation. Please note that the cost view does NOT mean that you will be charged for the storage you use; RDS storage is free for Monash researchers. The costs provided are included primarily for grants because the indicative storage costs of a particular project may need to be considered and the costs may also be used by Monash faculties for internal planning and projections.

Dashboard Help and Support
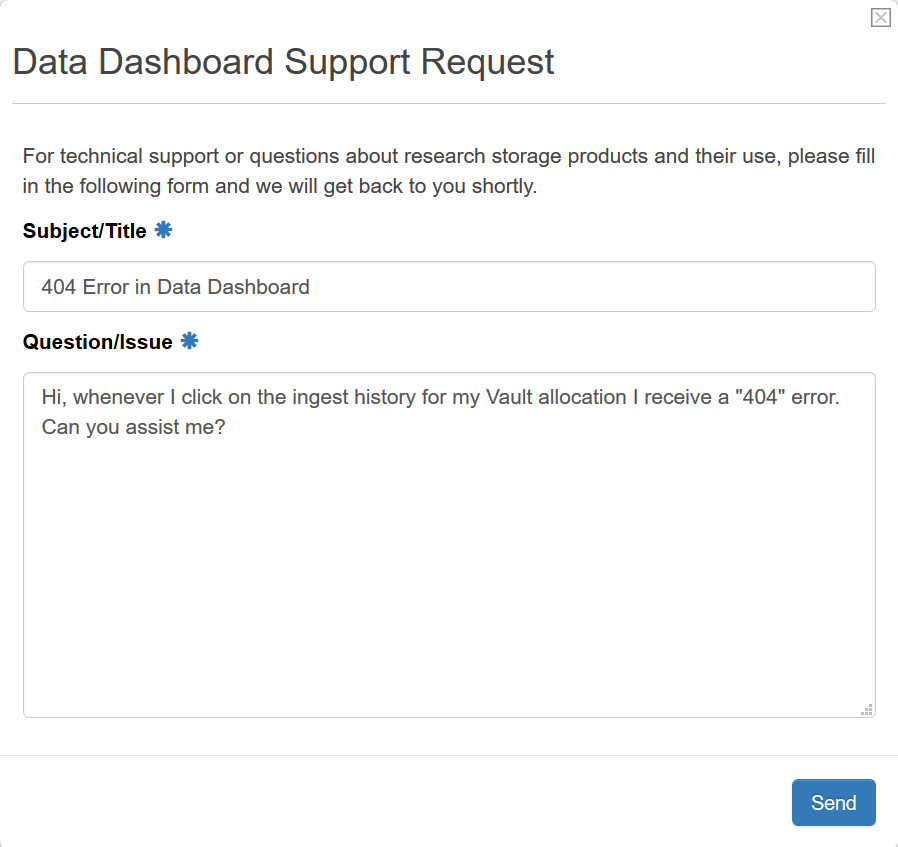
If you encounter any issues with the Data Dashboard, you can request assistance by clicking on the 'Support Request' link which is located in the top right-hand corner. This will open up a new window in which you can enter a title and a brief description of the problem. This will generate a support ticket and you will receive email confirmation once it has been lodged. Once a ticket has been created, a member of the RDS team will be in contact in order to discuss the issue and work with you to find a solution.
Updating Your Details and Customising the Data Dashboard
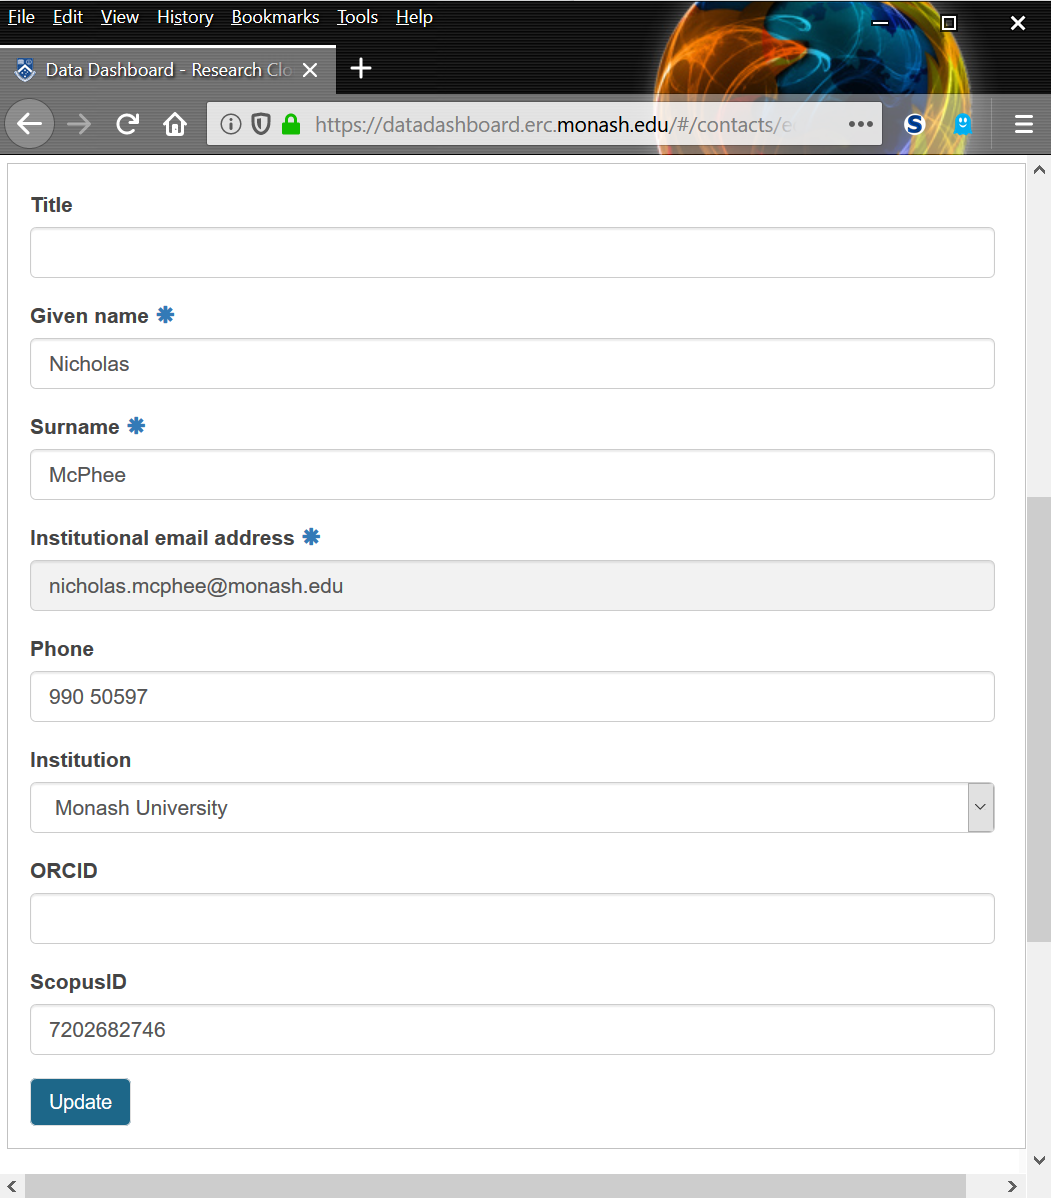
You can update your personal details by clicking on your email address which is located in the top right-hand corner of the page. This will open a new page which may take a few moments to load depending upon how many allocations list you as a Data Custodian or Technical Contact. The top section contains elements such your title, name, email address and phone number. Clicking on the 'Update' button will allow you to update your details, with the exception of your email address which is immutable. Clicking on 'Update' once again will save any changes you have made.
The Data Dashboard is still being enhanced and new features will be added in the future which will let you further customise your experience. More information will be provided when these features have been released.
Project Membership Management
The Project Membership feature is used to alter the level of access users have to allocations within the Data Dashboard as well as assign specific user roles. It can be accessed by selecting the 'My Requests' menu item under 'Allocations' and then clicking on the 'Memberships' link to the right of an allocation.
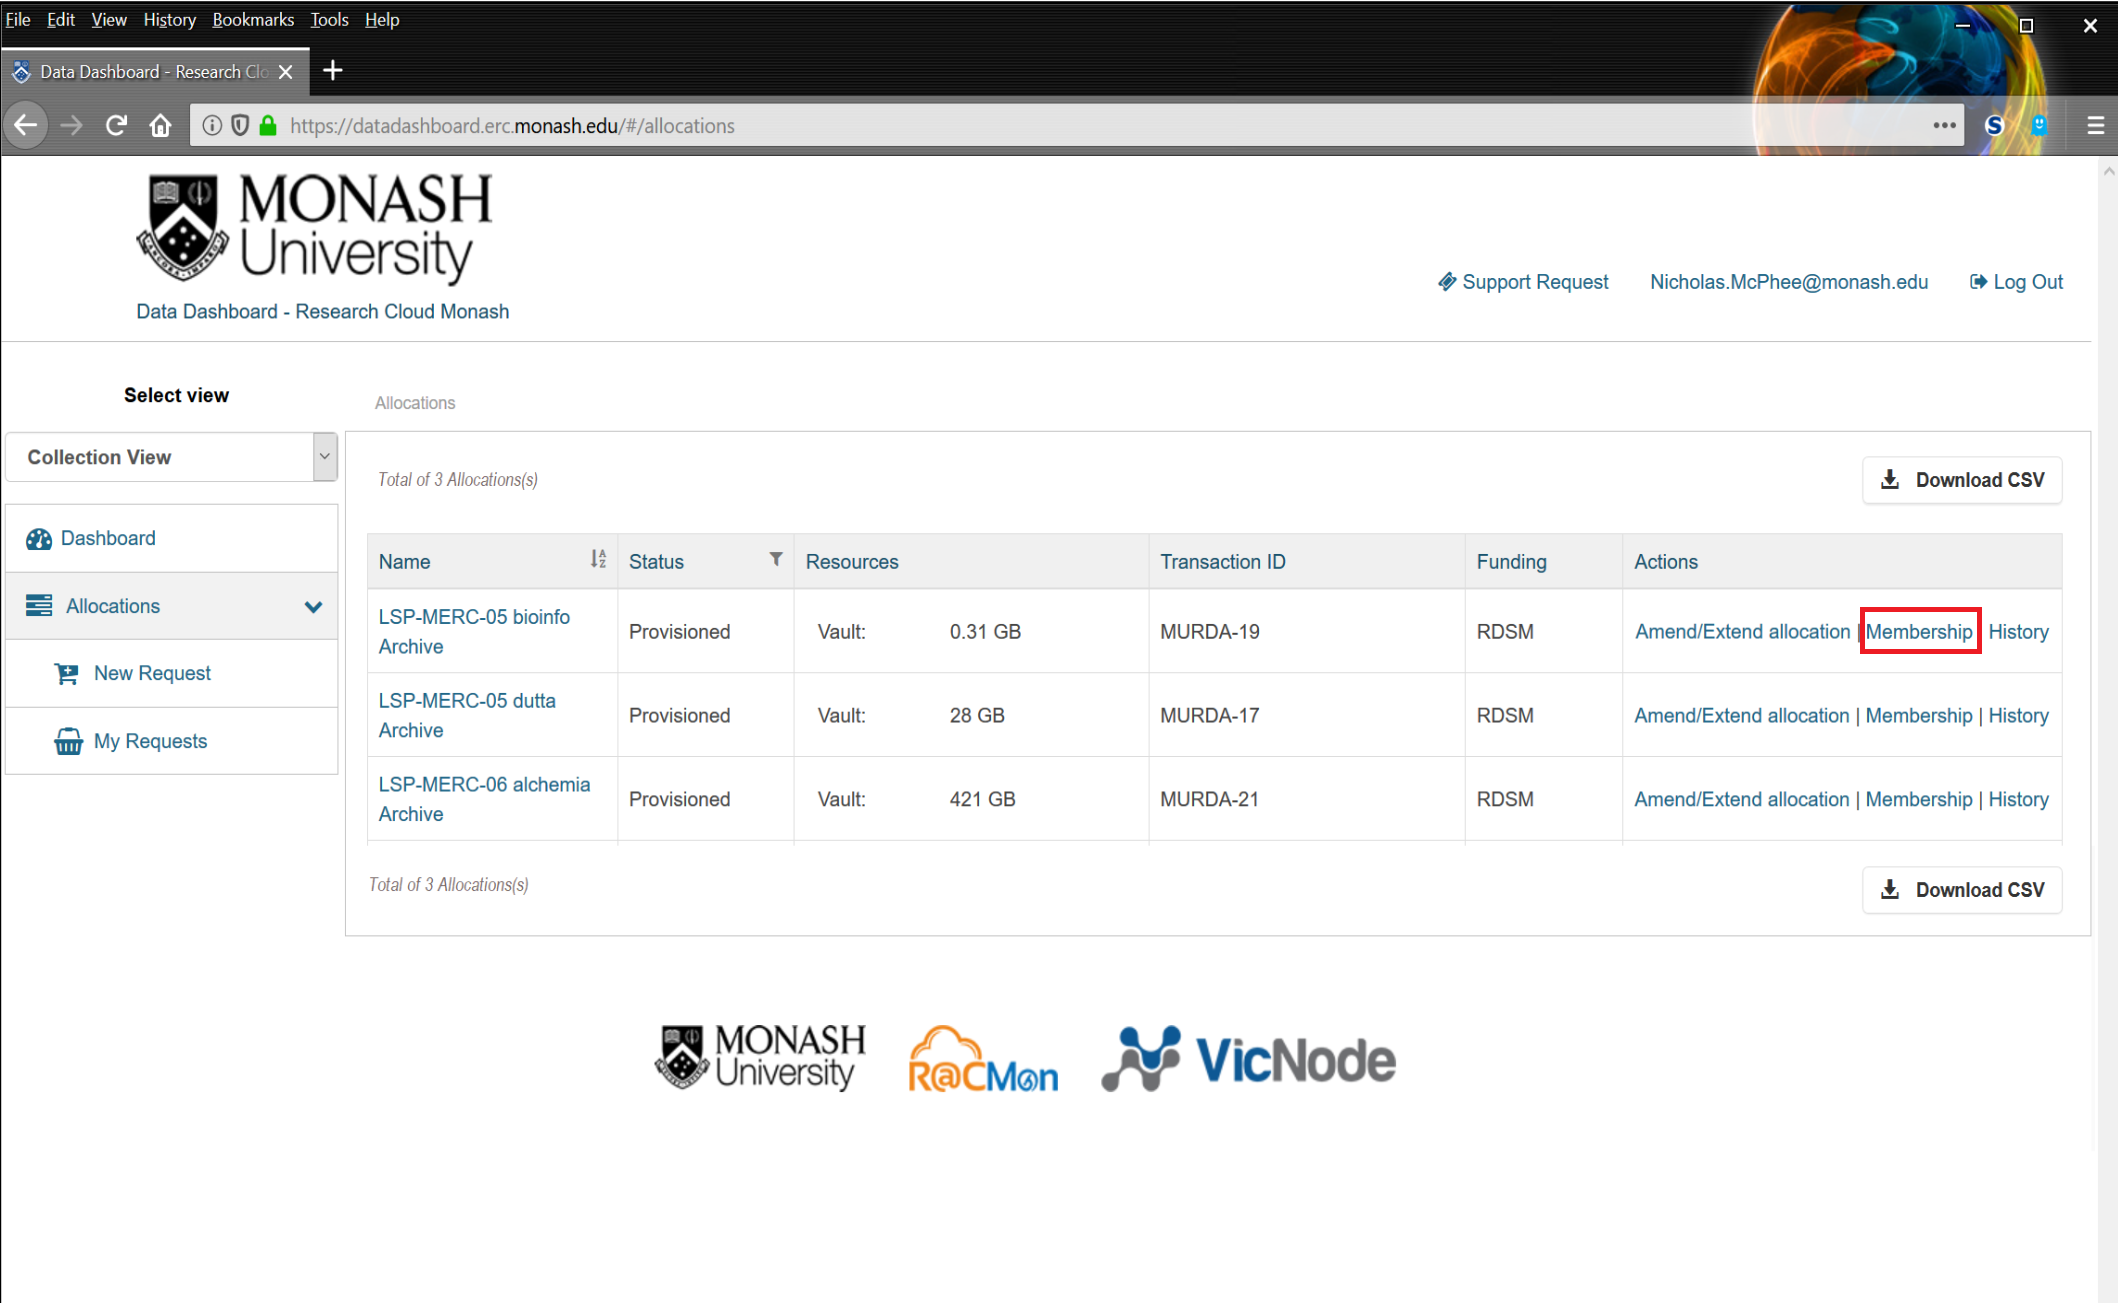
The Memberships page will display a list of all accounts (users) associated with the allocation and their respective roles.
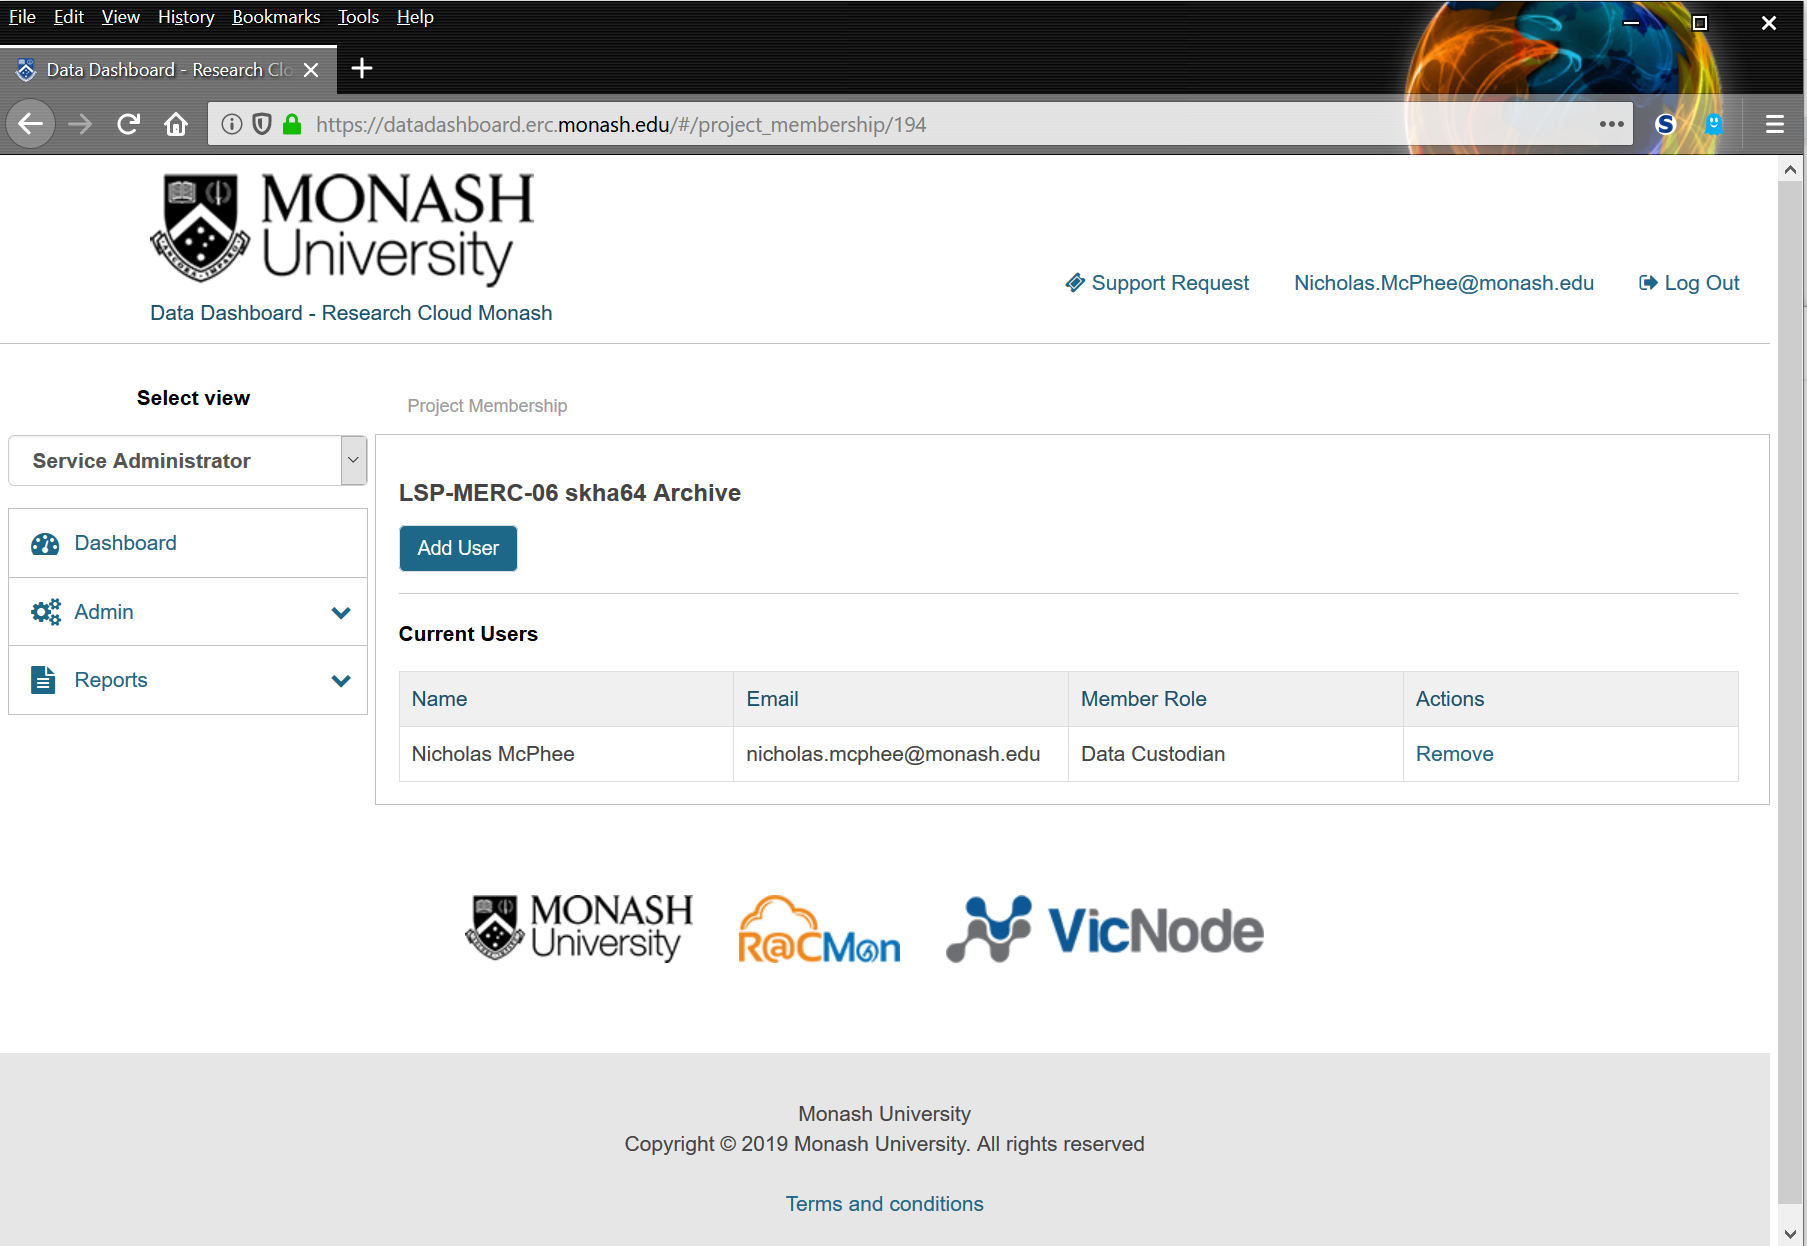
Clicking on the 'Add User' button will open a new window which will allow you to search for specific users by name. The appropriate user should be selected using the radio button to the left of the user's name and the 'User Role' dropdown box should be used to select the preferred role. The user can then be added by clicking on the 'Add User' button. Note that four roles are available: Data Custodian, Technical Contact, Data Provider and Observer. The latter two roles are mainly used for administrative purposes, therefore Data Custodian and Technical Contact are used in almost all cases.
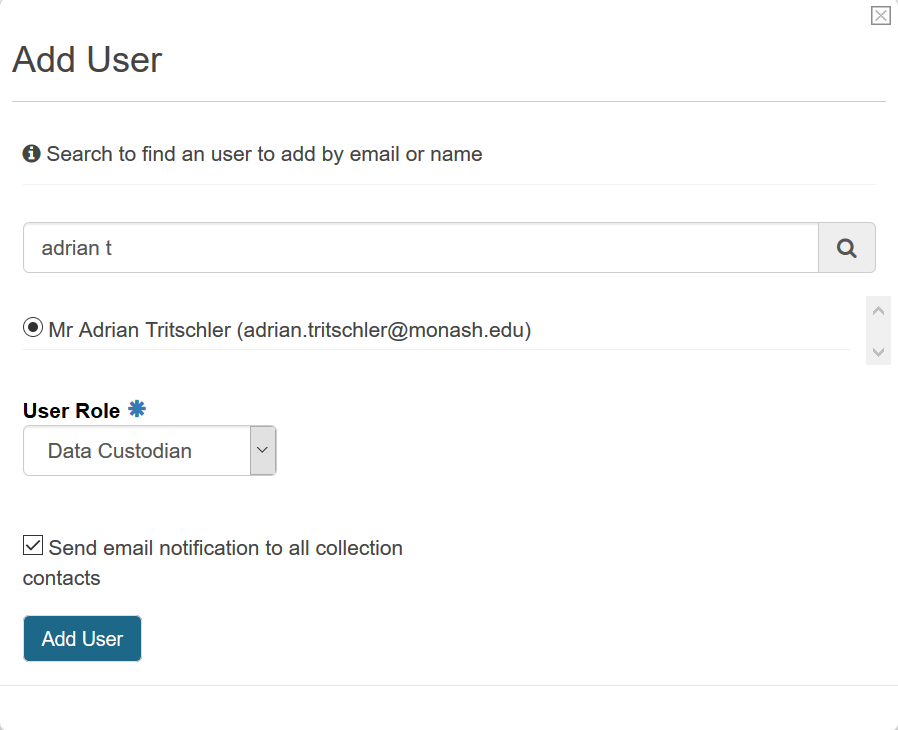
Once the new user has been added, it will appear in the 'Current Users' list. Users listed on the page can be removed at any time by clicking on the 'Remove' link.
Usage Alerts
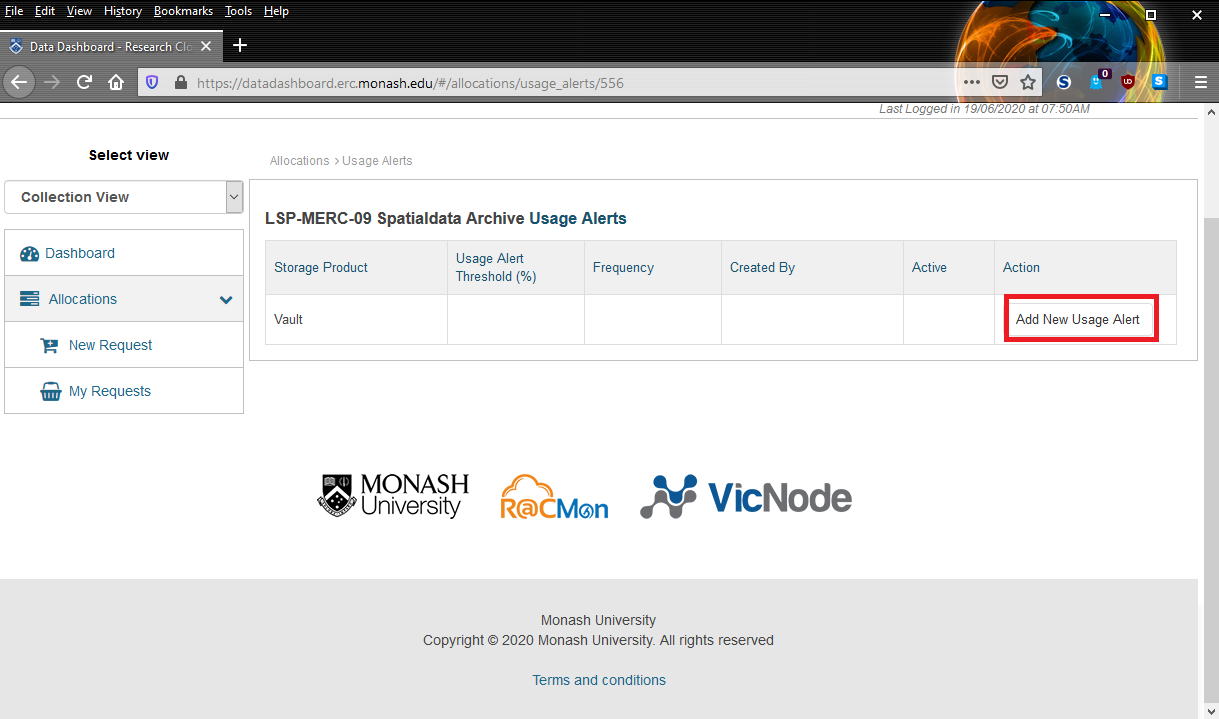
The Usage Alerts feature allows users to set up automated email alerts that are triggered when an allocation's usage reaches, or exceeds, a certain percentage. Alert emails will be dispatched to all collection members, including both Data Custodians and Technical Contacts. The feature can be accessed by clicking on the "Usage Alerts" link, which is located in the Actions menu when a user's list of storage requests is displayed.
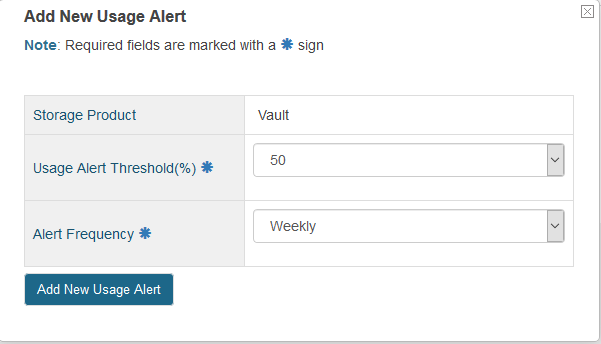
Alerts can be created for different storage products within an allocation by clicking on the "Add New Usage Alert" button. This will open a new window and allow you to configure the alert.
The Add New Usage Alert window will allow you to select a storage threshold, which each threshold representing a percentage of the total capacity of the allocation. The available options are 50%, 90% and 100%. Note that you can set up multiple alerts for each of the thresholds if you wish, but each alert will need to be created separately. Finally, you can opt to receive usage alerts weekly or monthly. Note that you will continue to receive alert emails until such time that the alert is deactivated (see below), an allocation extension is requested and provisioned or the amount of data in the allocation is reduced to an amount below the nominated threshold.
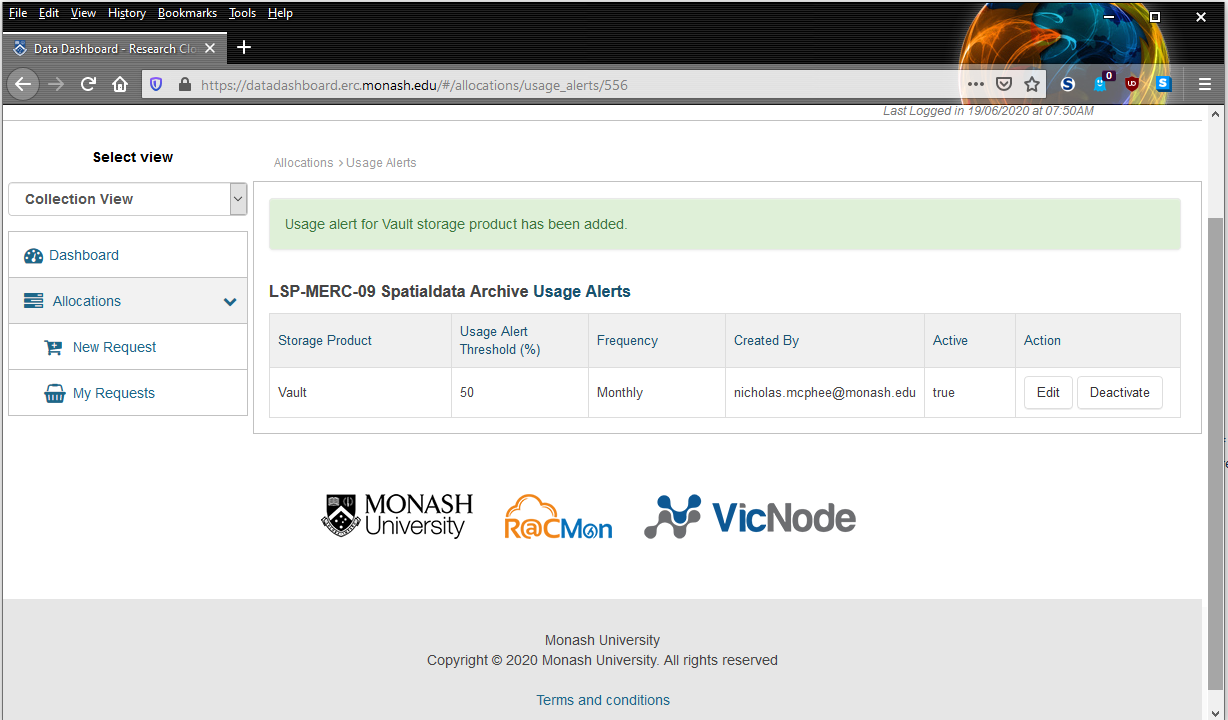
Once a usage alert has been created, it will appear in the list and can be modified by clicking on "Edit" or deactivated by clicking on the "Deactivate" button.
Frequently Asked Questions
How can I add multiple Data Custodians to an allocation? : When creating a new allocation via the 'New Request' button, only a single Data Custodian can be added initially. Multiple Data Custodians must be added separately via the Project Membership feature , which is possible only after an allocation has been submitted or saved as a draft.